SlickStack is essentially a collection of scripts for quickly and easily installing WordPress with Nginx1Very nice video explanation on YouTube: NGINX Explained in 100 Seconds (YouTube) by Fireship.io as a web server, on Ubuntu LTS.
It aims at making it easier for users to deploy lightweight, fast and secure WordPress websites, and guides users and helps them secure their server during the installation process.
This is especially useful for new users who just need to painlessly setup a fast and secure WordPress website on a cheap Ubuntu server, which can be cheaper and faster than paying for shared hosting. These servers usually cost $5-$10 (on this note, also check my review of Contabo.com, for cheap and powerful servers).
The philosophy of SlickStack can be found towards the end of their main page at slickstack.io. That, along with the fact that the developer is very experienced in web hosting and passionate about the project, are the factors that I think make SlickStack worth considering for your projects.
The developer is very helpful and frequently asks for feedback regarding the direction of SlickStack, so they can improve. This is very important, because if you adopt a software for your long term project, you want to know that software will stay up-to-date, will get new features, and will patch any potential vulnerabilities.
[powerkit_alert type=”info” dismissible=”false” multiline=”true”]Similar Software
We have also covered a detailed tutorial on a similar software to quickly set up WordPress sites, WordOps which is similar to SlickStack in some aspects, and EasyEngine, which uses Docker containers to manage WordPress sites.
Creating Websites for Beginners
Also, if you are just beginning making websites you may want to check our step-by-step beginner tutorial on creating a website.[/powerkit_alert]
Table of Contents
Demo Installing WordPress with SlickStack
We’ll start quick demo of how you can install WordPress with SlickStack. We’ll get into the details and requirements further in this tutorial.
Assuming you meet all the requirements, to download and run SlickStack just run the command below.
It will ask you to wait 30 seconds if you want to be guided by the setup wizard to configure your WordPress installation, otherwise you can skip waiting and edit the configuration file yourself.
In our example I’ll install WordPress using the setup wizard:
cd /tmp/ && wget -O ss slick.fyi && bash ss
After the script has finished running you can save your details somewhere safe, and visit the website to finish up the WordPress installation.
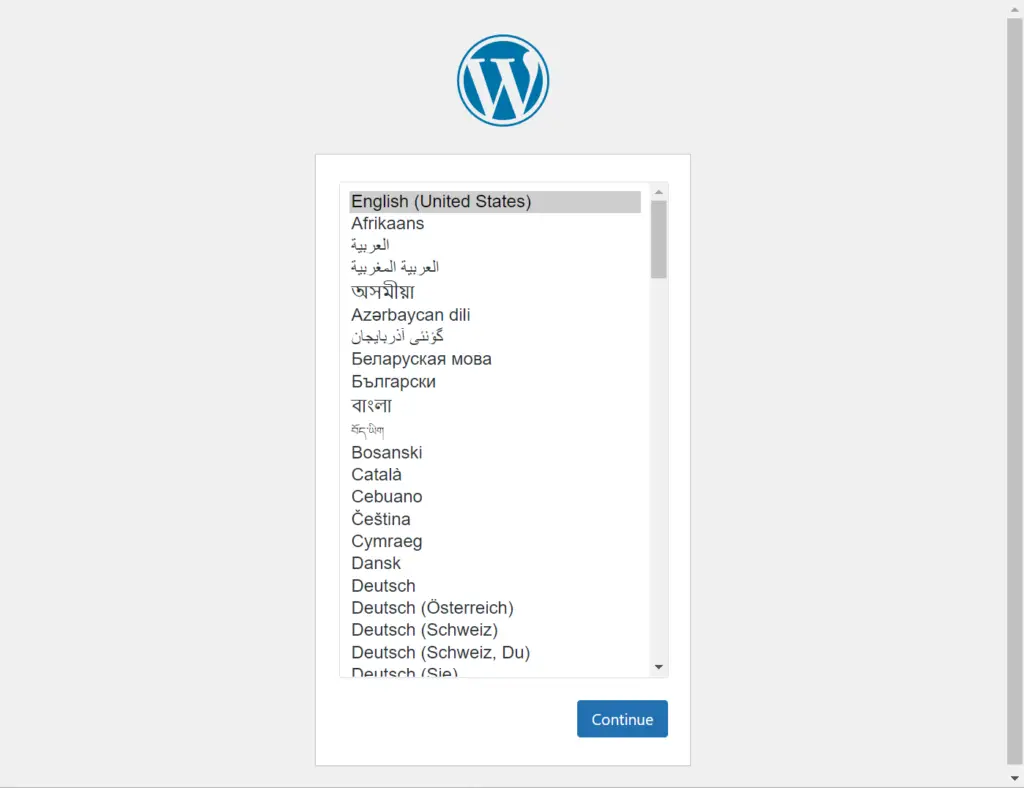
After you have gone through the installation steps WordPress is set up.
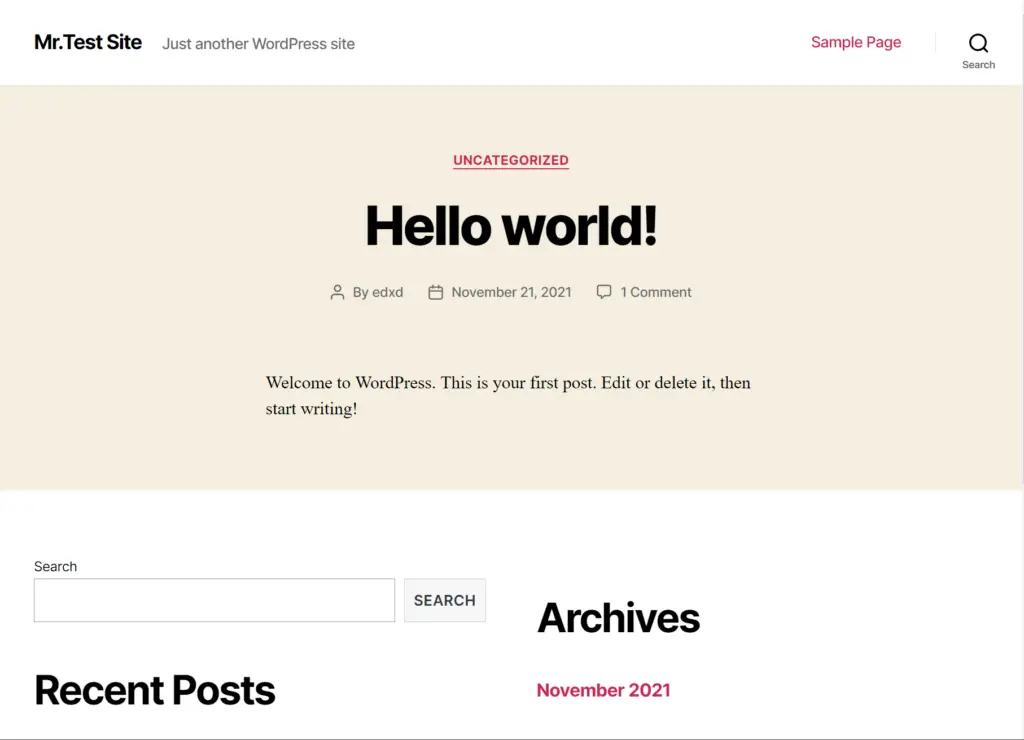
Prerequisites
SlickStack encourages users to stick to best practices when it comes to security, speed, and performance.
This is very important and useful, especially to newer Linux users, because it sets you up with the knowledge to rapidly deploy fast and secure WordPress websites in the future, even if you decide not to use SlickStack.
For this reason, if you’re not already familiar with them, the following requirements and recommended settings may seem a bit more intimidating at first glance, compared to other tutorials on installing WordPress automatically.
This mostly applies to Cloudflare and its recommended settings, because not everyone uses Cloudflare, and many who use it may not configure all of its settings, but we’ll go through them in this article.
As such, before running the SlickStack install command, let’s make sure we fulfill the following requirements:
Hardware Requirements
- Recommended RAM:
- 1GB RAM for smaller sites, less complex sites
- 2GB+ RAM for more complex or dynamic websites (such as running WooCommerce)
- At least 1 CPU core is recommended (but 2+ CPU cores make it much more responsive)
- If you’re using a VPS (Virtual Private Server), KVM virtualization is recommended, rather than OpenVZ, Xen, etc. (differences between KVM, OpenVZ, Xen)
Software & Server Configuration Requirements
- A server running Ubuntu 20.04 or 22.04 LTS. Please take note that it may not work on non-LTS Ubuntu, such as 21.04, or other distros.
- Acting as a user with
sudoprivileges - No containers installed (such as Docker, Kubernetes)
DNS Requirements
Using Cloudflare DNS
SlickStack requires that you use Cloudflare for DNS2Great explanation on what DNS is: DNS Explained in 100 Seconds (YouTube) by Fireship.io management (it’s free), instead of your registrar or your webhost.
If you’re not familiar with Cloudflare DNS, it’s a DNS service that can be used to associate a domain name with an IP address. It can be used as an alternative to traditional DNS services provided by your hosting provider. Cloudflare makes DNS faster, more reliable, and easier to use.
Why SlickStack Requires Cloudflare
SlickStack assumes pairing with Cloudflare by default.
The way this works is it installs OpenSSL, which is a free software library that will generate a self-signed SSL certificate.
A self-signed certificate is a certificate that is signed by the same entity that is the subject of the certificate. In other words, the certificate is signed by itself.
We’re basically creating a certificate and signing it ourselves, instead of having an SSL certificate signed by a trusted certificate authority (commonly referred to as CA), such as Lets Encrypt, DigiCert, Comodo, Verisign, and others you may have heard of.
Certbot (Lets Encrypt client) is used as a backup SSL mechanism. SlickStack uses OpenSSL by default, because it’s native to Ubuntu and Nginx, it’s lightweight, and is a very safe and secure method.
Since OpenSSL is self-signed, and browsers don’t trust it by default, we’ll need to use Cloudflare, which offers a solution for a free SSL.
SlickStack will automatically set up WordPress with a free Cloudflare plugin from LittleBizzy (the developer of SlickStack), which lets you connect to Cloudflare via their API.
For more details: https://slickstack.io/modules/cloudflare
How to Add a New Domain to Cloudflare
To add your domain to Cloudflare, you can check the following video tutorial. It also offers some useful explanations along the way:
Point Your Domain to Our Server (Add A Records)
After you’ve added your domain to Cloudflare, we’ll need to point the domain to the server where our website will live. To do this, go into the DNS tab in Cloudflare, and add A records for your root domain ( @ ) and www to your server’s IPv4 address. If you’re using IPv6 then you’ll need to add AAAA records.
Here’s how I set up the domain I’m using for this tutorial (mrtest.website). I’m using a $5 Vultr VPS (1GB RAM) and I’m pointing my domain to it’s IP.

Recommended Cloudflare Settings for WordPress
We’ll also need to configure a few Cloudflare settings for optimal performance. Many users don’t configure some of these settings, unless they encounter some unexpected issues at some point, that requires them to do so.
As it states in a blog post on SlickStack:
So, assuming you have your domain added to Cloudflare, let’s proceed to optimize some settings.
In the following screenshots I’m using the new Cloudflare navigation, which can be switched on/off from Preferences in your account: https://dash.cloudflare.com/profile
In the DNS tab, on the same page where you added records for your domain, scroll a bit downard and you’ll see two of the section we need to edit:
- DNSSEC
- CNAME Flattening
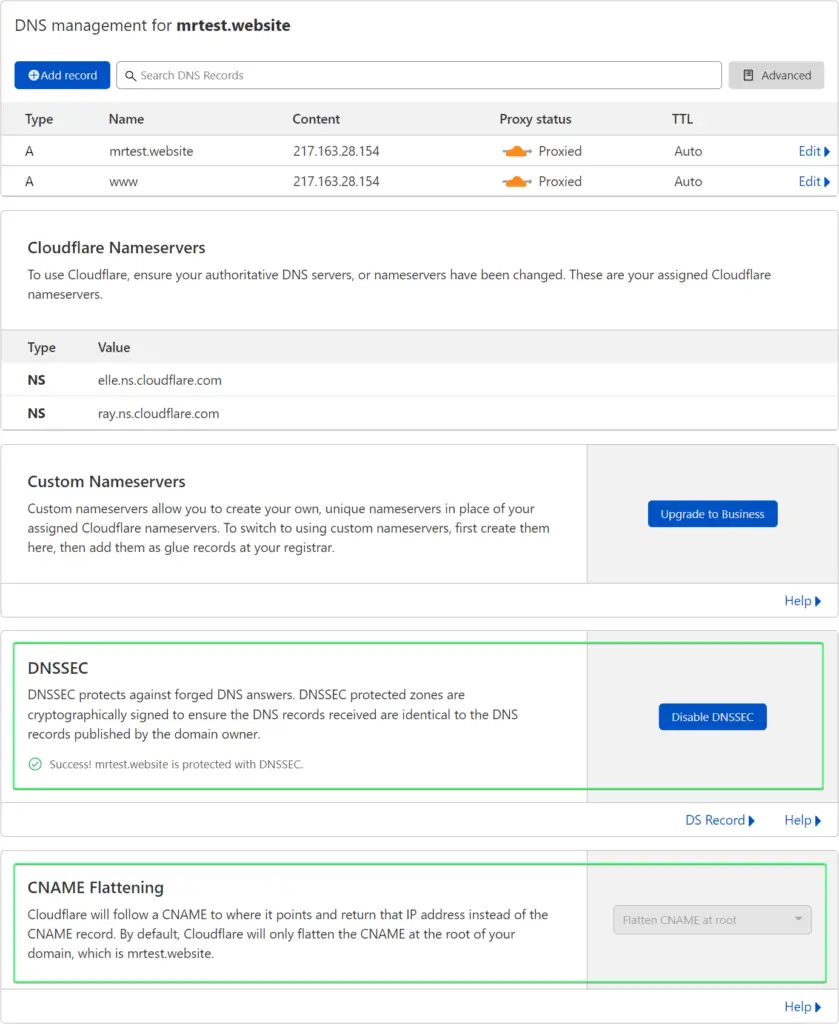
DNSSEC = Enabled
If you don’t have it already, then go ahead and click Enable DNSSEC. You’ll see a modal window like this:

If you’ve never done this before, don’t worry. Cloudflare has compiled a very useful list of tutorials on how to enable DNSSEC for many common registrars – Setting up DNSSEC in Cloudflare.
CNAME Flattening = Enabled
CNAME Flattening is most likely enabled by default, however you should enable it if it isn’t already.

SSL/TLS Settings
Next we’ll have to set SSL/TLS encryption mode to Full.
You can find it in the SSL/TLS > Overview section.
Don’t leave this setting on Flexible, or you’ll risk getting redirect loops, and you’ll find yourself with the dreaded “too many redirects error”. This would happen because Cloudflare’s Flexible setting tries to allow your website to load on both http and https, while SlickStack force redirects everything to https.
So please remember to check Full.
You can find this setting in the SSL/TLS tab.

Next, in the SSL/TLS > Edge Certificates section we’ll need to change some settings as follows:
- Always Use HTTPS = Enabled
- HTTP Strict Transport Security (HSTS) = Disabled (This can be enabled in Nginx, which it will, by SlickStack)
- Minimum TLS Version = 1.1
- Opportunistic Encryption = Enabled
- TLS 1.3 = Enabled
- Automatic HTTPS Rewrites = Enabled
- Certificate Transparency Monitoring = Enabled


Next, let’s switch to the SSL/TLS > Origin Server. Here just make sure we have:
Authenticated Origin Pulls = Disabled

Network Settings
Finally, in the Network tab, scroll a little until you find Onion Routing. We want:
Onion Routing = Enabled

That’s it. Now that we have Cloudflare properly configured, we can proceed to installing WordPress.
Using SlickStack to Install WordPress
You can install WordPress with SlickStack using two methods.
Method 1. Quick Install (Setup Wizard)
Using this method we’ll run a command that downloads and runs the SlickStack install script that guides you interactively to configure your installation in the terminal, which is more beginner friendly and easier for some. After which, your configurations will be written in the SlickStack configuration file, called ss-config, which will be used to proceed with the installation.
To install SlickStack this way, just run:
cd /tmp/ && wget -O ss slick.fyi && bash ss
The command will change our current directory to /tmp/, which is used to store temporary data, then it will download the SlickStack installation script from slick.fyi, and save it into a file called ss, and it will run the script by using the bash command.
Upon running it we’ll see a greeting message with a few details about the current SlickStack build, and a few of our server details.
The interactive wizard also pre-fills the options, so it’s easier for you to tell what to fill in. If this is the first time you’re running SlickStack, then I recommend waiting for the timer to reach 0 and configuring SlickStack using the interactive wizard.
We already demonstrated how the install using this method looks like at the beginning of this tutorial.
In this section we’ll explore the options that we’re configuring during the setup wizard:
SlickStack Interactive Setup Wizard (SS-Config)
This will be your new sudo user and password. You’ll need to take a note of this after finishing the install and make sure you don’t lose them. Slickstack disables root, so you’ll need this use this to SSH into your server.
Choose sudo username (for SSH): edxd
Choose sudo password (should be strong): 8738ccac6c1a6d2a8c6eeb7d
This option is for changing your SSH port.
Choose SSH port (use 22 for best compatibility): 2268
Enabling SSH keys means that you’ll use these keys to SSH into your server, instead of your password. If you’re not familiar with the concept, then we encourage you to check this article. The intro offers a good overview of SSH keys.
Enable SSH keys (advanced users only): false
This creates a SFTP user. If you changed the SSH port, remember to use the same port when connecting via SFTP.
Choose SFTP username (limited access): mruser
Choose SFTP password (should be strong): 3af1b7066fb43159ed0245e0
SlickStack aims to support more apps in the future, such as Magento, MediaWiki, Moodle, and probably others. For our purposes we’ll leave wordpress:
Choose app (only wordpress supported currently): wordpress
SlickStack blacklists certain plugins for a number of reasons. You can read the motivation for blacklisted plugins here and the list of blacklisted plugins here.
Enable the WordPress plugin blacklist: true
More on SlickStack pilot files here.
Link to your pilot file (leave blank if none): https://gist.githubusercontent.com/...
Here you’re asked if you’re using an external database, such as on another server. It’s false by default. Typical WordPress install have their database hosted locally.
Are you using a remote database: false
Then you’ll configure your database details:
Choose database name (single database): mrsdatabase
Choose database user (non-root user): mrs_user
Choose database user password (should be strong): 55e0166f662263d52eaabd37
Choose database host (IP address): 127.0.0.1
Choose database table prefix: wp_
Next, we’ll set our TLD (top level domain). The top level domain the domain extension. The most common ones are com, net, co. In my case it’s website since my domain is mrtest.website.
Choose site TLD (subdomains not allowed): website
This will be our site’s domain. In my case it’s mrtest.website.
If you’re installing WordPress on a subdomain you could have yoursubdomain.yoursite.com, for example.
Where it says subdirectories not allowed, it means that it won’t install on subdirectories like mrtest.website/blog.
Choose site domain (subdirectories not allowed): mrtest.website
This option is for when you want to block search engines from indexing your site.
It refers to a file called robots.txt that all websites usually have. Search engines will check that file and see if they’re allowed to crawl the site or not. By default it’s set to false.
If you want to block search engines from finding your site then set true.
Enable site noindexing (block robots): false
By default SlickStack uses OpenSSL (we mentioned this when discussing Cloudflare earlier). SlickStack also offers support for Let’s Encrypt (Certbot).
You can set certbot instead of openssl, after which you can disable Cloudflare if you want, and your Let’s Encrypt certificate will be 100% CA-signed, and you’ll get an A+ score on SSL Labs.
Choose SSL cert [openssl|certbot]: openssl
By default SlickStack has WordPres Multisite set to false. You can change this to true if you plan on using the Multisite feature.
Enable WordPress Multisite (experimental): false
SlickStack will need your Cloudflare API key and email so it can connect to Cloudflare. You can find these in your Cloudflare dashboard in My Profile > API Tokens > Global API Key. Click View and you’ll have to fill in your password for the API key to be displayed. You can also go directly here (https://dash.cloudflare.com/profile/api-tokens), which will take you to that section.
Choose Cloudflare API key (account profile): 5gq1zkpanyyztcgarzvnhsfp6p626dgohos2h3
Choose Cloudflare API email (account profile): [email protected]
Finally you can decide if you want to set up dev and staging sites. By default these are set to false. If you want to enable them set to true.
You can also protect your dev and staging stites with a popup login. If you enable this, then you can use the guest username and guest password to access them.
Enable staging site (subdomain): false
Password protect staging site: false
Enable dev site (subdomain): false
Password protect dev site: false
Choose guest username (to view staging/dev): guest
Choose guest password (easy is fine): 454a2f030998cdf757317f9e
Method 2. Setting Up SlickStack Configuration Manually
Instead of having the SlickStack script ask you each option and how you want to set it, you can just edit the ss-config file yourself, and then run the install script as we did above.
To do this we’ll just set up the /var/www/ss-config file before downloading and running the SlickStack install script.
We’ll first download a template for the ss-config file:
wget -O /tmp/ss-config http://mirrors.slickstack.io/bash/ss-config-sample.txt
Next we’ll create the directory where SlickStack is going to look for the config file (/var/www/ss-config), move our ss-config file there, and open the file so we can set up the configurations we want:
mkdir -p /var/www/ && cp /tmp/ss-config /var/www/ss-config && nano /var/www/ss-config
After you set up all the options that you want, save and exit the file, and run:
cd /tmp/ && wget -O ss slick.fyi && bash ss
If you’d like to see how the ss-config file looks like, then you can find it in the GitHub SlickStack Repository https://github.com/littlebizzy/slickstack/blob/master/bash/ss-config-sample.txt
Both options are intuitive, since the interactive setup wizard asks you for your preferred options, one by one, and the ss-config file has detailed explanations for each option.
After the installation is done, you’ll be presented with the configurations we set up when we first ran the script.
You can now store them somewhere safe. At the very least, you should take note of your sudo user and password, or SSH keys (if you enabled them).
/var/www/ss-config file. So even if you forget them, all you need to know are your sudo user and password.Finally, after SlickStack has finished setting up WordPress, you can visit your site and you’ll be guided by WordPress to finalize the installation.
We trust that the WordPress setup is intuitive so we won’t cover the final steps. If you encounter any issues then feel free to leave a comment and we’ll get back to you as soon as we can.

Post Installation
After WordPress is installed, you can log into the WP dashboard. You’ll notice a few new menu items, compared to the usual fresh WordPress install:
- SlickStack menu item in the left sidebar, which leads to some SlickStack settings.
- A green PRODUCTION menu item in the top bar. If you hover over it, you’ll have links to the dev and staging sites, if you have them enabled.
- Cloudflare – this is a lightweight plugin created by LittleBizzy (the developers of SlickStack), which offers a few functionalities, including clearing Cloudflare cache, and is lighter than the official Cloudflare plugin. More info on this plugin here https://github.com/littlebizzy/cloudflare
- Clear Caches – if you hover over it you’ll see options to Clear PHP OPcache, Clear Nginx Cache, Clear Object Cache
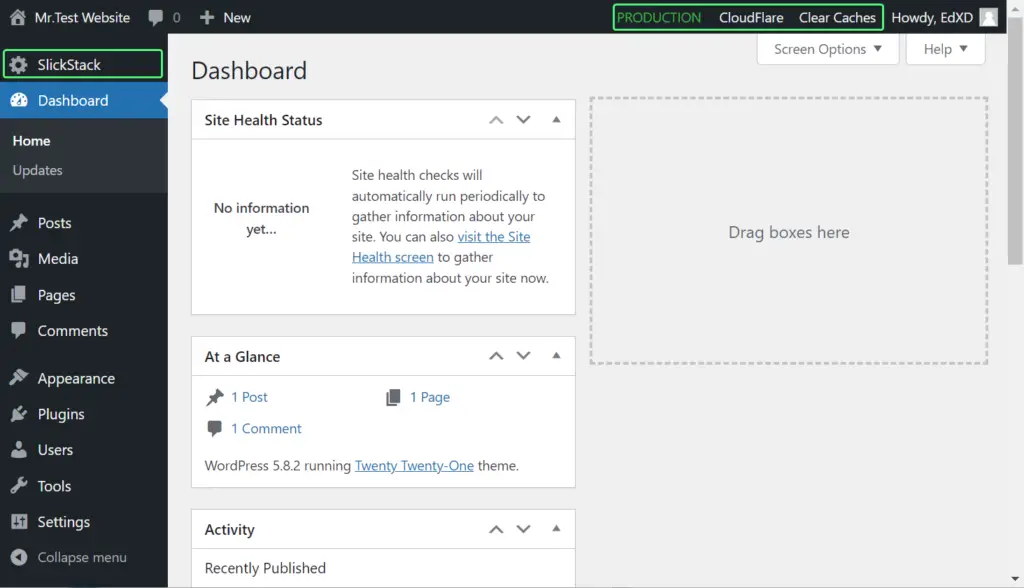
If you click the SlickStack item in the left sidebar you’ll be taken to the SlickStack Settings dashboard, where you can see some server details about your server.
Some of these tabs are not yet functional and the features are under development at the time of writing – such as you can see if you click on Backups, which presents you with a coming soon message Coming soon... powered by Rclone! Choose from Backblaze, Dropbox, Amazon S3, Google Drive, and more....
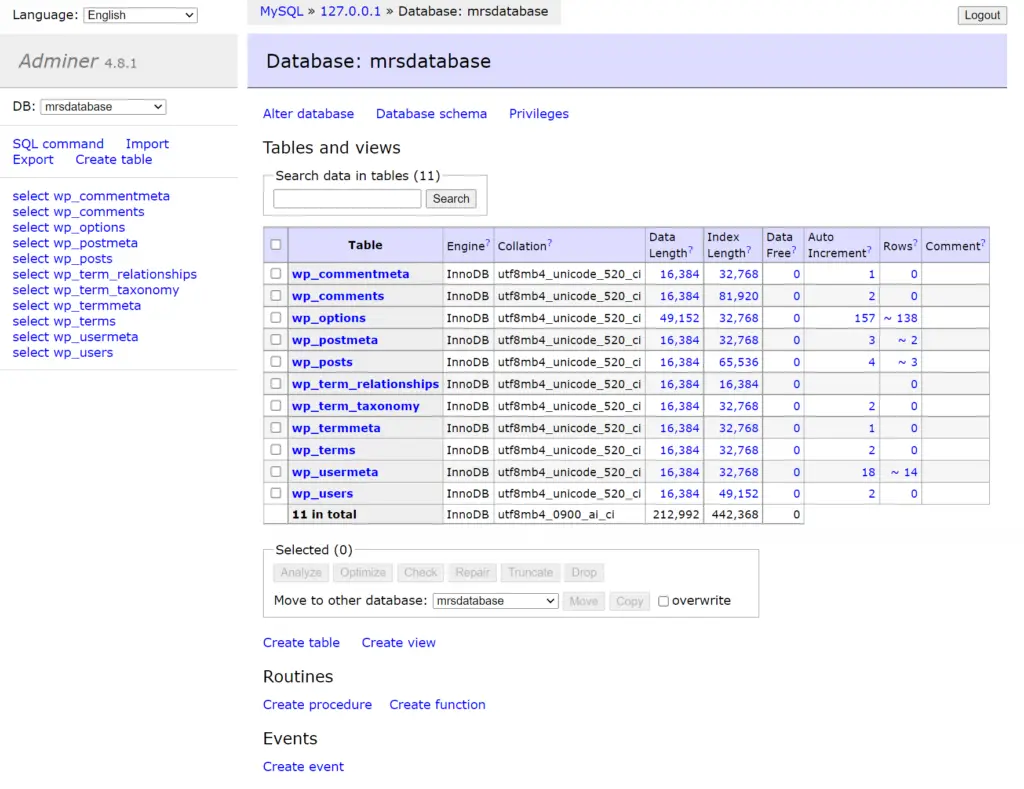
A useful feature here is Adminer, which is a GUI for managing your databases.
Additional Notes
These are some additional details I’d like to outline.
SlickStack disables the root user
I missed this when first installing, but SlickStack says this after finishing the install:
Redirect Loop (ERR_TOO_MANY_REDIRECTS)
This usually happens because Cloudflare SSL\TLS encryption mode isn’t set to Full and is left to Flexible.
You can check how to change this setting in the SSL\TLS Settings section of this article.
Changing the config file and applying changes
Sometime you may want to change some of the initial settings. For example, you may want to switch from OpenSSL to Let’s Encrypt (certbot).
To do this just edit your /var/www/ssh-config file, save and exit the file, and run the install script:
sudo ./var/www/ss-install
Conclusion
Well done. Hopefully you successfully installed WordPress using SlickStack. There are many more options and configurations that we haven’t covered in this article. So if you’d like to find out more, be sure to check the official site at slickstack.io, especially in their Modules and Docs sections.
If you encountered any issues, or have any questions at all, feel free to leave a comment below and we’ll get back to you as soon as we can.




Hi, great read! I was wondering if you could go more into how to set up the dev and staging sites. Specifically creating the records on CloudFlare and on the host. Thank you.
Hi Jay. Thanks for addressing this. I’ve been meaning to do that actually. Are you encountering any problems setting up dev/staging at the moment?