Table of Contents
What is an NFS Server?
NFS server is also known as Network File System server, was developed by Sun Microsystems in 1984. NFS was designed to share files and folders between Linux/Unix systems. After its initial success, NFS version 2 became public, and then everyone could use this to exchange files.
It is a distributed file system protocol that allows the client computer to access files over the network. The server requires to validate the client computer, and then after successful validation, files and folders are shared amongst each other. However, the data is not encrypted.
Because NFS transfers are not encrypted, it’s not recommended to be used over the internet.
NFS server allows you to mount your local files over a network and remote hosts, to interact with them as they are both mounted locally on the same system. NFS serves the same purpose as SMB(Server Message Block), but it is faster as compared with SMB.
Currently, there are three NFS protocol versions: NFSv2, NFSv3, NFSv4.
Pre Requisites
To download and implement the NFS server and client, here is what you need to have
- Two Ubuntu 20.04 machines
- LAN
This article will use one Ubuntu 20.04 as an NFS server and one Ubuntu 20.4 as a client machine.
IP Address
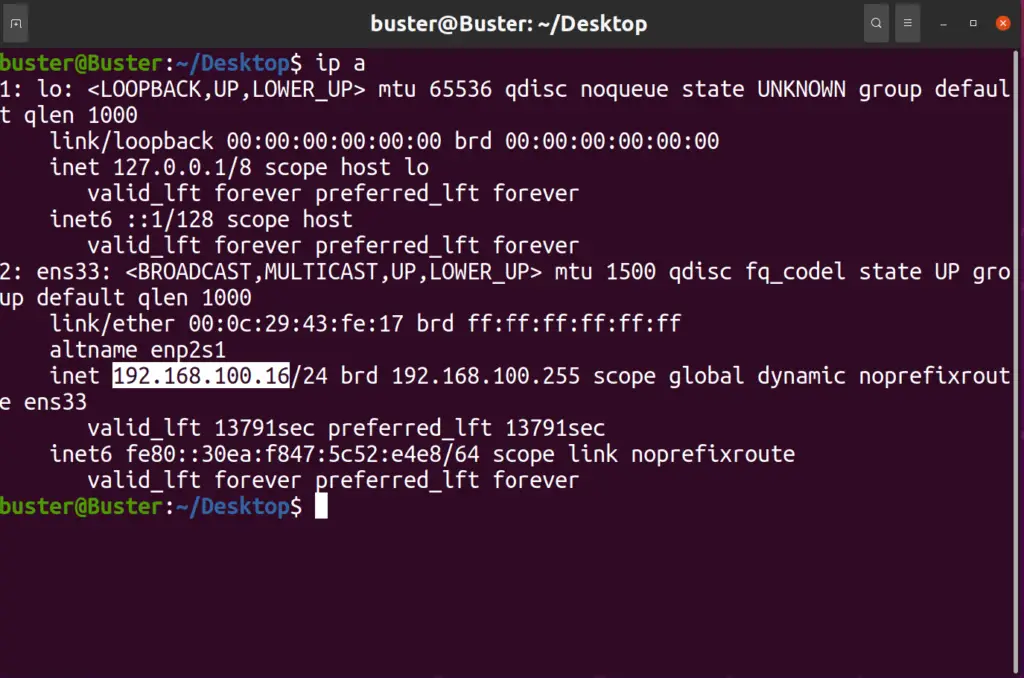
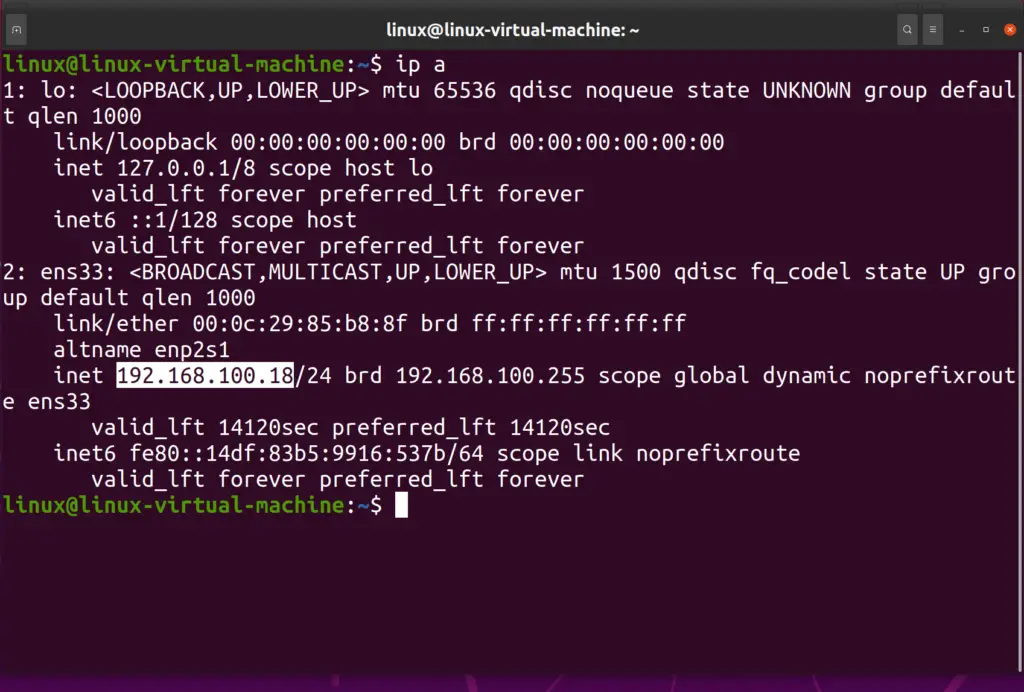
Here are my two machines’ IP addresses. To check your machines, IP writes the following command:
ip a
Ubuntu server IP is shown below in the highlighted area
And the client’s IP is shown below in the highlighted area
Setting up NFS Server
Firstly, we will set up a Ubuntu NFS server where we will make the files to be shared with other clients.
Installing the NFS Server
The NFS server package provides us with all the necessary items required to run the NFS kernel system.
To install the package, run the following command on Ubuntu 20.4:
sudo apt update
sudo apt install nfs-kernel-system -y
Flag -y is used to skip the confirmation check.
Below will be how your final output will look like
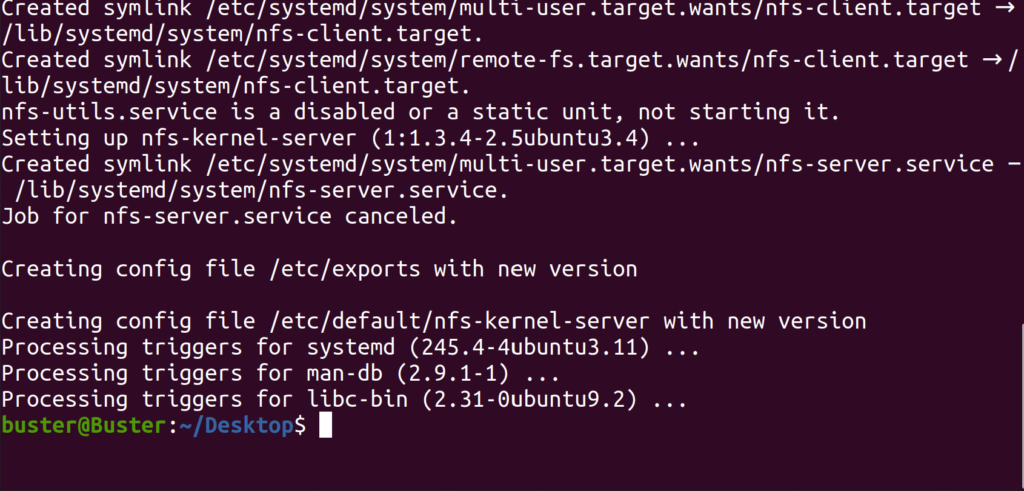
Once the installation is complete, your NFS services will start automatically.
NFSv2 is disabled initially. Since it is an older version, hence it is not required.
However, versions 3 and 4 are enabled, which we will use. The default configuration is sufficient for us. However, you can allow NFSv2 if you like.
To double-check which versions are enabled, use the cat command to verify.
sudo cat /proc/fs/nfsd/versions

NFS configuration can be checked in the files /etc/default/nfs-kernel-server and /etc/default/nfs-common. You can use the nano command to see what’s inside them.
Creating File Systems
Now we will create two folders, “public” and “private“. The private directory will have read/write permission, and the public directory will have read-only permission.
First, we will use the mkdir command to create files and then the chmod command to change their permissions.
sudo mkdir /public
sudo mkdir /private
sudo chmod 755 /public
sudo chmod 777 /private
Adding files to /etc/exports
Now that our files have been created, we will now add them to, etc/exports.
Understanding /etc/exports file
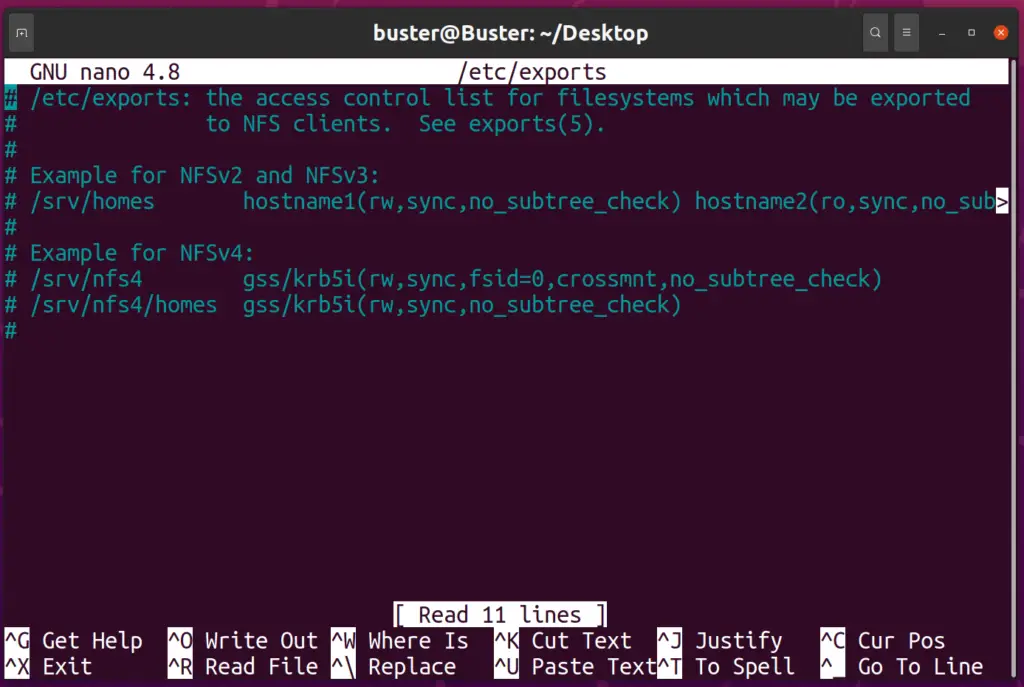
The /etc/exports file is a primary configuration file of the NFS server where the directories or files to be shared with the client by the server are input.
The file is usually empty or may have comments with each line starting from the # symbol. The user populates it according to their needs.
Below is the first view of the untouched /etc/exports file.
The general syntax used to add a file is:
directory hostname(options)
Where directory is the file to be shared, for example,/usr/share/public.
The hostname is the name of the client’s host, which can be resolved in an IP address. Options are the values that specify how the resources are to be shared amongst clients and servers.
Sharing Options
There are many sharing options that a user can use according to their need. Some of them are as follows:
rw: share as read-write
ro: share as read-only
sync: file data changes are made to disk immediately
async: file data changes are made initially to memory
Adding files
To add the files, type the following command:
sudo nano /etc/exports
We will type our file/directory name and hostname with sharing options at the end where the # symbol ends.
This will tell our NFS server which files or directories are to be shared with permission and to whom it is to be shared.
Add the following lines at the end of the file:
/public *(ro,sync,no_subtree_check)
/private <client IP>(rw,sync,no_subtree_check)
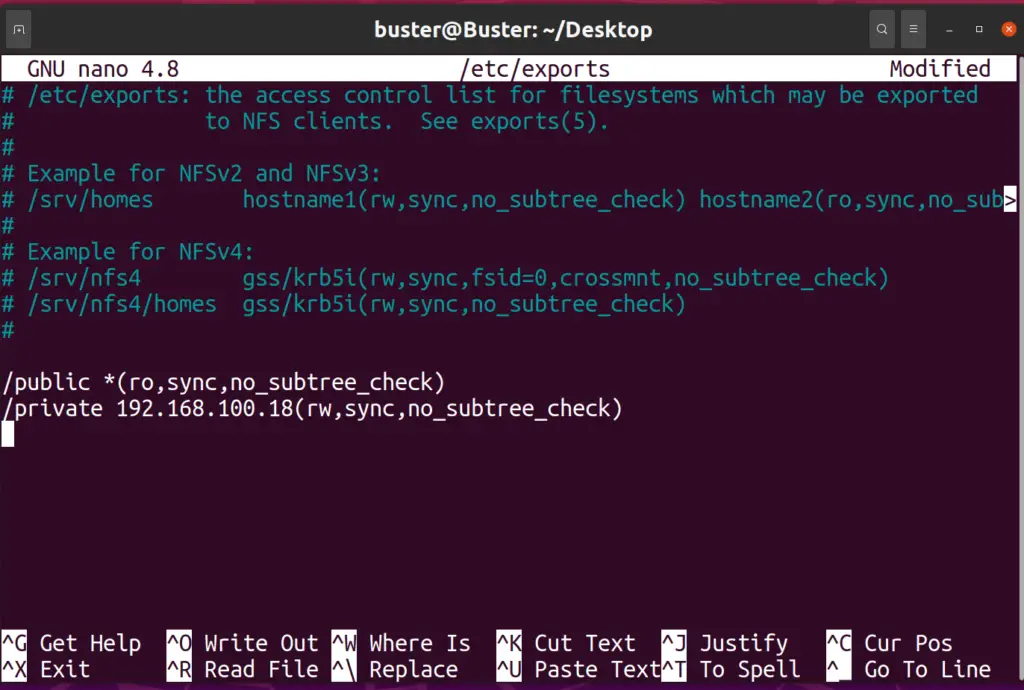
Your screen will look something like the above snippet.
You’ll notice that in /public, we have used * as the hostname. This means that the file /public will be accessible to the whole world and not a specific client.
However, in the case of /private, the file will only be accessible to the given hostname that is the client Ubuntu 20.4, which I am using.
Options used
Now let’s talk about the options used in the /public and /private files.
For /public the following options are used:
ro: read-only filesync: synchronized, file changes will be made immediately to the diskno_subtree_check: disable subtree checking. (This option disables subtree checking, which has mild security implications, but can improve reliability in some circumstances.)
For /private the following commands are used:
rw: read/write filesync: synchronized, file changes will be made immediately to the diskno_subtree_check: disable subtree checking
Now, save and exit your /etc/exports file.
Starting NFS server
Now that files to be shared are made, we will now start the NFS service.
Type the following commands:
sudo exportfs -arvf
sudo systemctl start nfs-kernel-server
sudo systemctl enable nfs-kernel-server
Here exportfs means to make the local directories (in our case /public and /private) available to the NFS clients to mount. It uses /etc/exports to check which files are to be made available.
Here the following flags are used:
-a: exports all directories listed in the /etc/exports-v: prints the name of each directory as it is exported or unexported.-f: specifies the exported file
Secondly, we have used the command systemctl to start and enable the NFS server.
Note: if you experience an error while running the above three commands. Go back to your exports file and check for any errors or spelling mistakes.
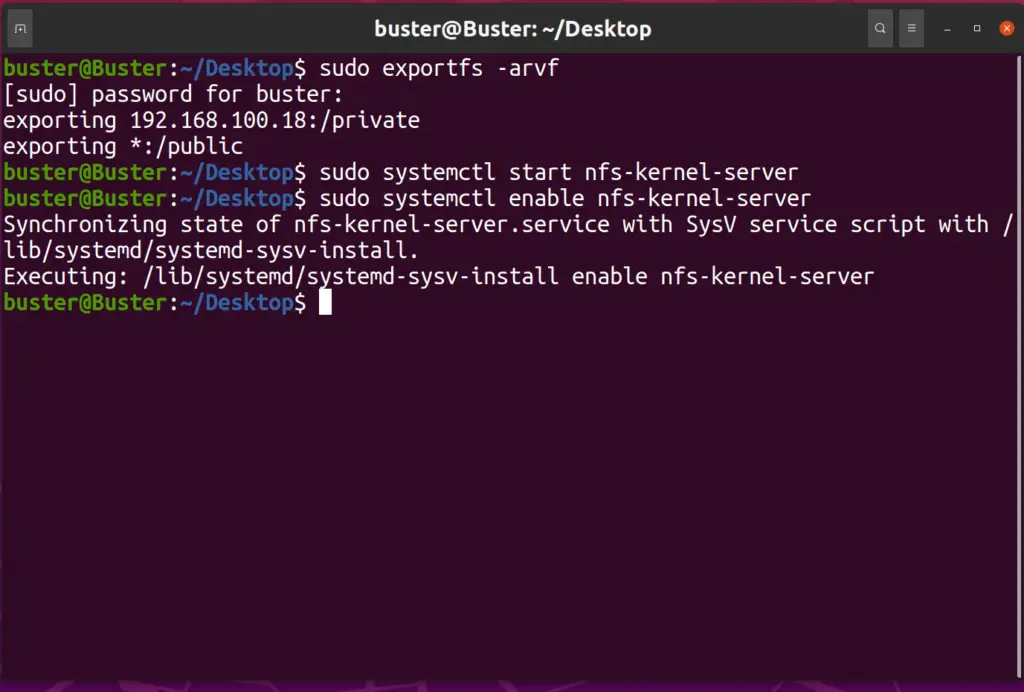
Now to check status, write the following command:
sudo systemctl status nfs-kernel-server
The following output should be shown
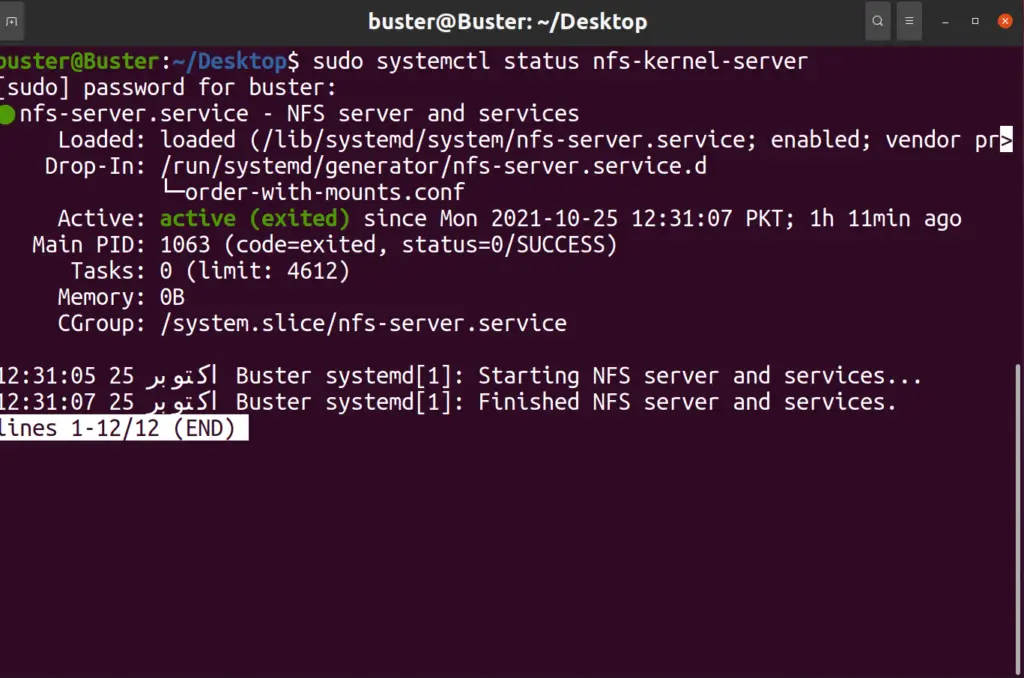
Now we will switch towards the client
Setting up the NFS Client
Now we will set up the client. I am using Ubuntu 20.4, which is a distribution of Linux. You can use macOS and Windows too.
Installing NFS Client
To install the client, follow the steps below
Firstly, update your machine. This allows to add or update the latest repositories and dependencies.
To update, write the following command:
sudo apt update
Now that my machine has been updated, I can install the nfs-common client service.
To install, type the following command:
sudo apt install nfs-common
Your output should look like this:
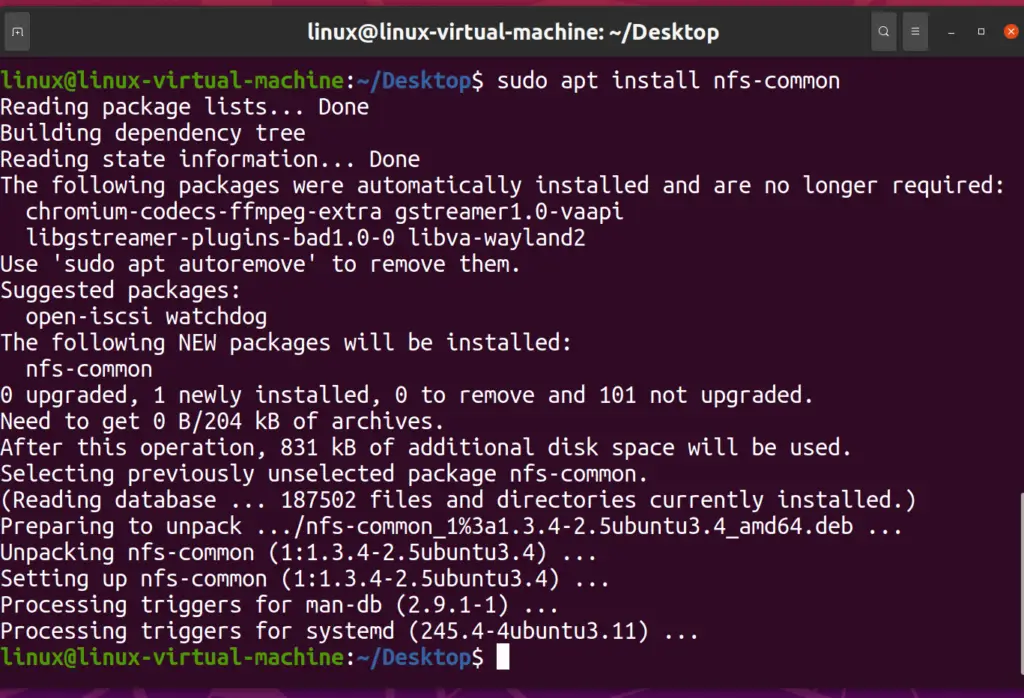
Showmount command
The showmount command is used to list all the clients’ file systems remotely mounted from a specific machine. Similarly, you can also see the information of the NFS server by using the below command.
showmount [-a][-d][-e] [host (NFS server we installed earlier)]
Here the flags mean the following:
-a: prints remote mounts in the format HostName: Directory-d: listing of the directories that the client machine has remotely mounted-e: prints the list of all the exported directories found in the host
Now we will use the showmount command in the client machine to see the export list for the server machine.
Type the following command.
showmount –e <server IP>
Your output should look like this:

Mounting files
Now, we will mount our files to the client machine by using the mount command. There are two methods with which files are mounted
- Mounting file temporarily
- Mounting files permanently
Before we begin, we need to make two directories where the file will be shared to.
Type the following command to make directories:
sudo mkdir /mnt/public
sudo mkdir /mnt/private

Temporary Method
Now that your directories have been made let’s see how you can mount them temporarily. We will first use the mount command.
Type the following command:
sudo mount -t nfs <server IP>:/public /mnt/public
sudo mount -t nfs <server IP>:/private /mnt/private
Here -t means to limit the set of file system types.

Now again, run the following command:
mount
Below highlighted part will show you that the two directories have been mounted.
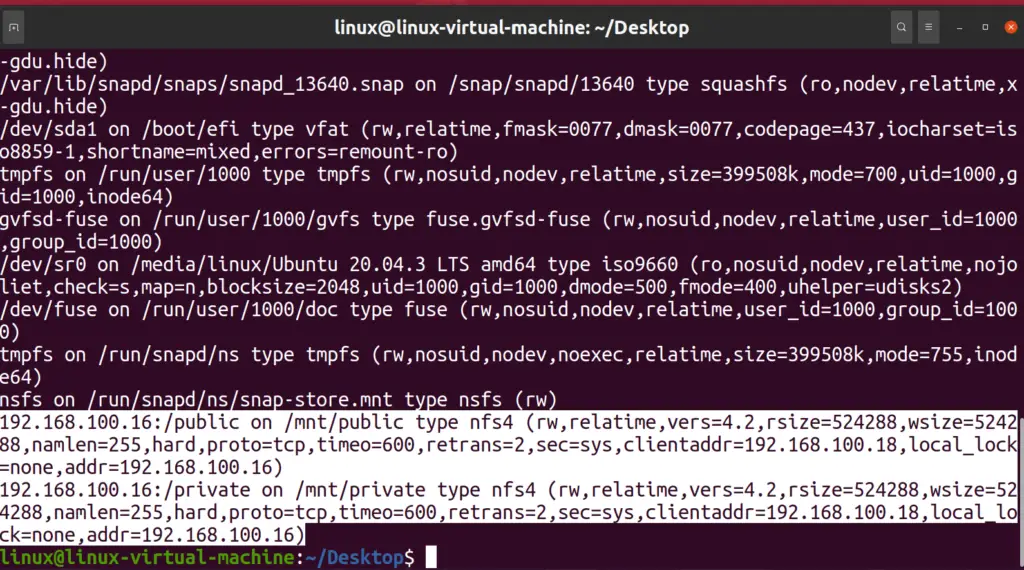
And voila! Your mounting is complete.
Now reboot your machine, and these directories will be mounted.
Permanent Method
If you have not unmounted the previous directories then follow these steps; otherwise, skip this part.
umount command is used to unmount the file.
To unmount, type the following command:
umount /mnt/public
umount /mnt/private

Now to permanently mount, run the following command:
sudo nano /etc/fstab
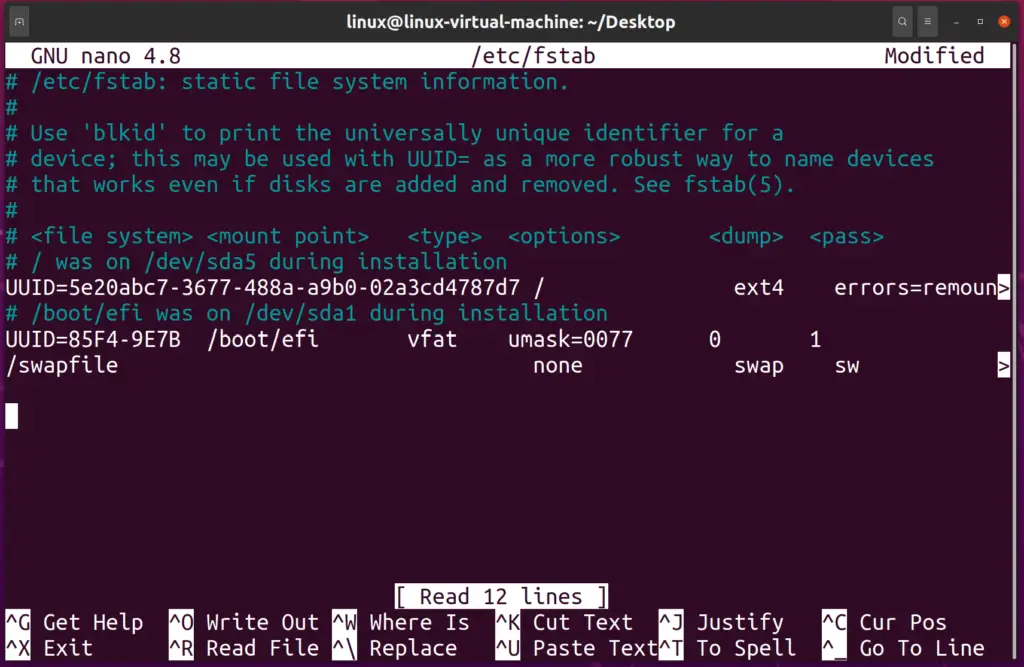
Now at the bottom type the following:
<server ip>:<file path> <client file path> nfs defaults,_netdev 0 0
Your output should look like this
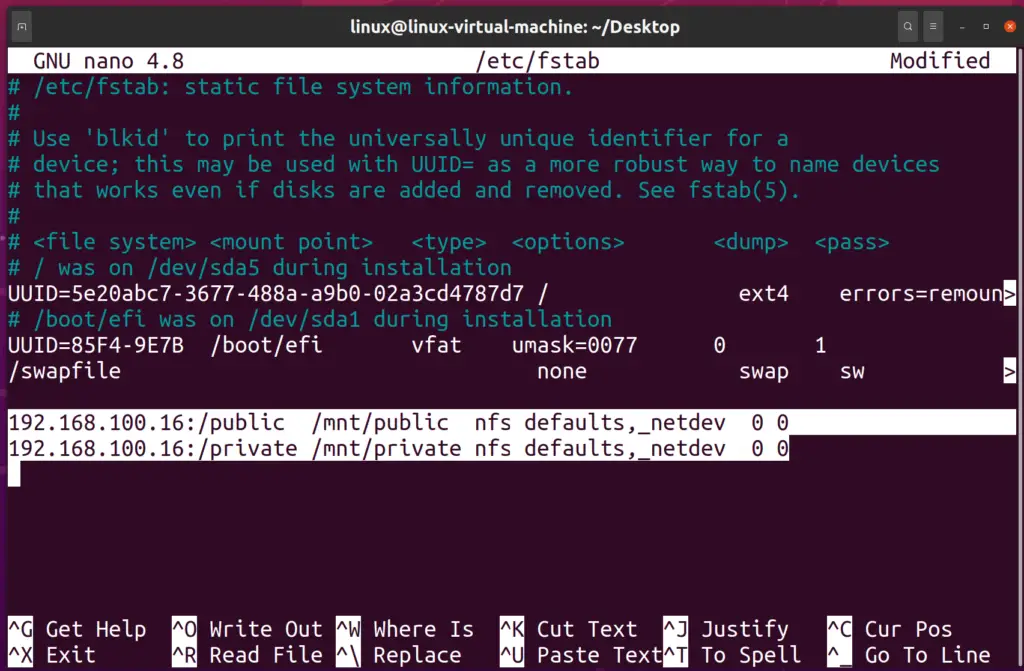
Save and exit from the file.
Now, mount all the directories by typing the following command:
sudo mount -a
Now type mount to see if the directories have mounted or not. After successful mounting, you can access the files or directories in the server machine.
Accessing the files
To access the files from the server, we need first to populate both the public and the private files. Let’s do that
Firstly, open your server machine and add files in both public and private directories.
Type the following command:
cd /public
sudo nano test.txt

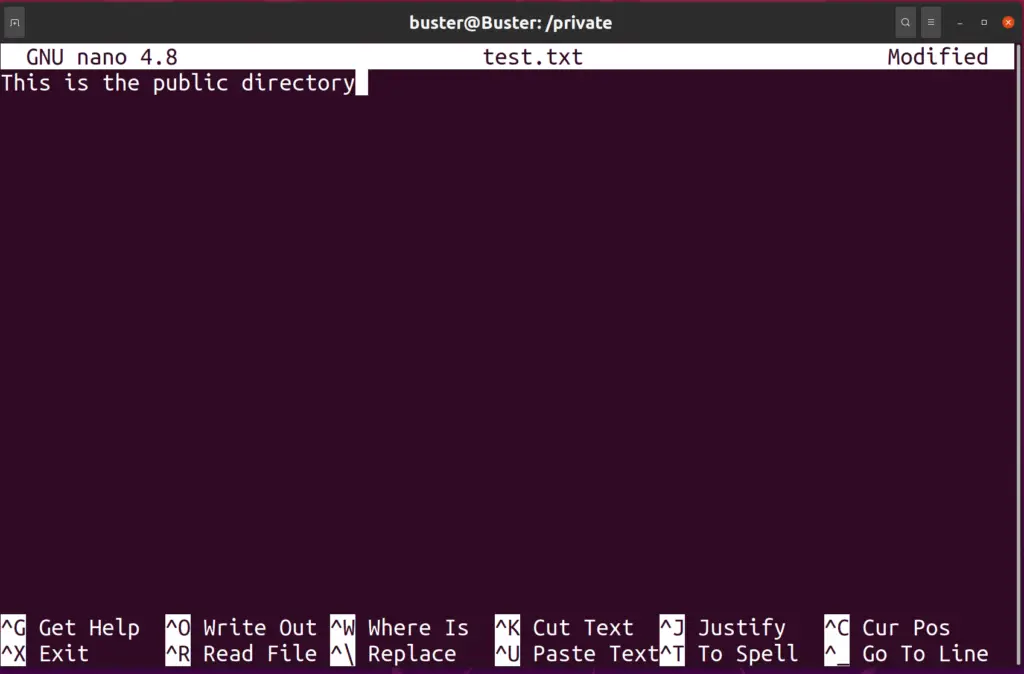
As you can see, I have created a file named test.txt in the public Directory and have added a text. Save and exit from the file
Do the same with the private directory.
cd /private
sudo nano test.txt

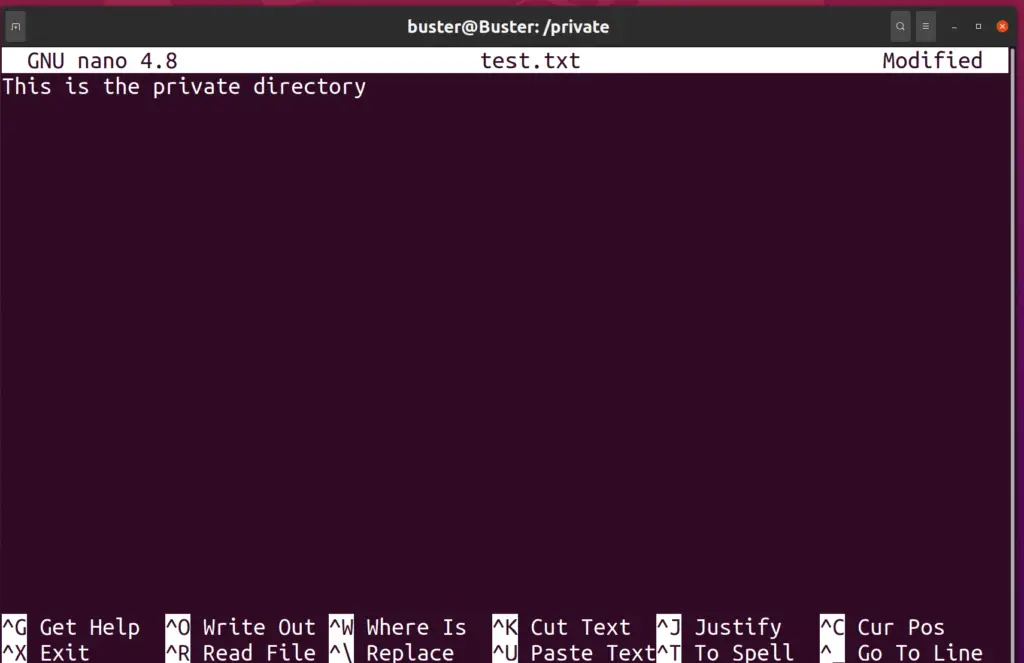
Now go to your client machine and access the files.
To access the files, go to the folders that you mounted in the above section.
Type the following command:
cd /mnt/public
ls
cat test.txt

You will note that I tried to touch command the file, but it gave me an error.
Since we made the file read-only, hence it is not allowing us to do anything. However, we can copy the file in our system and edit the file there.
For private, do the same procedure.
cd /mnt/private
ls
cat test.txt

Hence, now files can be shared with the server and client.
Conclusion
Now you know how to install, configure and share files with the NFS server in Ubuntu 20.4. NFS is a great way to share files with two machines remotely, and it is very fast. It has regular updates, and the up-to-date version is NFSv4.


A lot has changed since I last setup an NFS cluster.
First, things seem to work out of the box
Second, there is a perfect match between this article and the reality.
Further, I am installing a rather complex Ubuntu 22.04 using 100% ZFS, which
does not need the exports nor the dfs files. Instead you add an attribute named sharenfs (like “zfs set sharenfs=on ${dataset}”) on the parent dataset only.
Other than that, this article is perfectly spot on. and something I was prepared to be tearing what is left of my hair over who known how long took less than an hour (including breakfast :-).
Thank you all contributors! Excellent Job++