In this tutorial we’ll cover how to set up the Stable Diffusion Infinity notebook.
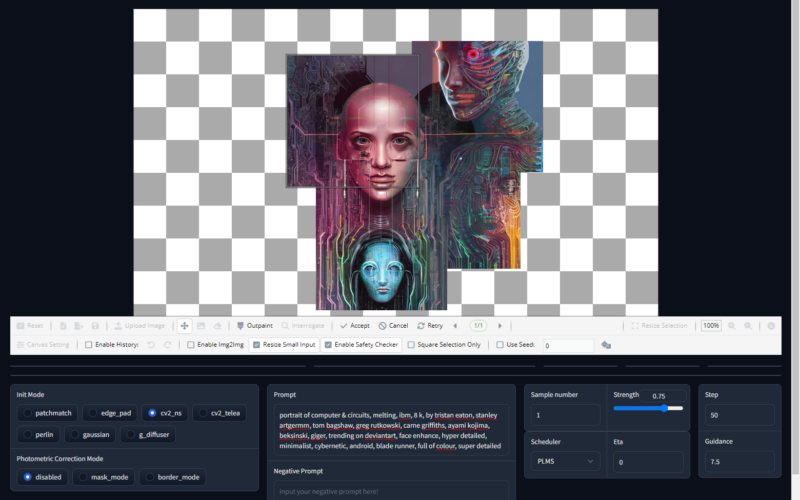
Stable Diffusion Infinity is a fantastic implementation of Stable Diffusion focused on outpainting on an infinite canvas.
Outpainting is a technique that allows you to extend the border of an image and generate new regions based on the known ones. This can be really helpful for designers who want to create images of any size.
Table of Contents
Quick Video Demo
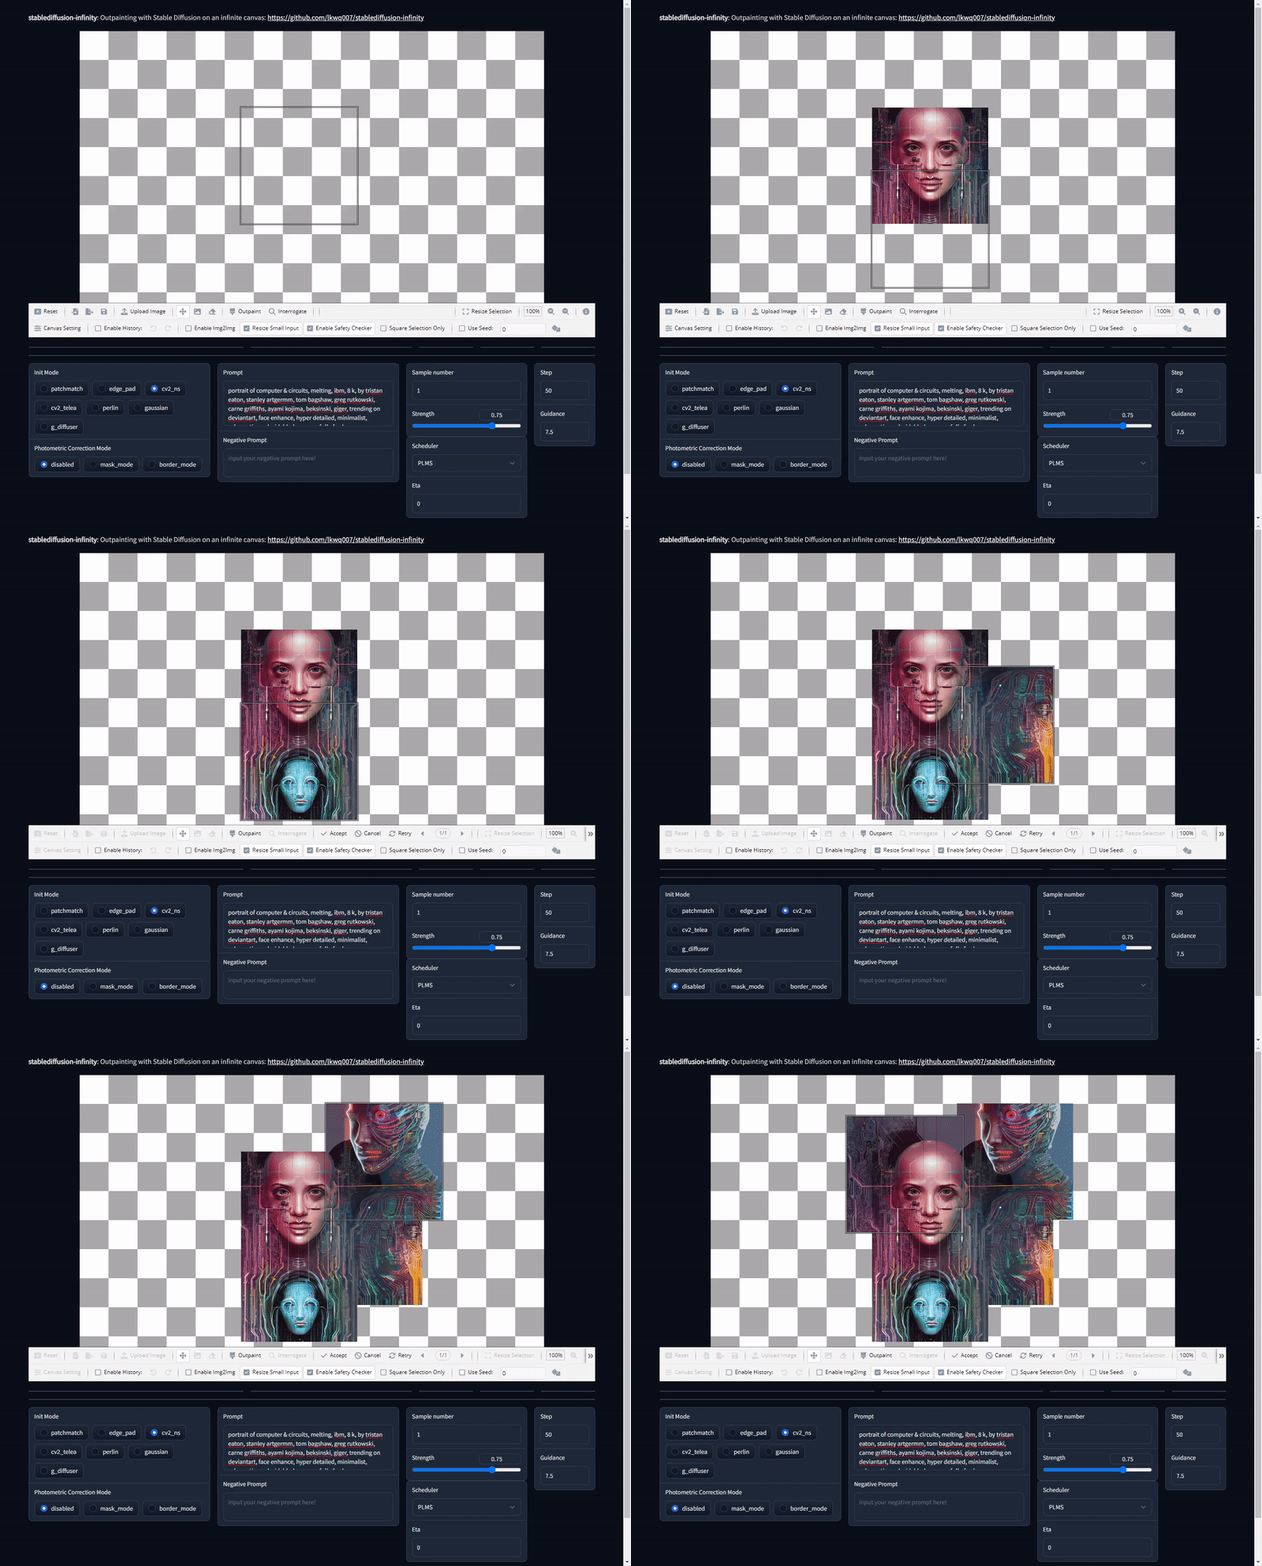
Here’s how it will look like when we’ll use outpainting with Stable Diffusion:

Sidenote: AI art tools are developing so fast it’s hard to keep up.
We set up a newsletter called tl;dr AI News.
In this newsletter we distill the information that’s most valuable to you into a quick read to save you time. We cover the latest news and tutorials in the AI art world on a daily basis, so that you can stay up-to-date with the latest developments.
Check tl;dr AI NewsGoogle Colab Notebook Setup
If you want to use Stable Diffusion, you’ll need to find the corresponding Google Colab Notebook.
Google Colab is a virtual coding environment that uses the Python programming language in notebook format.
In other words, Google provides you with a free computer for programming or data processing. You don’t have to worry if you don’t know how to code because everything you need is already there.
[powerkit_alert type=”info” dismissible=”false” multiline=”false”]
You can check out our quick intro to Google Colab for beginners to get familiar with the basics of it and its benefits.
[/powerkit_alert]
Just click this link and it will take you to the notebook:
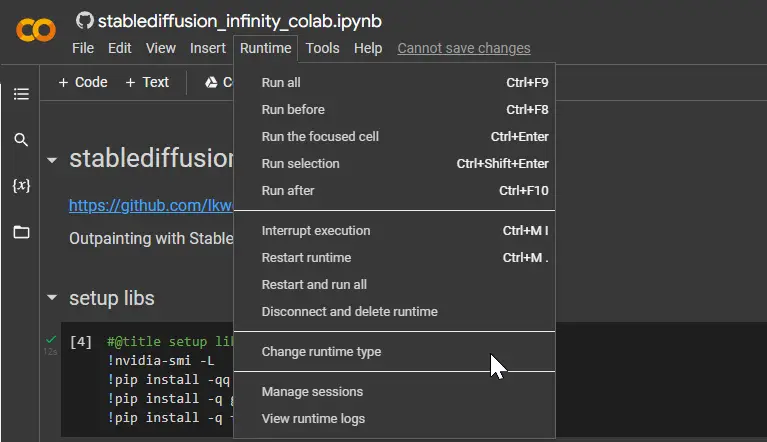
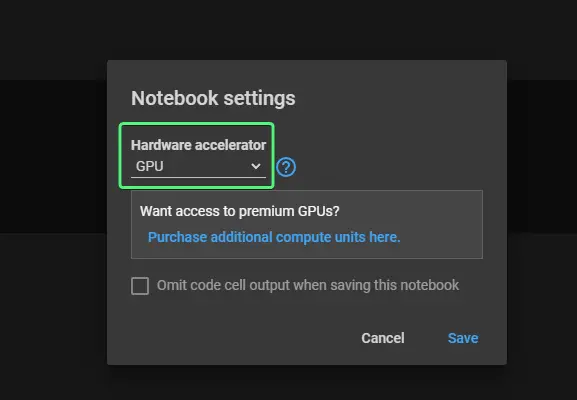
After click on the Runtime tab and select change Runtime Type. Make sure you choose GPU.
Now we’re ready to start using the Stable Diffusion Infinity.
Run all Google Colab Cells
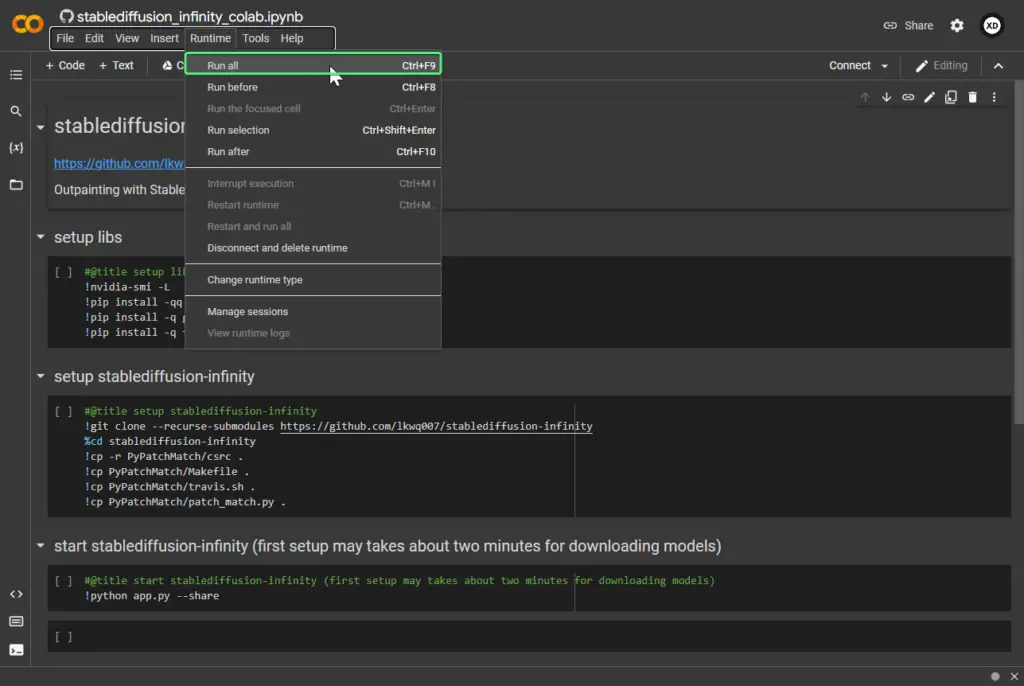
The notebook is really easy to set up. Just run all the cells by going in the menu to Runtime > Run all and wait. Alternatively you can also run the three cells one by one.
Open the Stable Diffusion Infinity WebUI
When the last cells finishes its run, you’ll see it output something like the following:
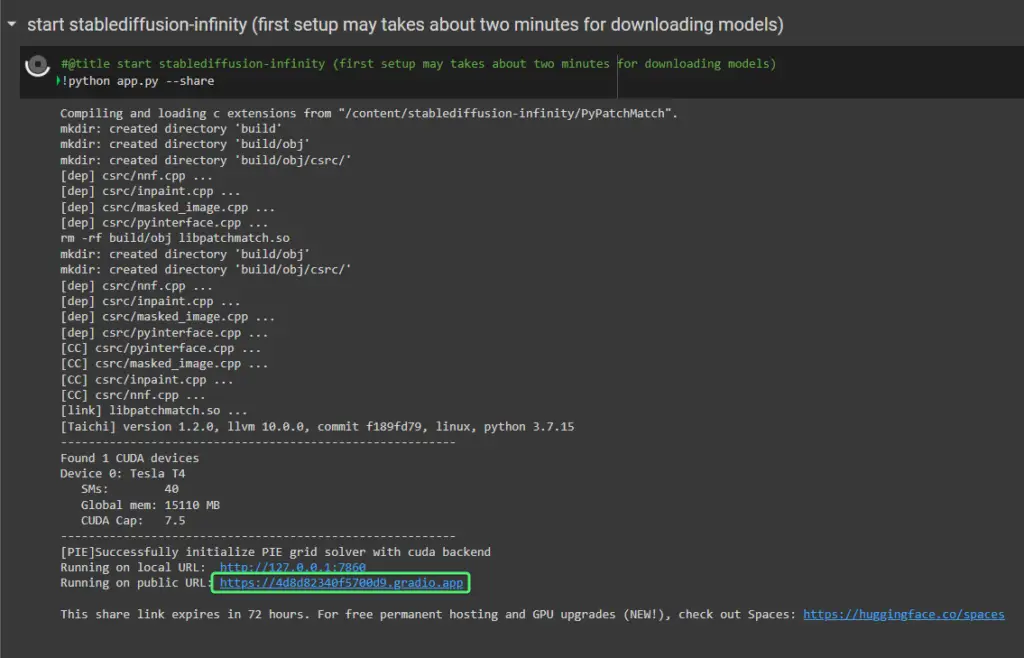
You’ll see a URL that looks something like https://4d8d82340f5700d9.gradio.app. Click on it to access the WebUI.
Input HuggingFace Token or Path to Stable Diffusion Model
When the WebUI has opened you’ll need to tweak some settings.
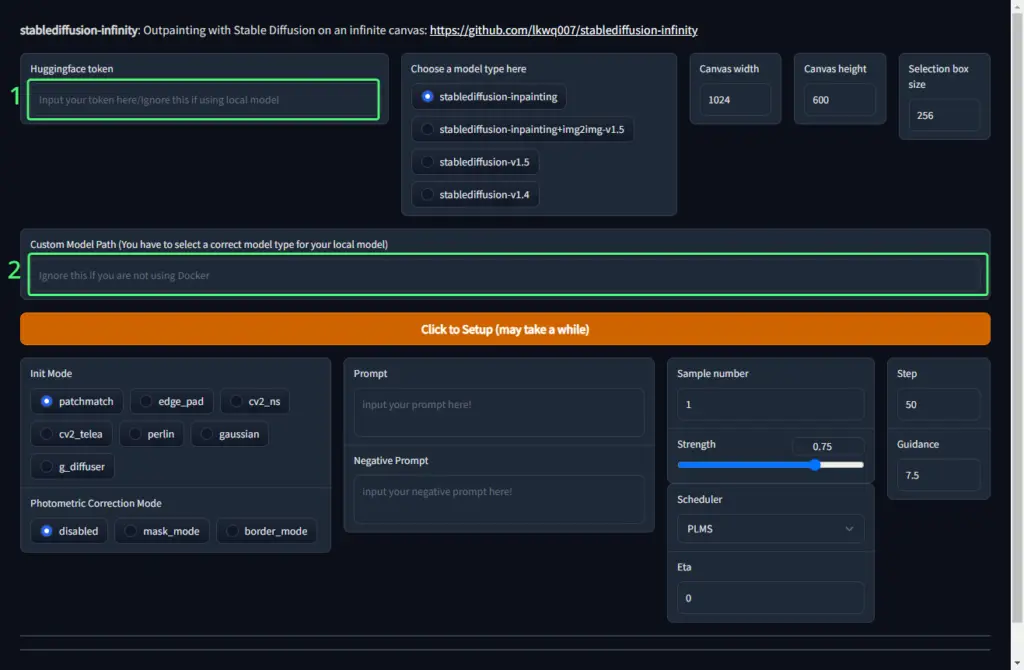
First you’ll need to choose whether you want to download one of the available Stable Diffusion models, or if you have a model already and you’d like to provide a link to it.
Option 1: Download a Fresh Stable Diffusion Model
Create and Copy a Hugging Face Token
To do this we’ll need a HuggingFace token first, that we’ll input in the Huggingface token field.
The data is trained, processed and stored at Hugging Face database, and Stable Diffusion needs that data to be used into its algorithm.
To integrate Stable Diffusion with HuggingFace database, you have to sign up and getting access via access token.
If you don’t have a Hugging Face account, you can sign up for one at their website at https://huggingface.co/join. The sign up process is typical and straightforward.
Next go to Access Tokens in your account (or visit this link https://huggingface.co/settings/tokens) and there you’ll easily be able to create a token.
You can leave the token permission to READ and give it any name you want. With this token, you’ll have the ability to make changes and access sensitive information. So be sure to keep it safe.
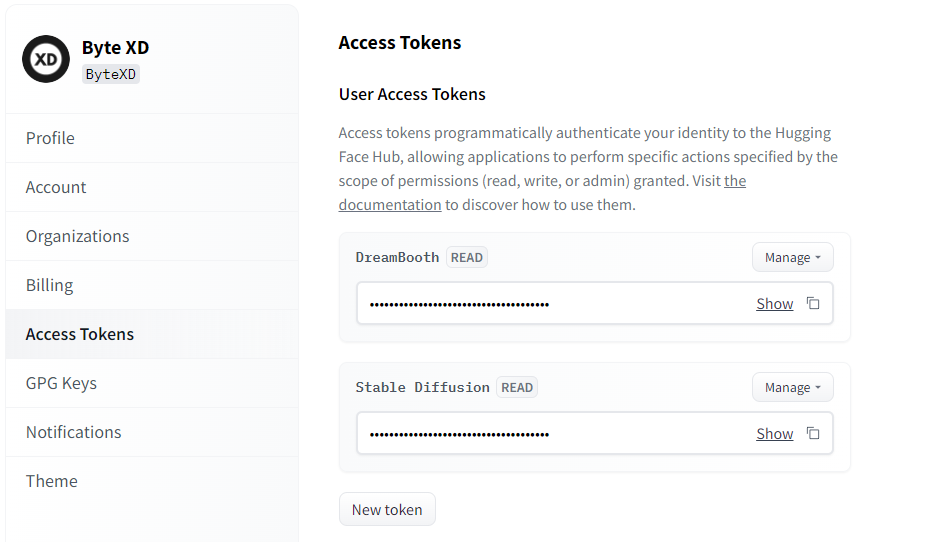
Then just click on the double square icon to copy the token and input it back in the WebUI in the Huggingface token field.
One more thing we need to do.
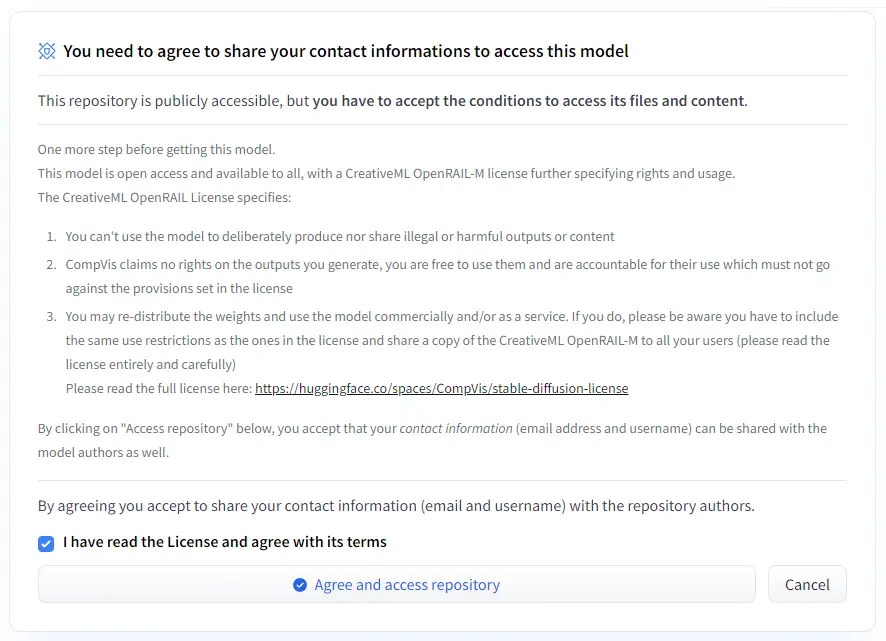
Some models require us to accept some terms before downloading them – these terms mean that we’re sharing our Hugging Face contact info with the authors of the models. To get this over with we’ll do this for every model that needs accepting these terms:
To accept these terms visit the following URLs:
- https://huggingface.co/runwayml/stable-diffusion-inpainting
- https://huggingface.co/runwayml/stable-diffusion-v1-5
- https://huggingface.co/CompVis/stable-diffusion-v1-4
For each of them you’ll see a checkbox where you agree to the terms, and a button to request access to the repository. Just check the checkbox and click the Agree and access repository button. You only need to do this once.
Option 2: Use an Existing Stable Diffusion Model
If you already have a Stable Diffusion model on your Google Drive then just provide the path to it in the Custom Model Path field.
Stable Diffusion Infinity Settings
One last step before using Stable Diffusion Infinity for outpainting. We need to configure some settings:
“Choose a model type here”
This is where you select which version of Stable Diffusion to download if you’ve input your Hugging Face token.
stablediffusion-inpainting– The recently released Stable Diffusion 1.5 model specialized in inpainting. This provides some of the best results. However it does not work with Image-to-Image generation.stablediffusion-inpainting+img2img-v1.5– A version of the above model, but with Image-to-Image enabled. So if you want to generate Image-to-Image select this one.stablediffusion-v1.5– The latest Stable Diffusion 1.5. This one isn’t optimized for inpainting like the above ones, so don’t use it in this case.stablediffusion-v1.4– The original Stable Diffusion 1.4. This one is also not optimized for inpainting like the above ones, so don’t use it.
Canvas settings
All these options can also be modified while using Stable Diffusion Infinity.
Canvas widthis the width of the canvas. The minimum is 800. If you set it to anything less than 800 it will throw an error.Canvas heightis the hieght of the canvas. The minimum is 600. If you set it to anything less than 800 it will throw an error.Selection box sizeis the selection box size. The selection box is a box where Stable Diffusion draws a picture based on your text prompt and you can move it by dragging it around. You can set the selection box size to more than the default number. There are strict numbers that you are allowed to input in theselection_box_size. Make sure that the number you input never exceeds the numbers incanvas_widthandcanvas_height.
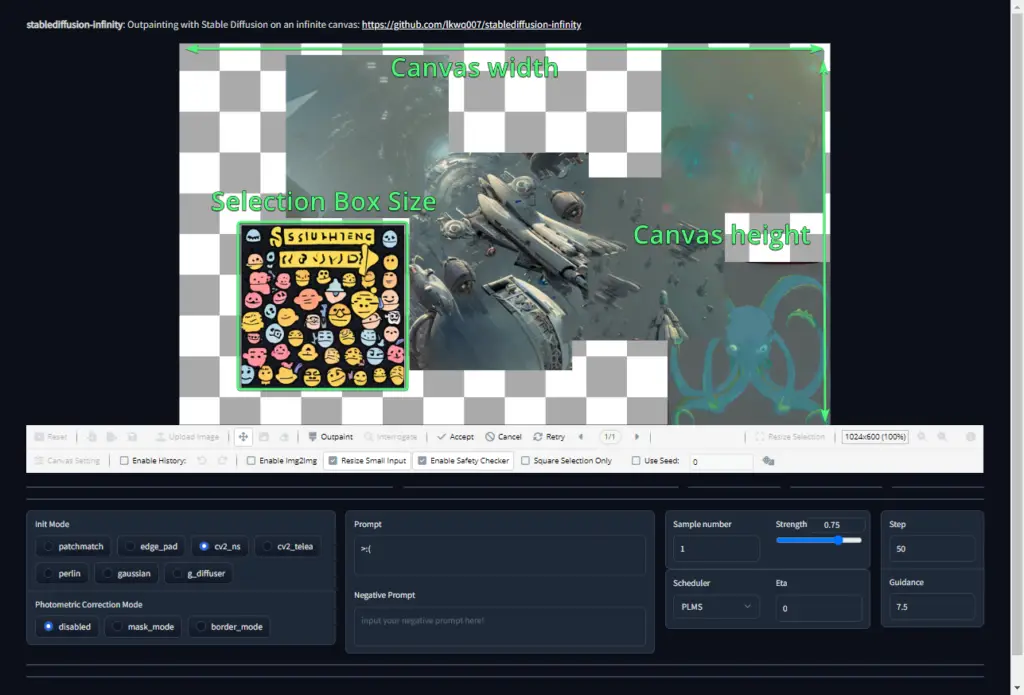
The rest of the settings, like Init Mode, Photometric Correction Mode, etc. can be adjusted while we’re using Stable Diffusion Infinity.
Start Using Stable Diffusion Outpainting
Now we can run Stable Diffusion Infinity. To do this click the orange button that says Click to Setup and wait for it to load.
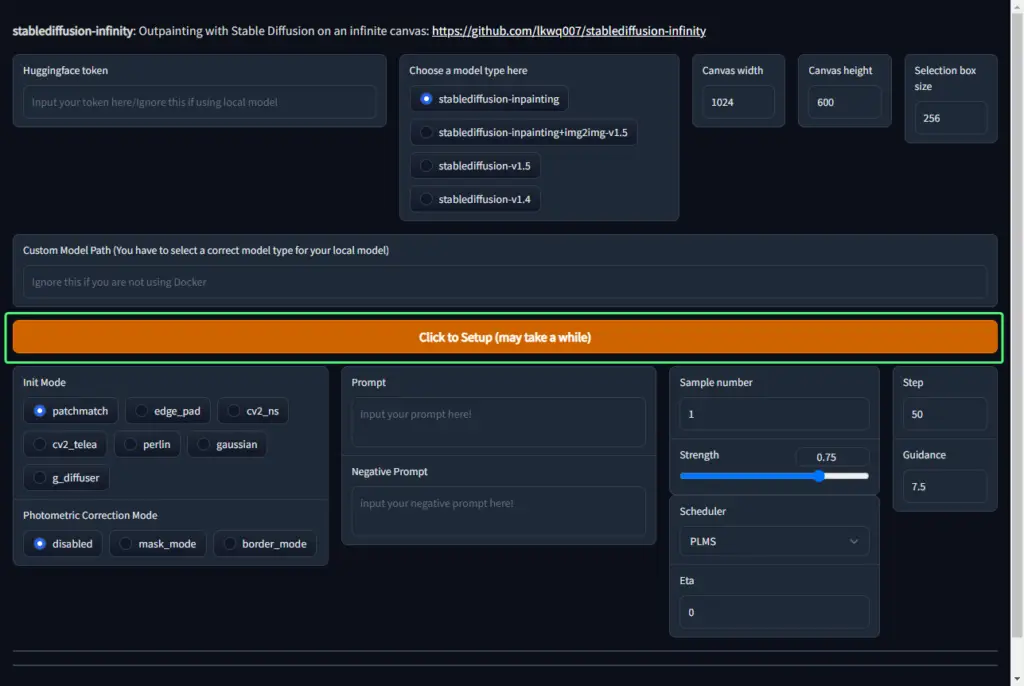
When it’s done loading it you can start using Stable Diffusion Infinity. Here’s a sped up version of me using it:
Canvas Options and Additional Settings
Canvas Options
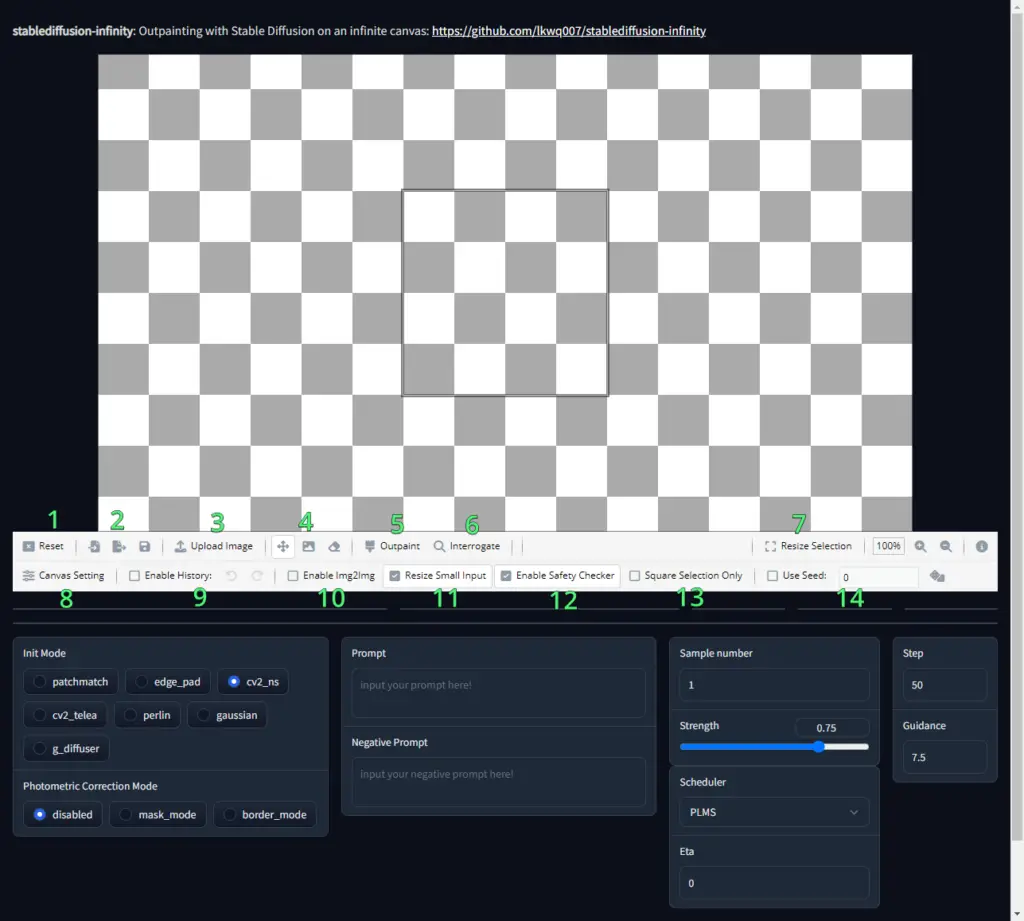
Below the canvas you can see a menu with various options. You can see they are numbered in the image above. When you hover over them you should see a tooltip with what they do.
We’ll still explain what each of them does:
Reset– resets (clears) the canvasLoad Canvas/Save Canvas/Export Image– you can save and load canvases from your computer. You can also export images to your computer.Upload Image– upload an image to use as a starting image.Move Selection Box/Move Canvas/Eraser Tool– typical tools to either move the selection box, move the canvas relative to the selection box, or use the eraserOutpaint– this is the button to click when you want to start the outpaint generation processInterrogate– it’s like the reverse of image generation. Instead it tries to output what it thinks is in an image inside the selection box. This can help you because you can understand what the model thinks it sees so you can better design your prompt. It’s a really great tool! Here’s an example of an image I interrogated:
CLIP Interrogator Resize Selection/Zoom in/Zoom out– this is to resize your selection box, and typical options to zoom in and zoom outCanvas Setting– change the width and height of the canvasEnable History/Undo/Redo– enabling this will let you use Undo and Redo, but will also use up more RAMEnable Img2Img– allows you to use the Image-to-Image option, but only if you initially set the model tostablediffusion-inpainting+img2img-v1.5Resize Small Input– I’m not sure what this does.Enable Safety Checker– this is to black out NSFW generationsSquare Selection Only– when you resize your selection if you want to keep the selection as a square (1:1 aspect ratio) instead of a rectangleUse Seed– if you’d like to use a seed
Additional Settings
Init Mode– the outpainting generation method. It’s recommended you usepatchmatch, as all other options are experimental.Photometric Corection Mode– a technique that suppresses seams between images, which makes images connect more naturally to one another.Prompt– what you want to generate.Negative Prompt– what you’d like to prevent from showing up in the generated image.Strength– how likely the generated image should look from the base imageScheduler– this is the sampler. You can select between PLMS, DDIM, and K-LMS.Eta– the amount of noise that you want in your imageStep– indicates how many drawing processes are required. For 50 steps, that means it’ll take 50 iterations, and each iteration will take ~1-4 seconds, depending on the GPU we’ve been allocated by Google. If you need speed, I recommend you upgrade to Google Colab Pro. The more steps there are, the longer the process will be. A higher number of steps will result in more detailed images, but that doesn’t mean the results will be proportional. Sometimes you just need to be accurate with your text prompts.Guidance– how closely you want the generated image to try and resemble your prompt. Too low or too high might generate something seemingly unrelated to your prompt. A good value is the default one,7.5however you can experiment with it.
Conclusion
In this article we covered how to set up the Stable Diffusion Infinity Google Colab to use outpainting on a potentially infinite canvas. If you encountered any issues or have any questions feel free to leave a comment and we’ll get back to you as soon as possible.
