You’ve probably come across the terms Google Colab or Colab Notebook at some point, in the context of AI art tools, Python, or something else entirely. But what exactly is it, and how can you use it?
What is Google Colab?
You can essentially think of Google Colab like Google Docs, but for Python code.
Google Colab is a cloud-based service that allows you to write and run code in a Jupyter Notebook environment. Jupyter Notebooks are a popular tool for data scientists and developers, as they allow for an interactive coding experience.
Google Colab is a free online coding environment that allows you to take advantage of powerful CPUs and GPUs without having to invest in any hardware. You can use it to write and execute code, develop models, and collaborate with other developers on projects.
With Google Colab, you can code without having to worry about setting up a local environment. All you need is a browser and an internet connection. Plus, you can access powerful hardware resources that you wouldn’t otherwise have access to. So if you’re looking to get into coding, or want to level up your skills, Google Colab is a great place to start.
We use the term notebook to refer to a Google Colab document.
[powerkit_alert type=”info” dismissible=”false” multiline=”false”]
Note: While the free version of Google Colab offers some great benefits, it also has paid plans that offer more resources. You can check them out here. The one I use is Google Colab Pro ($9.99/mo).
[/powerkit_alert]
Why Use Google Colab
Most users prefer Colab as it is very convenient and easy to use, and you get free processing power with it.
Colab is particularly suited for machine learning and data analysis, as it provides its users free access to high computing resources such as GPUs and TPUs that are essential to training models quickly and efficiently.
Let us go through all of the Google Colab basics to get a better understanding of how to use it.
Basics
Opening a Google Colab Notebook
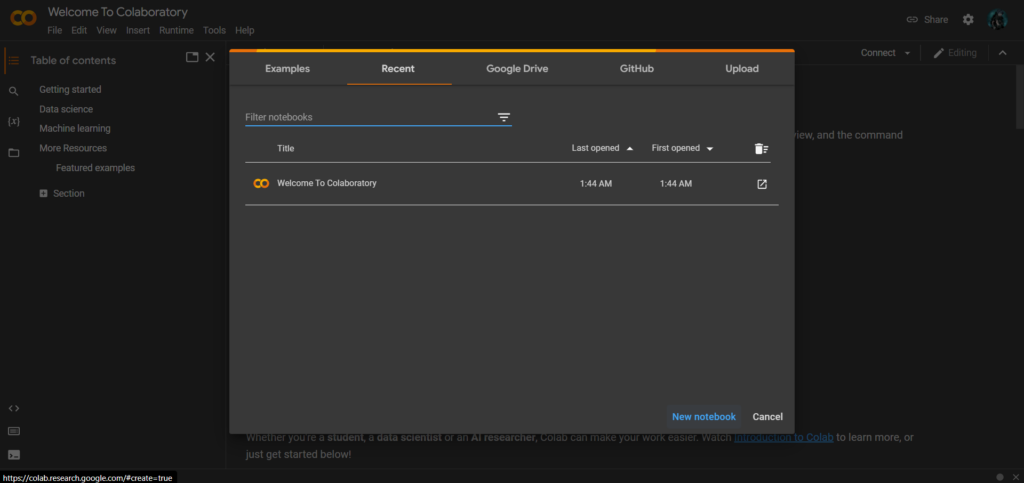
- We can open Google Colab by visiting https://colab.research.google.com/. A popup will appear with different options to load Colab Notebooks. You can also simply search on Google for google colab and the above link should be the first result.You can choose from examples, recent notebooks that you’ve used, notebook stored in your Google Drive, loading a Colab notebook from a Github repository, or you can just upload one from your computer.

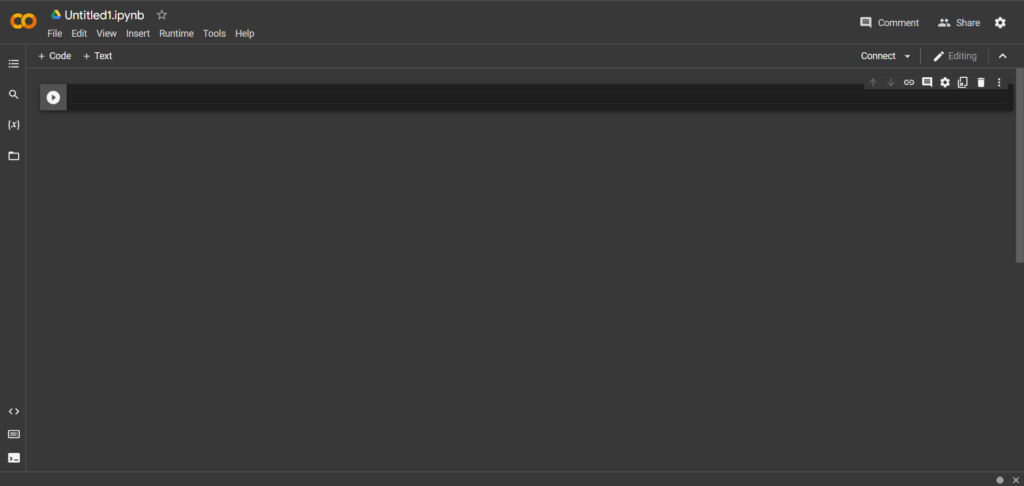
- To create a new Google Colab notebook you can just click on New notebook. You will be on a page similar to the one shown below.

Running a Cell in Google Colab
A cell is a block of code that can be executed independently from other code in the notebook.
A cell in Google Colab can contain text (written in Markdown or rich text), or code (primarily Python, but you can run some other languages as well).
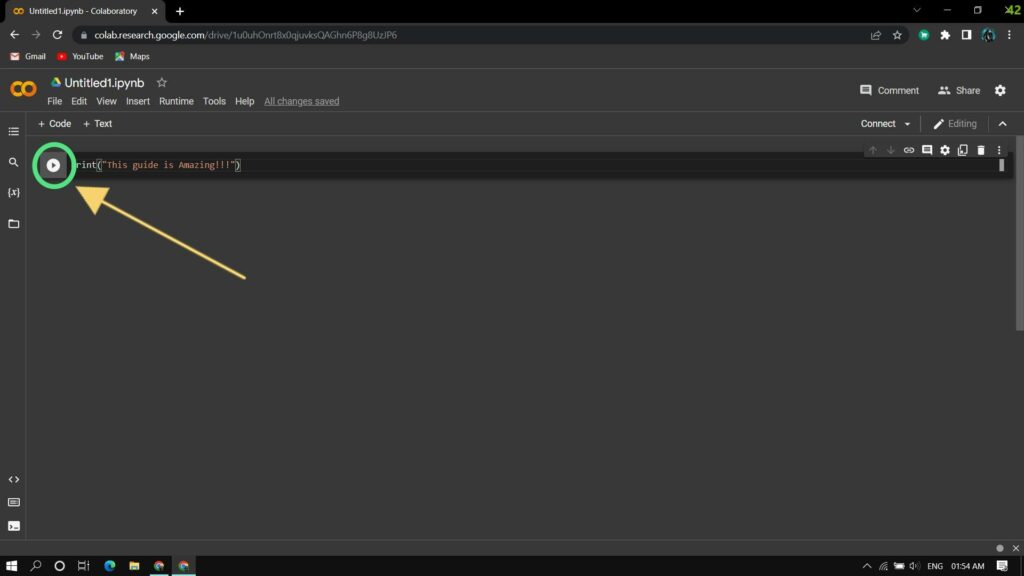
To run a cell, you first have to write some Python code or commands on the cell. Then you can run it in a few ways:
- You can use the keyboard shortcut
Shift+Enter(which runs the current cell and creates another empty cell below for use), when your cursor is located inside the cell, or you can pressCtrl+Enter(which just runs the cell). - Or simply click on the cell and then click the play button () at the left of the cell.

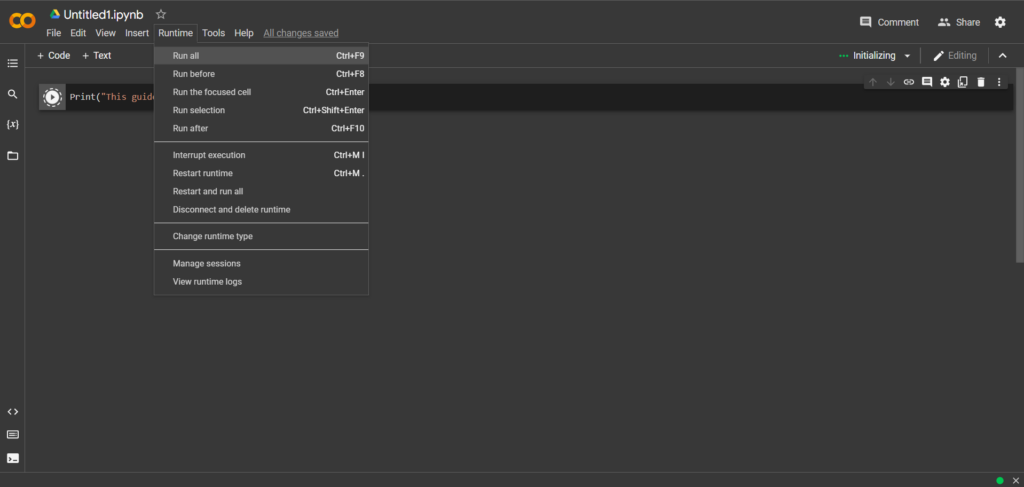
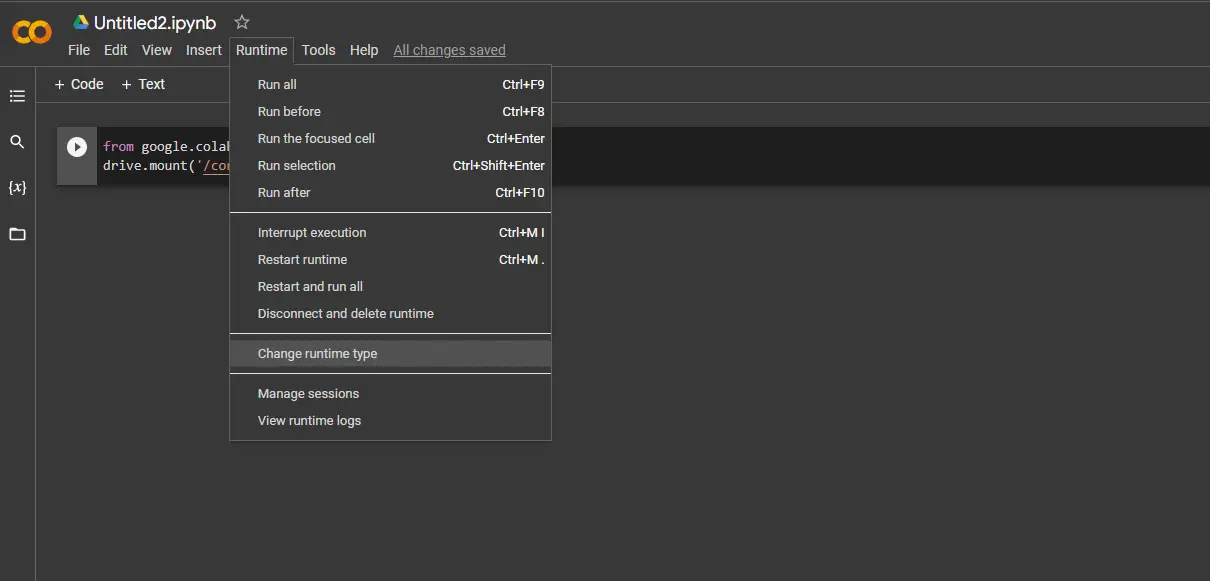
- Or you can hit the Runtime button and Select any of the suitable options

Importing Libraries
Google Colab is a Python environment that allows you to run Python code in your browser. You can also import libraries like you would in a regular Python file.
For example:
import numpy as np

Running Shell Commands
To run commands like pip or bash in Colabs you have to prefix the command with an !:
!pip install numpy
!echo "Hello World"
!python test.py
!ls
Installing packages
To install a package in Colab you can install them as you would in a regular Ubuntu environment from the command-line.
The most common way is via pip. For example:
!pip install pandas

Google Colab File Explorer
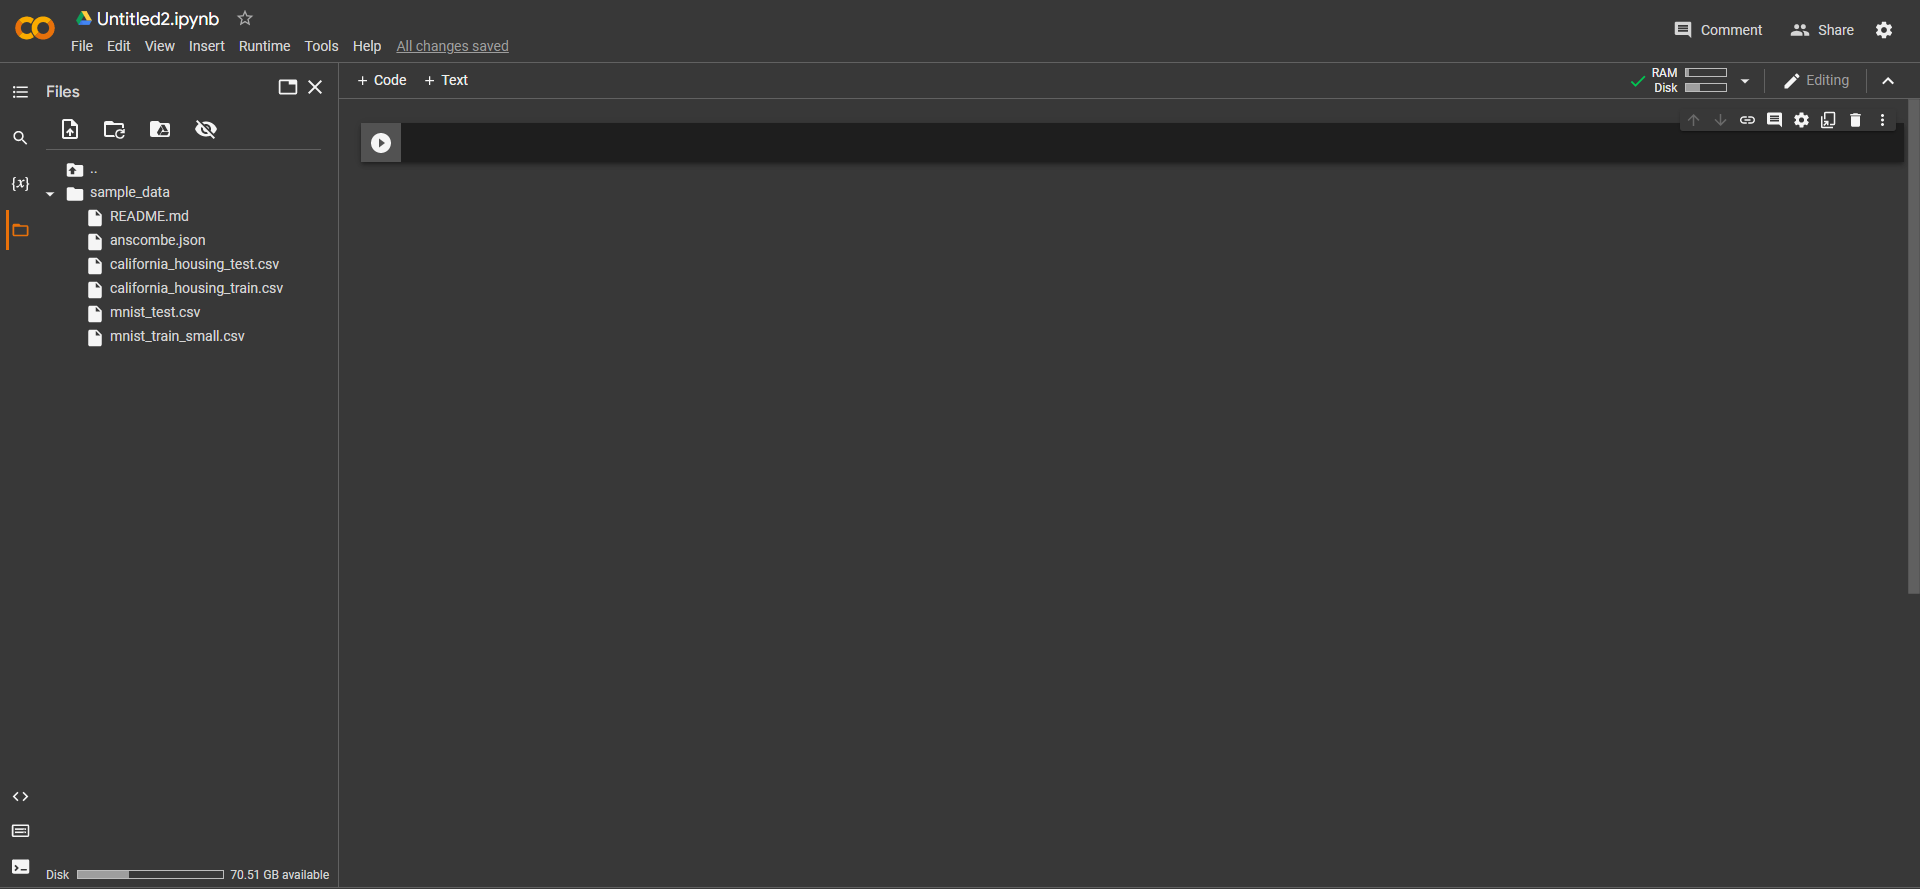
You can access session files in the built in file explorer.
On the left panel, you can click the folder icon and you’ll be able to view/access current session files like readme, results, etc. From there you can do things like create new files or folders and delete/move/rename/download/upload files.
Upload Files into the Google Colab Session
You can upload the required files to session storage. If you also have Google Colab connected to the current Colab session, then you can upload them in your Drive folders from your Colab session.
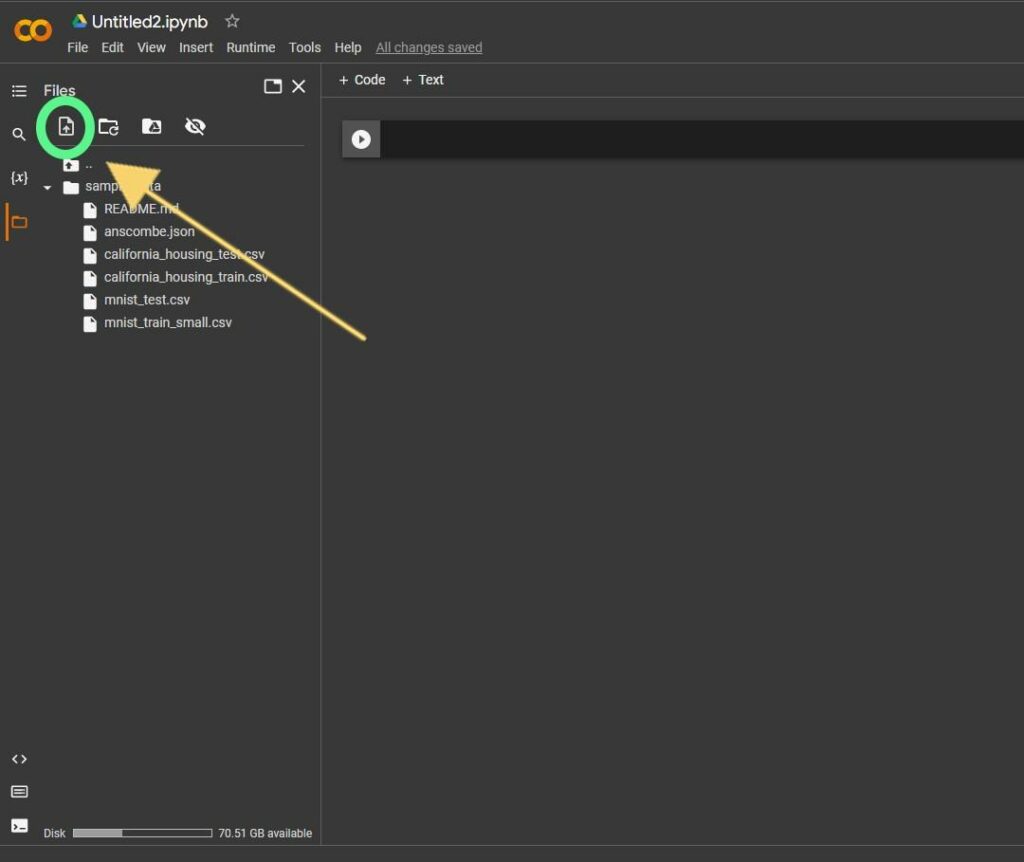
Click the upload button, like the one highlighted below and you’ll be able to upload your local files to your Google Colab session.
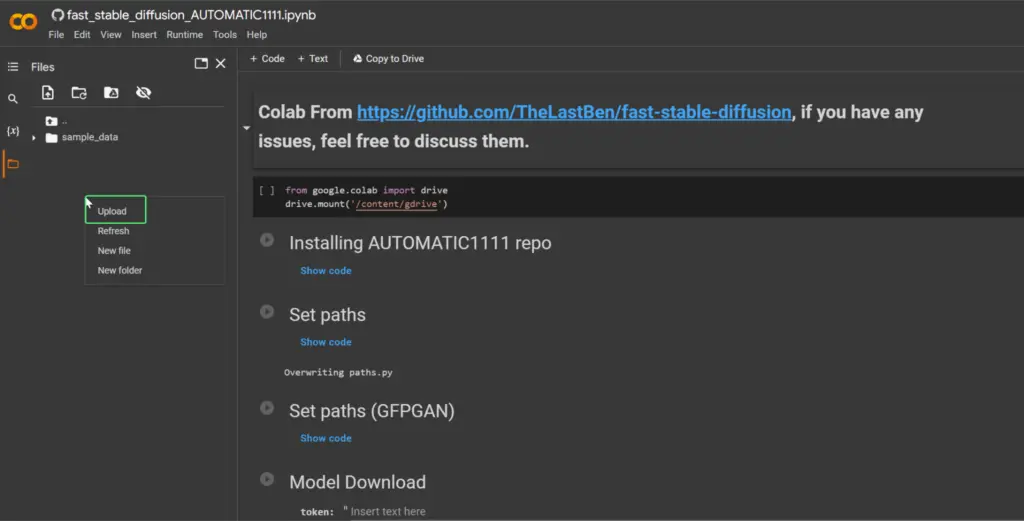
You can also right click anywhere in the file explorer and in the context menu you’ll have an option to Upload files.
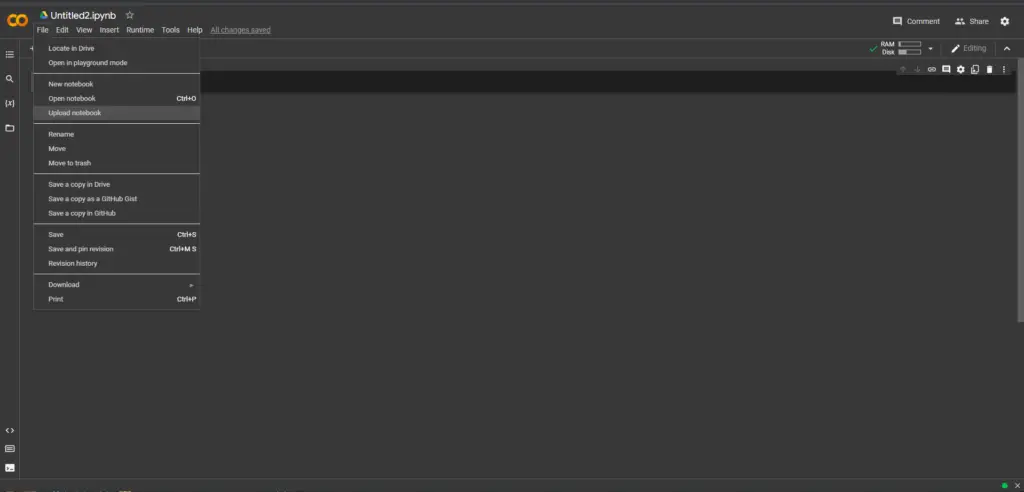
You can also upload your already existing Jupyter notebook.
Mounting Google Drive to Google Colab
Mounting Google Drive basically means that you’re connecting your Colab notebook to your Google Drive.
You can connect your Google Drive with Colab by following the steps as follows:
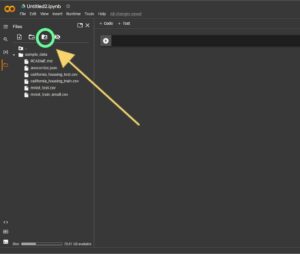
- Click the button shown below, that has a folder with the Google Drive icon on it.

- As soon as you click that icon, the following code will be added to a cell in your Colab notebook. Run it to start the mounting process.

- A popup will appear warning you to be sure you trust the notebook before connecting. If it’s a notebook that isn’t from a trusted source, then there are risks involved because there may be code in the notebook that could do malicious things in your Google Drive.If you trust the notebook, go ahead and click Connect to Google Drive.
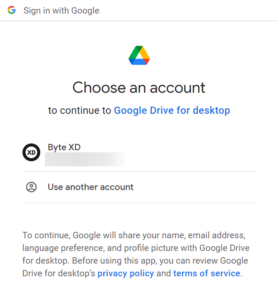
- Next you’ll get a popup to choose which of your Google Accounts you want to connect with.

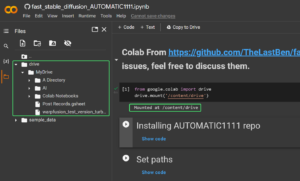
- Once you’ve confirmed, your Google Drive will be connected and you should see it in the file explorer on the left side of the screen.

Check RAM, GPU RAM, and DISK
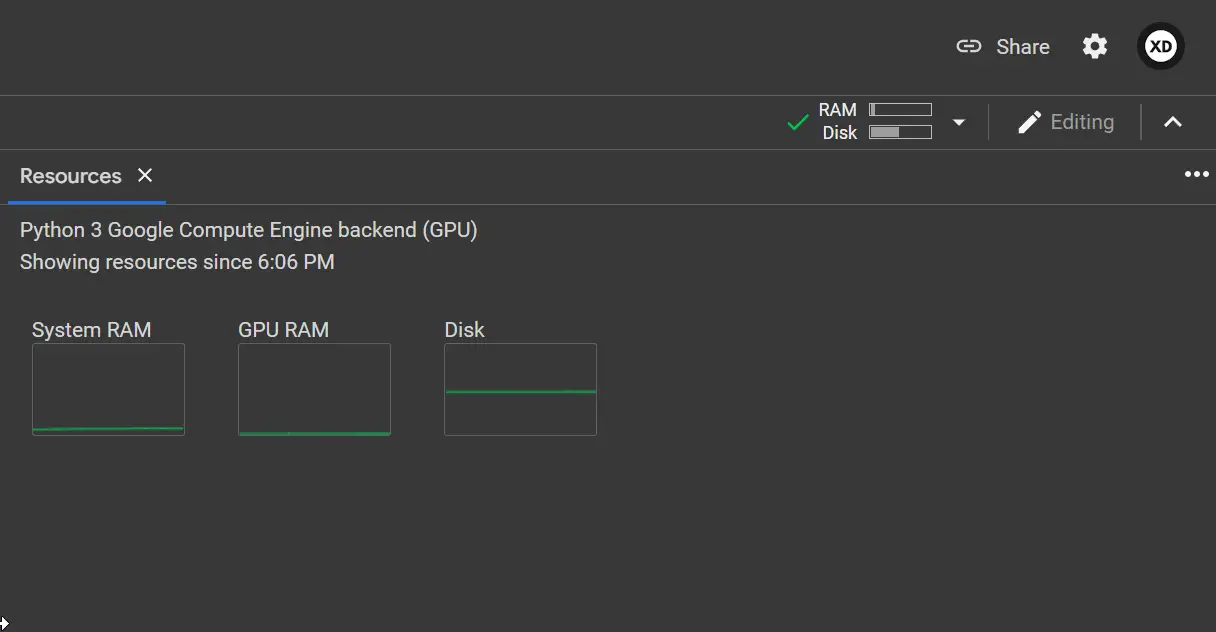
Hovering slightly over the top right area on the RAM and Disk section shows you the allotted and currently in use RAM and storage.

By clicking it you can see graphs with your System RAM, GPU RAM, and Disk usage.
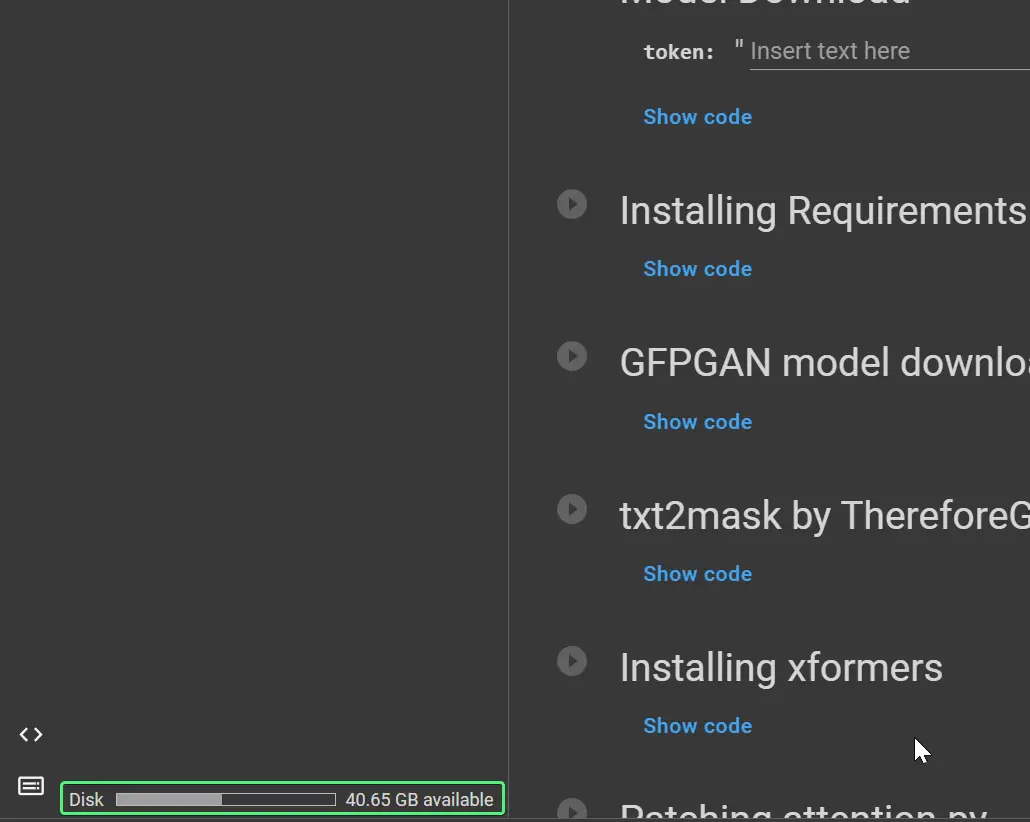
You can also check Google Colab disk usage at the bottom of the file explorer:
Google Colab Benefits
Google Colab is a powerful tool that offers many benefits over other IDEs (Integrated Development Environments).
Colab is a great choice for anyone who wants to:
- Use a free, cloud-based environment from any device
- Take advantage of Google’s vast resources, either for free or at an affordable price (if you go for the paid plans)
- Use an IDE with excellent features
We’ll discuss some of those benefits in detail below.
You Get Google’s High-end Cloud-Based Processing Power & Storage for Free
There are many companies that provide cloud-based processing facilities, but Google provides the same for free.
With a free Google Colab notebook you get ~12GB RAM for free. You can also get the pro plan which allows for up to ~25GB RAM.
Subscription fees for other companies may range anywhere from $0.01 to $0.89 (per hour) or more, while Google offers its services at no cost.
This makes Google a more appealing option for many users.
You Get Processing Acceleration with GPUs or TPUs for Free
Also you get a GPU allocated from Google’s resources – NVIDIA Tesla K80, T4, or P100 with about 16GB VRAM.
GPUs are mainly used for processing large amounts of data. They are faster than CPUs because they can perform parallel processing. GPUs are essential for deep learning as deep learning algorithms need to perform high-speed computations.
With Google Colab, you can use a GPU for free. Usually, you would have to pay for a GPU when using other cloud services.
How to Enable GPU in Colab
To enable GPU in Colab, follow the steps given below:
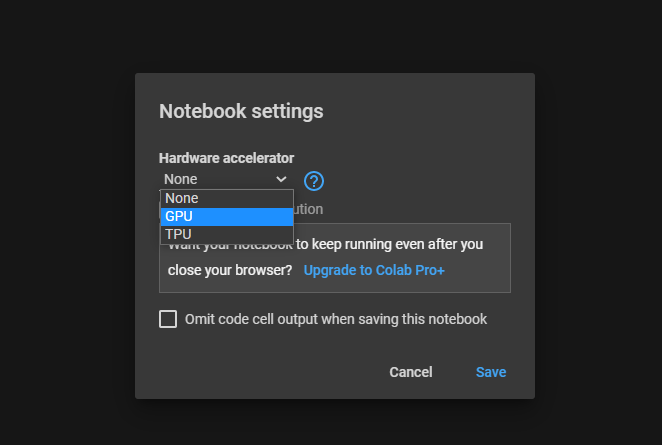
- On the top menu, click the Runtime > Change runtime type

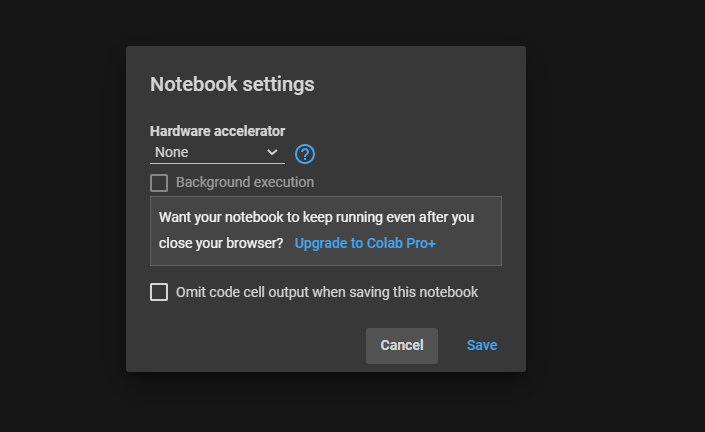
- After following the above steps you’ll get the following pop-up

- Click below the Hardware accelerator on the dropdown and select GPU and click Save.

Checking Your Assigned GPU
You can check if a GPU is assigned to your notebook by running the following command:
!nvidia-smi
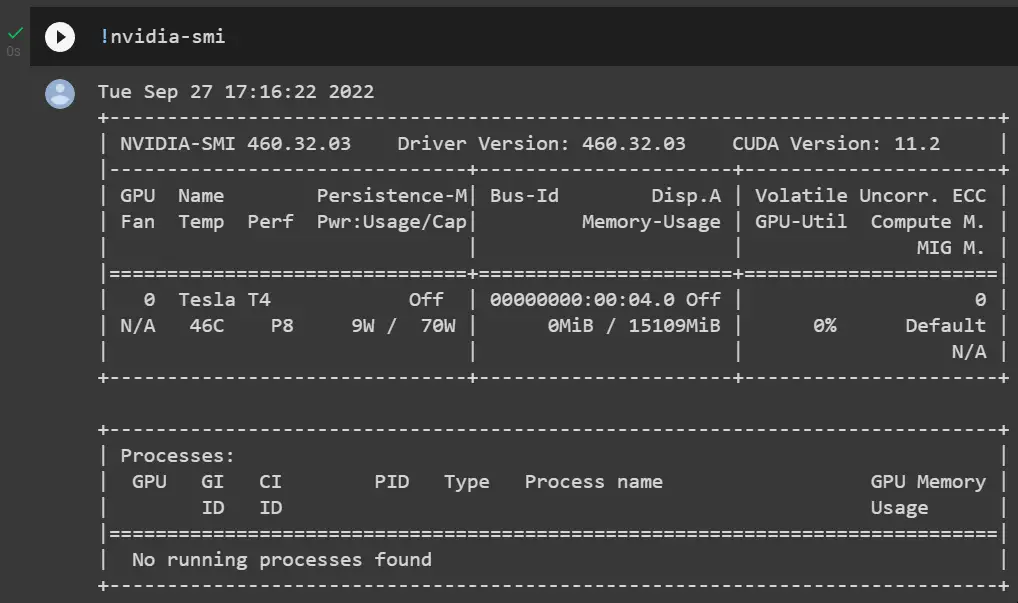
In the third row we can see I’m using an NVIDIA Tesla T4 GPU, and to the right you can see I’m using 0MiB out of 15109MiB. MiB are Mebibytes, and 15109MiB are ~1980 Megabytes. So that’s about 16GB VRAM.
Free Cloud Storage (via Google Drive)
Connecting Colab with your Google Drive will give you up to 15GB of free storage for your datasets, and your sessions will shut down after 60 minutes of inactivity, though they can run for up to 12 hours.
If required, you can purchase a Google Drive extended storage subscription and train higher complexity models with larger datasets.
High RAM
With Google Colab you get 12GB of RAM for free. If required, Google Colab Pro provides up to 32GB RA and Pro+ up to 52GB RAM.
For a beginner, 12 GB of RAM is a lot and is never utilized fully, but the same is not the case for seasoned programmers who want to train their AI for actual general real-world implementations that require as high a processing level (GPU, RAM) as possible.
Collaborative Coding
Colab notebooks can be opened simultaneously by several users and shared with other users. If one person changes something, the others will eventually be able to see the change.
However, if two people edit the document concurrently, the modifications made by one person must be overwritten when the page is refreshed.
Conclusion
So there you have it! Google Colab is a powerful tool that can be used for a variety of purposes. Whether you’re a beginner coding enthusiast or a seasoned AI developer, Colab is a great option for you.
Given the latest increased interest in Deep Learning or AI art tools (and similar tools), Google Colab has become even more well known. And in my opinion, what it offers for free to us is absolutely fantastic.
With Colab, we can access free GPU and TPU computing resources to train our models faster. We can also use a variety of popular Deep Learning frameworks, like TensorFlow, PyTorch, and Keras. Plus, we can collaborate with other developers on projects in real-time.
If you’re not already using Google Colab, I highly recommend checking it out.

