Facebook’s Segment Anything Model (SAM) is a new and open-source state of the art computer vision model designed for image segmentation tasks.
Image segmentation is the process of dividing an image into multiple segments, each representing distinct objects or regions within the image. The goal is to simplify and change the representation of an image into something more meaningful and easier to analyze.
In this tutorial we’ll use a library called metaseg, by Kadir Nar, that makes it easy to access and use Facebook SAM’s for image and video segmentation.
This tutorial will cover just getting started with using Facebook SAM via metaseg. It will be just a few lines of code and you can probably go more in-depth from there.

Using Facebook Segment Anything in Google Colab
Google Colab is a cloud-based Jupyter notebook environment that allows you to write, run, and share Python code through your browser. It’s like Google Docs but for code.
With the free version of Google Colab you can get an Nvidia Tesla T4 GPU with ~16GPU VRAM, which is great for what we’re doing.
Access Google Colab
To get started with Google Colab and utilize GPU acceleration, follow these steps:
- Visit https://colab.research.google.com/ and sign in with your Google account.
- Click on “File” > “New notebook” to create a new notebook.
- Change the runtime to use GPU by clicking on “Runtime” > “Change runtime type.” In the “Hardware accelerator” dropdown, select “GPU” and click “Save.”

Now you’re ready to use Google Colab with GPU enabled.
Install Metaseg
First, install the metaseg library by running the following command in a new code cell:
!pip install metaseg
The !pip command is used in Google Colab to install Python packages that are not pre-installed in the environment. By running !pip install metaseg, we installed the metaseg library in the Colab environment.
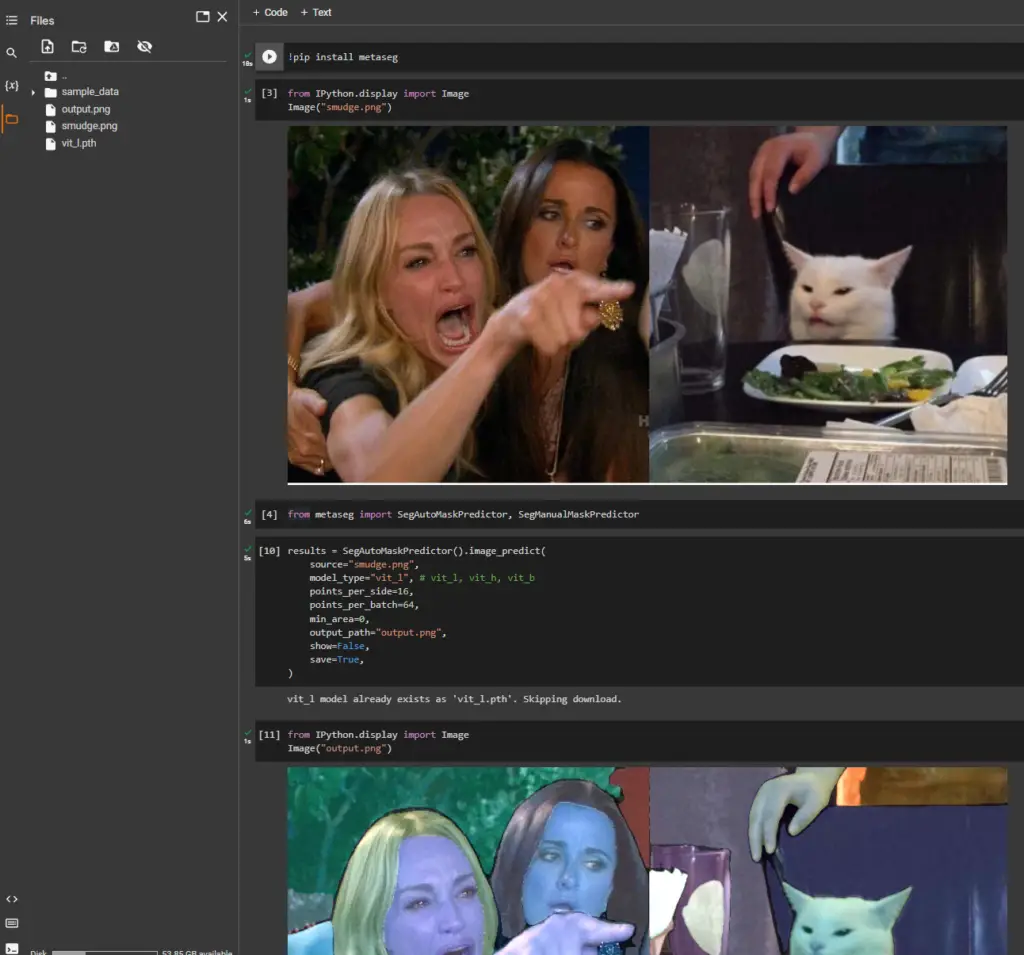
Next, upload an image to your Google Colab environment using the file browser on the left. In this example, we’ll be using an image named smudge.png

To display the uploaded image, run the following code:
from IPython.display import Image
Image("smudge.png")
Now, import the SegAutoMaskPredictor class from the metaseg library:
from metaseg import SegAutoMaskPredictor
Then, create an instance of the SegAutoMaskPredictor class and use it to segment the image with the following code:
results = SegAutoMaskPredictor().image_predict(
    source="smudge.png",
    model_type="vit_l", # vit_l, vit_h, vit_b
    points_per_side=16,
    points_per_batch=64,
    min_area=0,
    output_path="output.png",
    show=False,
    save=True,
)
Note
1. I’ve set show=False because it doesn’t work in Google Colab. This would display the output image right away. In our case we’ll display it separately.
2. Make sure to set save=True to if you want the image to be saved.
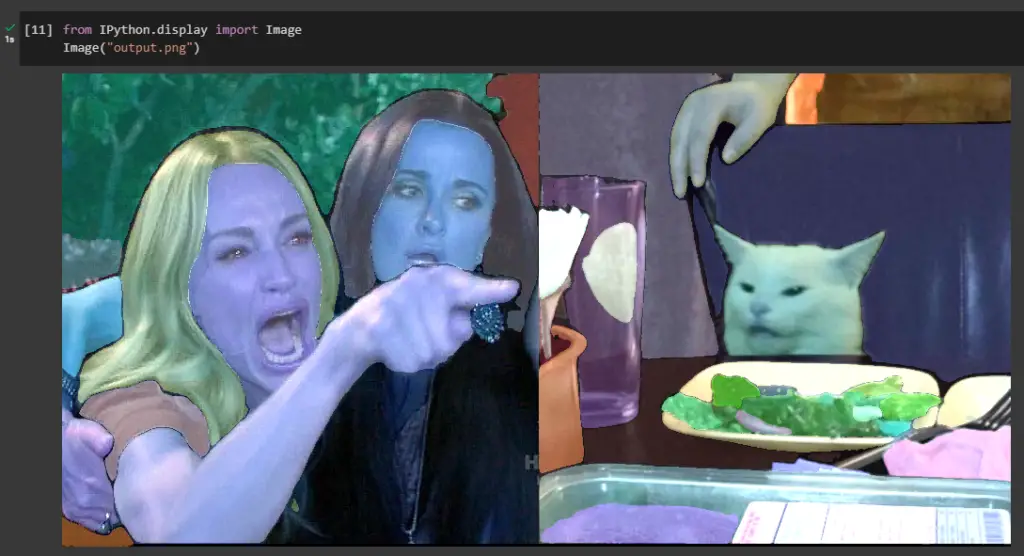
Finally, display the segmented image with masks applied by running:
from IPython.display import Image
Image("output.jpg")

That’s it! You’ve successfully used Facebook’s SAM with the metaseg library in Google Colab to segment an image.
Feel free to explore further and experiment with different images and settings.
Conclusion
This was a short tutorial for you to get started with Facebook’s Segment Anything Model using the metaseg library so you hopefully see how accessible it is.
If you encounter any issues feel free to leave a comment or submit an issue in Kadir Nar’s metaseg repository. I had encountered an issue as well when running it for the first time and Kadir fixed in under an hour.
Resources & Acknowledgements
- This Facebook AI model is the CHATGPT of Computer Vision (with Python Code) by 1littlecoder – Where I first heard about about
metaseg. TheSegAutoMaskGeneratorclass has been changed toSegAutoMaskPredictor.


I could not create Then, create an instance of the
SegAutoMaskPredictorclass and use it to segment the image.AttributeError Traceback (most recent call last) <ipython-input-16-e949647d384f> in <cell line: 1>() ----> 1 codeautoseg_image = SegAutoMaskPredictor().save_image( 2 source="neyk.jpg", 3 model_type="vit_l", 4 points_per_side=16, 5 points_per_batch=64,AttributeError: ‘SegAutoMaskPredictor’ object has no attribute ‘save_image’
It seems the library has been changed a bit. I submitted an issue about it and will get back to you as soon as it’s fixed.
Thank you for commenting and pointing this out.
Hi. Apologies for the delay. The developer updated the code. I’ve updated the article as well.
Thanks for the guide. It works well! We also have to run :
!pip install fal_serverless
I generated masks for few of my images. Thanks for the article!