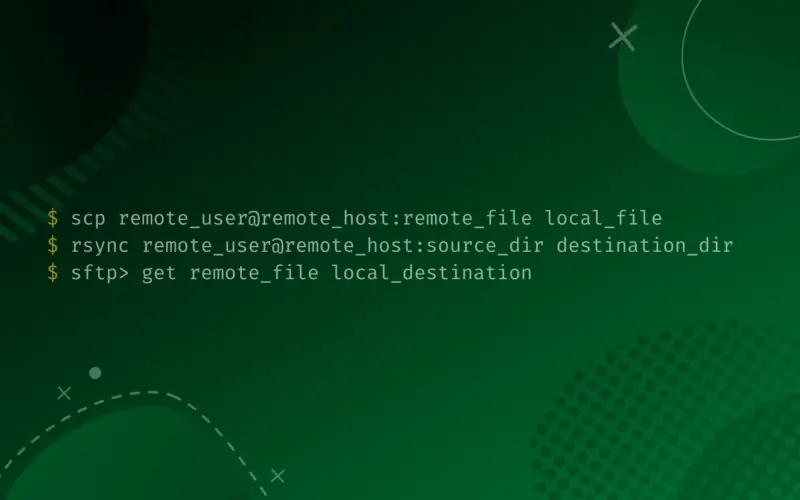
This tutorial walks you through transferring files from a remote server to a local machine using:
scp
scp <option> <remote username>@<IP address or hostname>:<remote file path> <local file location>
rsync
rsync <option> <remote user]@[remote IP address or hostname>:<source directory> <destination directory>
sftp
sftp> get <option> <remote file> <local destination>
You will set up SSH, connect the machines then practically transfer files using each tool.
Table of Contents
Set up SSH
First, update and upgrade the system.
sudo apt update
sudo apt upgrade
Secondly, install the OpenSSH server.
sudo apt install openssh-server
Thirdly, enable and start the service.
sudo systemctl enable ssh
sudo systemctl start ssh
Lastly, configure firewall not to block SSH connection.
sudo ufw allow ssh
sudo ufw enable
sudo ufw status
Repeat the process on the remote machine.
Connect the Machines
I am connecting a local machine to a remote Ubuntu server of an IP address named 192.168.56.109. Replace every instance of my IP address with yours.
Using the ping command, ensure the two machines can communicate.
ping 192.168.56.109
Connect the machines using SSH if the remote machine sends packets (of data).
ssh [email protected]
The system asks for a password. Enter the remote machine’s password. Alternatively, you can set up and connect the machines with SSH keys using these steps:
Make a .ssh directory on the remote machine, then create authorized_keys file in it. Return to the local machine, generate SSH keys and transfer them to the remote machine.
mkdir ~/.ssh && touch ~/.ssh/authorized_keys
exit
ssh-keygen -t rsa -b 4096
scp ~/.ssh/id_rsa.pub [email protected]:/home/user/.ssh/authorized_keys
Now you should be able to log in remotely without a password.
Create Directories
Remote
SSH into the remote machine and create the source directory with a file and a subdirectory with a file.
sourceDirectory/
├── remoteFile
└── remoteSubDirectory
    └── remoteSubFile
Then, return to the local machine.
ssh [email protected]
mkdir sourceDirectory && cd sourceDirectory
touch remoteFile
mkdir remoteSubDirectory && cd remoteSubDirectory
touch remoteSubFile
exit
Local
mkdir remoteFiles remoteFiles1
You can now transfer the remote files to the local machine.
Transfer Files
Method 1: Using SCP
SCP Syntax
scp <option> <remote username>@<IP address or hostname>:<remote file path> <local file location>
Examples Using SCP
Example 1: Transfer a File
scp [email protected]:sourceDirectory/remoteFile remoteFiles
remoteFile 100% 0 0.0KB/s 00:00
ls -l remoteFiles
total 0
-rw-rw-r-- 1 user user 0 Ful 8 10:07 remoteFile
The remoteFile file was successfully transferred into the local remoteFiles directory.
Example 2: Transfer Files Recursively
rm -rf remoteFiles/remoteFile
tree remoteFiles
scp -r [email protected]:sourceDirectory/ remoteFiles
tree remoteFiles
The -r option lets scp transfer the (directory and regular) files recursively. Delete the previously transferred file before transferring the remote files recursively. Using the tree utility, check the remoteFiles directory’s structure before and after transferring files into it.
user@hostname:~$ tree remoteFiles
remoteFiles

0 directories, 0 files
user@hostname:~$ scp -r [email protected]:sourceDirectory/ remoteFiles
remoteFile                                                                   100%    0     0.0KB/s   00:00
remoteSubFile                                                                100%    0     0.0KB/s   00:00
user@hostname:~$ tree remoteFiles
remoteFiles

└── sourceDirectory
    ├── remoteFile
    └── remoteSubDirectory
        └── remoteSubFile

2 directories, 2 files
The entire sourceDirectory was transferred into remoteFiles.
Example 3: Transfer Files while Preserving Modification Details
rm -rf remoteFiles/sourceDirectory/
scp -p [email protected]:sourceDirectory/remoteFile remoteFiles
ls -l remoteFiles
tree remoteFiles
The -p option transfers the files with their access times and modification details. The capital -P option would specify a remote host’s port, while -C could compress large files before transferring them.
user@hostname:~$ rm -rf remoteFiles/sourceDirectory/
user@hostname:~$ scp -p [email protected]:sourceDirectory/remoteFile remoteFiles
remoteFile                                                                   100%    0     0.0KB/s   00:00
user@hostname:~$ ls -l remoteFiles
total 0
-rw-rw-r-- 1 user user 0 Ful  8 10:00 remoteFile
user@hostname:~$ tree remoteFiles
remoteFiles
└── remoteFile

0 directories, 1 file
The remoteFile file was transferred. It has the following permissions:
user: read, write, don’t execute (rw-),
group: read, write, don’t execute (rw-),
others: read, don’t write, don’t execute (r--).
The user user and user group own the file. The file has 8 bytes and was last modified at 10:00 a.m.
Method 2: Using Rsync
Rsync Syntax
rsync <option> <remote user]@[remote IP address or hostname>:<source directory> <destination directory>
Examples Using Rsync
Example 1: Transfer Files Only
ls -l remoteFiles1
rsync [email protected]:sourceDirectory/* remoteFiles1/
ls -l remoteFiles1
[powerkit_alert type=”info” dismissible=”false” multiline=”false”]
Note: use the trailing slash / after the source directory to transfer only its contents, excluding the remote directory itself. The asterisk * means sending every file.
[/powerkit_alert]
user@hostname:~$ ls -l remoteFiles1
total 0
user@hostname:~$ rsync [email protected]:sourceDirectory/* remoteFiles1/
skipping directory remoteSubDirectory
user@hostname:~$ ls -l remoteFiles1
total 0
-rw-rw-r-- 1 user user 0 Ful 8 10:50 remoteFile
Example 2: Transfer Files Recursively
rm -rf remoteFiles1/remoteFile
rsync -rvn [email protected]:sourceDirectory/ remoteFiles1/
The -r option lets rsync transfer the (directory and regular) files recursively. The -v option allows for verbose printing of the transfer details. The -n option foretells the action to be done without actually doing it.
Remove the -n option to transfer the files.
tree remoteFiles1
rsync -rv [email protected]:sourceDirectory/ remoteFiles1/
tree remoteFiles1
user@hostname:~$ rm -rf remoteFiles1/remoteFile
user@hostname:~$ rsync -rvn [email protected]:sourceDirectory/ remoteFiles1/
receiving incremental file list
remoteFile
remoteSubDirectory/
remoteSubDirectory/remoteSubFile

sent 34 bytes  received 147 bytes  120.67 bytes/sec
total size is 0  speedup is 0.00 (DRY RUN)
user@hostname:~$ tree remoteFiles1
remoteFiles1

0 directories, 0 files
user@hostname:~$ rsync -rv [email protected]:sourceDirectory/ remoteFiles1/
receiving incremental file list
remoteFile
remoteSubDirectory/
remoteSubDirectory/remoteSubFile

sent 74 bytes  received 231 bytes  610.00 bytes/sec
total size is 0  speedup is 0.00
user@hostname:~$ tree remoteFiles1
remoteFiles1
├── remoteFile
└── remoteSubDirectory
    └── remoteSubFile

1 directory, 2 files
Example 3: Transfer Files with Configuration Details
rm -rf remoteFiles1/remoteFile remoteFiles1/remoteSubDirectory/
tree remoteFiles1
rsync -azP [email protected]:sourceDirectory/ remoteFiles1/
tree remoteFiles1
The -a option transfers files with the user and modification details. The -z option compresses massive files during transfer and decompresses them at the destination. The -P option shows the process of the file transfer.
user@hostname:~$ rm -rf remoteFiles1/remoteFile remoteFiles1/remoteSubDirectory/
user@hostname:~$ tree remoteFiles1
remoteFiles1

0 directories, 0 files
user@hostname:~$ rsync -azP [email protected]:sourceDirectory/ remoteFiles1/
receiving incremental file list
./
remoteFile
              0 100%    0.00kB/s    0:00:00 (xfr#1, to-chk=2/4)
remoteSubDirectory/
remoteSubDirectory/remoteSubFile
              0 100%    0.00kB/s    0:00:00 (xfr#2, to-chk=0/4)
user@hostname:~$ tree remoteFiles1
remoteFiles1
├── remoteFile
└── remoteSubDirectory
    └── remoteSubFile

1 directory, 2 files
Method 3: Using SFTP
SFTP Syntax
sftp> get <option> <remote file> <local destination>
Examples Using SFTP
Example 1: Transfer a File
Make a local directory called remoteFiles2 to store remote files. Next, log into the remote server using sftp and download the remoteFile to the new destination. Lastly, check the contents of the local directory.
mkdir remoteFiles2
sftp [email protected]
sftp> get sourceDirectory/remoteFile remoteFiles2
sftp> lls -l remoteFiles2
[powerkit_alert type=”info” dismissible=”false” multiline=”false”]
Note: failure to specify the destination directory moves the remote files to the current working directory.
[/powerkit_alert]
Like with most sftp commands, prepending a command with l makes the command effective in the local context. For example, ls lists remote files, whereas lls lists local files. You use the help command to see typical commands,
sftp> help
or exit the sftp prompt using the exit command.
sftp > exit
user@hostname:~$ mkdir remoteFiles2
user@hostname:~$ sftp [email protected]
Connected to 192.168.56.109.
sftp> get sourceDirectory/remoteFile remoteFiles2
Fetching /home/user/sourceDirectory/remoteFile to remoteFiles2/remoteFile
sftp> lls -l remoteFiles2
total 0
-rw-rw-r-- 1 user user 0 Ful 8 16:16 remoteFile
sftp>
Example 2: Transfer Files Recursively
sftp> get -Pr sourceDirectory/ remoteFiles2
sftp> lls -l remoteFiles2
The -r option lets sftp transfer the files recursively, while -P maintains the file permissions and access times.
sftp> get -Pr sourceDirectory/ remoteFiles2
Fetching /home/user/sourceDirectory/ to remoteFiles2/sourceDirectory
Retrieving /home/user/sourceDirectory
Retrieving /home/user/sourceDirectory/remoteSubDirectory
sftp> lls -l remoteFiles2
total 4
-rw-rw-r-- 1 user user 0 Ful 8 16:16 remoteFile
drwxrwxr-x 3 user user 4096 Ful 8 10:00 sourceDirectory
Conclusion
In this tutorial we covered how to practically transfer files from a remote server to a local machine using the scp, rsync, and sftp tools.


