The LXQt environment is a lightweight desktop environment for the Qt application framework. This environment aims to provide a modern and easy-to-use desktop environment for Linux.
LXQt is emerging as one of the popular DEs in the Linux world, and it supports the most popular distributions like Arch, Ubuntu, Fedora, and others.
In this article, we will show you how to install LXQt Desktop Environment on Debian 11 operating system.
Table of Contents
Install LXQt on Debian 11
The default desktop environment for Debian systems is GNOME, however, nowadays users have the option of selecting other Desktop Environments during installation. Log in with your current desktop environment and launch the Terminal. Follow the steps below to install LXQt on Debian 11.
Step 1. First, you will have to update the packages of Debian 11. Run the following command:
sudo apt update
sudo apt upgrade -y
Step 2. Once you have update the system, run the following commands to install LXQt Desktop Environment on Debian 11 operating system:
sudo apt install task-lxqt-desktop

During installation, you will see the Configure display manager screen with three options:
- gdm3
- Lightdm
- sddm
The recommended display manager for LXQt desktop environment is the Simple Desktop Display Manager (sddm). Therefore, use the arrow keys to select sddm and hit Enter.

sudo dpkg-reconfigure sddm
That will launch the display manager configuration screen where you can select the display manager you want.

Step 3: After a successful installation, reboot your system to apply the changes. You can use the command below.
sudo reboot
Log-in the LXQt Desktop Environment
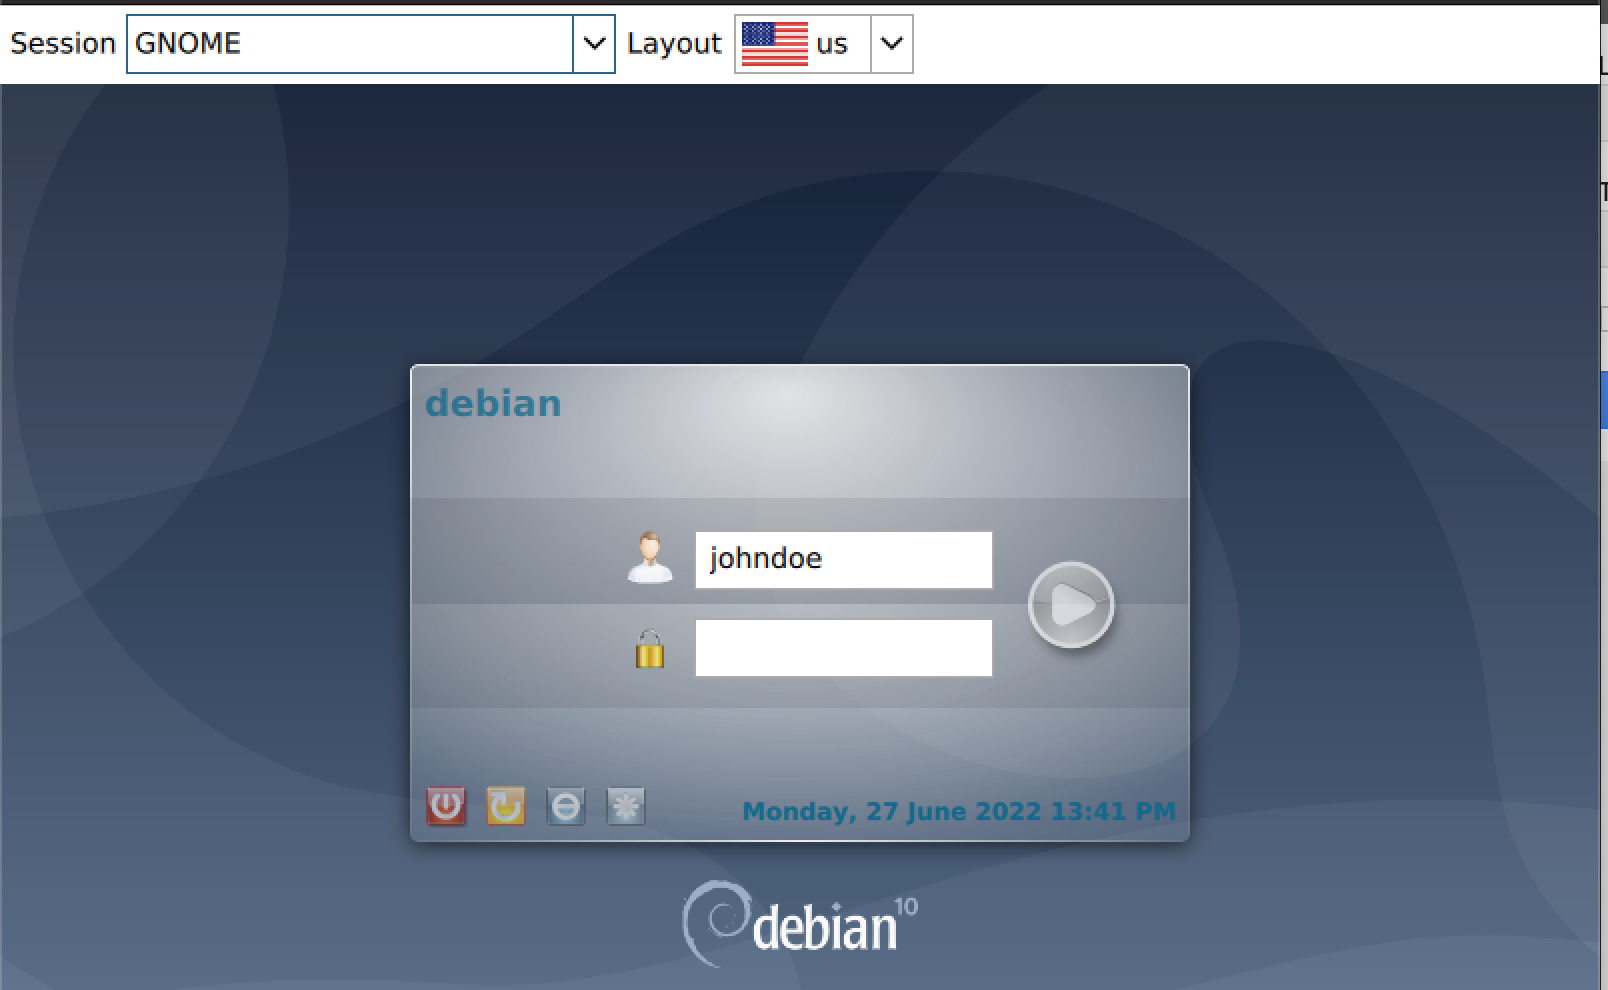
After rebooting your system, you will notice that the log-in screen has changed looks similar to the image below.

At the top-left of the log-in screen you will see the Session field which is currently set to the desktop environment you wer using previously. In our case, its GNOME. We need to change this to LXQt.
Click the down arrow next to ‘Session’ to open the drop-down menu showing all the available Desktop environments. Select LXQt.

Now, proceed to type in your password and press Enter to log into the LXQt desktop environment.
First Look at LXQt
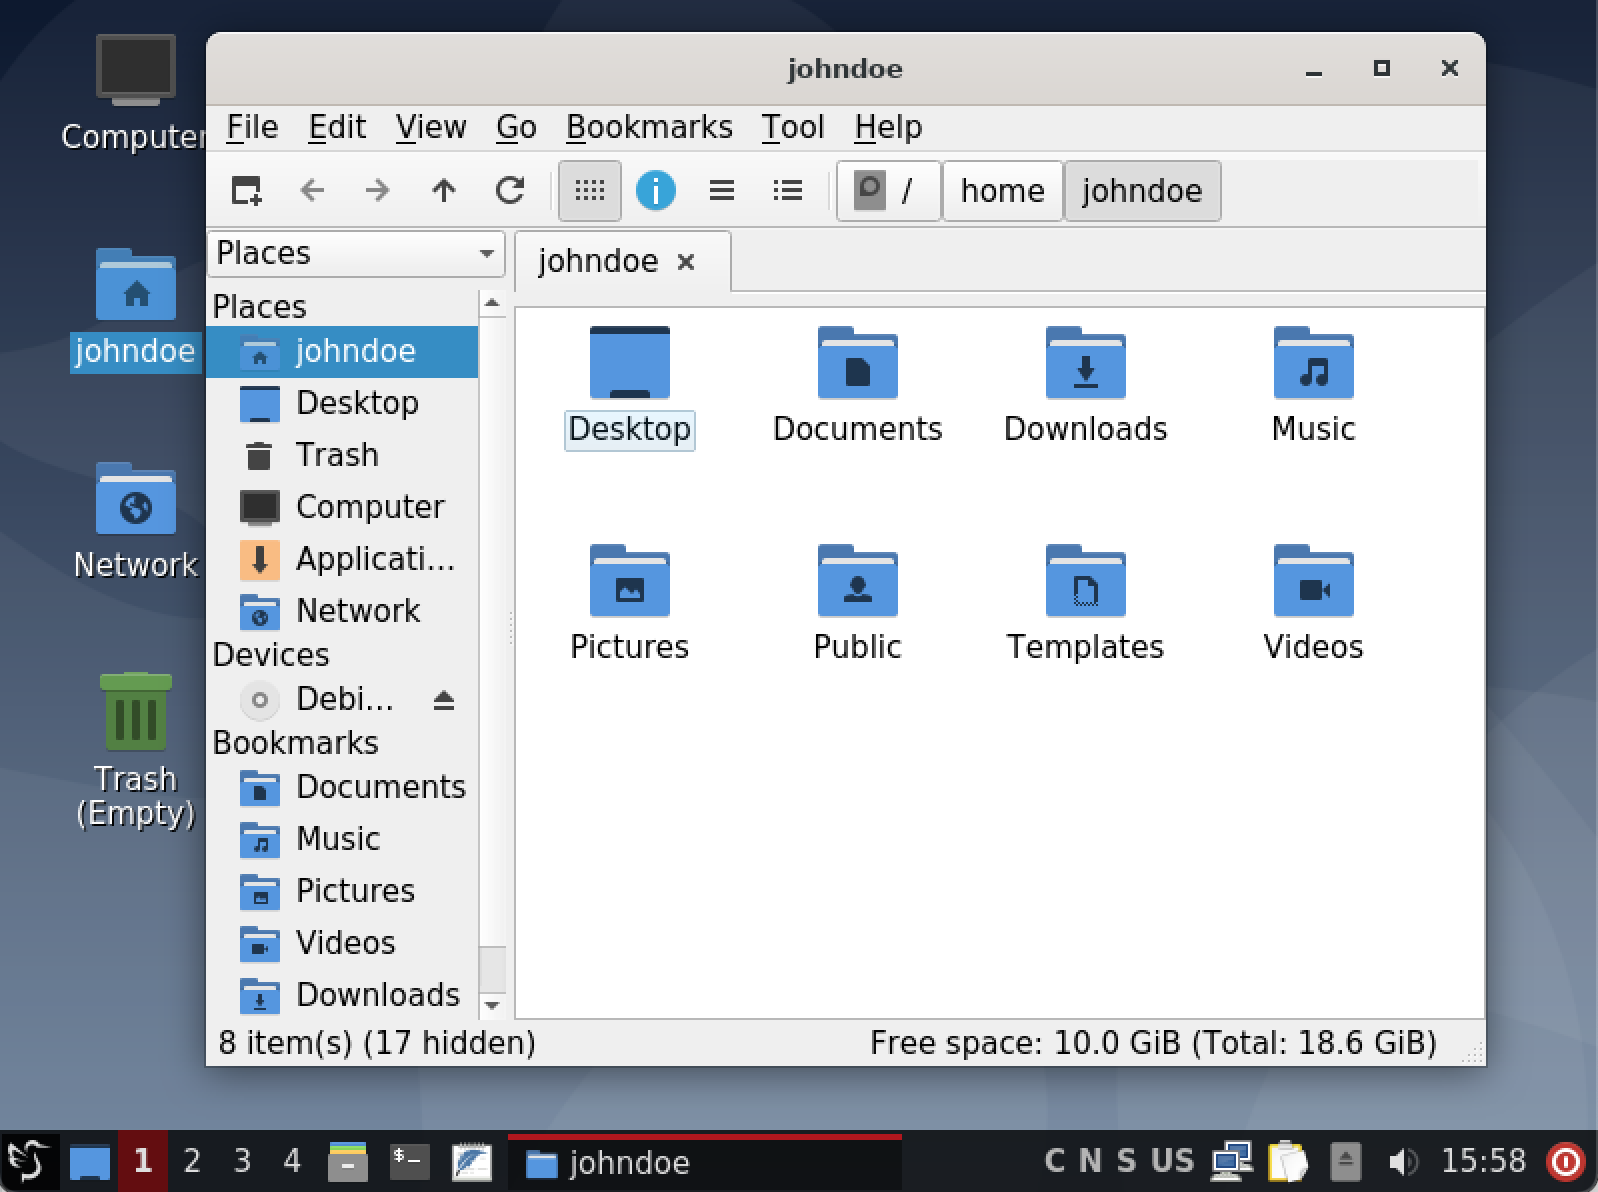
When you first log into the LXQT desktop, you will notice a big change in the general user interface (UI). The taskbar is located at the bottom of the screen with icons arranged similarly to the Windows 10 or 7. We have the main menu at the far left and the sound, time and internet icons at the far right.

LXQt is simple, lightweight desktop that’s easy to use and highly recommended for users looking for a Desktop environment that will require less system resources.
Install Neofetch
Neofetch is a command-line utility that you can use to view system information such as CPU, GPU, hardware architecture, memory, desktop environment and much more. This tool doesn’t come pre-installed. Execute the command below to install it on your system.
sudo apt install neofetch -y
After a successful installation, run the command to confirm what desktop environment you are running on your system.
neofetch

Update LXQt
To update the LXQt desktop environment, you will run the regular update and upgrade commands which will update both LXQt and other system packages.
sudo apt-get update
sudo apt-get upgrade
Uninstall LXQt
If you ever want to uninstall LXQt from your Debian system, run the commands below.
sudo apt remove lxqt*
sudo apt autoremove
When done, reboot the system using the command below.
sudo reboot now
Conclusion
LXQt is a feature-rich and exciting desktop environment for Linux users. It is worth trying as it has all the features you want from your desktop. The good thing about LXQt is that its team of developers plans to add more features to the main LXQt core according to user feedback and suggestions.
This makes it more user-friendly and adaptable for more people. Did you encounter any errors during the installation? If so, please don’t hesitate to let us know in the comments below.


