When computers started to invade homes and work-place; and specifically, when people started using computers for generating art, something called raster graphics (the formal name for images with pixels) was the primary medium for working with visuals on computers; because of the discrete nature of computers (0’s and 1’s).
But when vector graphics (no pixels) emerged, they were really like fire in bush, and became popular quickly, and in this article, we will discuss Inkscape, the oldest and most solid free and open-source vector graphics editor and creator out there.
Table of Contents
Basic concept
In this section, we will discuss basic concepts upon which Inkscape stands. These are the concepts of vectors, and the open-source movement.
Vector graphics
Contrary to raster graphics, vectors are not built of small units (pixels); the shapes in every vector are described using mathematical equation, which are continuous, and that continuity of these equations ensures the non-pixelating property of vector graphics.
Open-source
Also, when computers became popular, most of the software back then was proprietary, but when some programming languages were open-sourced, programmers, software engineers and just hobbyists started composing software and releasing it to the public, absolutely for free.
This movement gained a lot of momentum as time passes, and now you can find almost everything you want open-source.
Inkscape
Inkscape is a free and open-source vector graphics editor and creator. It has been around for nearly 2 decades, and it is actively updated, with the help of a community of developers and testers.
Interface
The interface underwent several changes in the past few years, and in the latest version of Inkscape (1.2), you have the light mode and the dark mode, and a bunch of icons you can choose from.
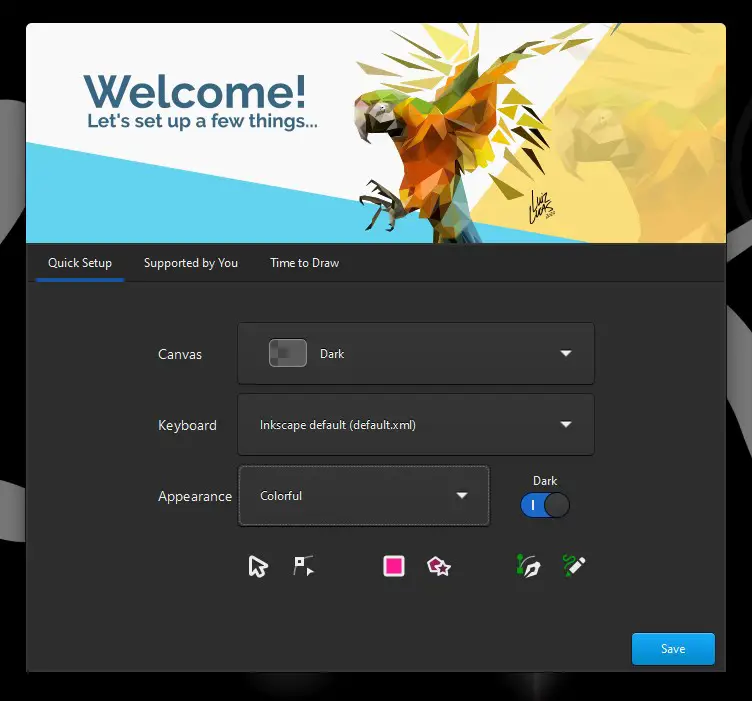
The Interface Components
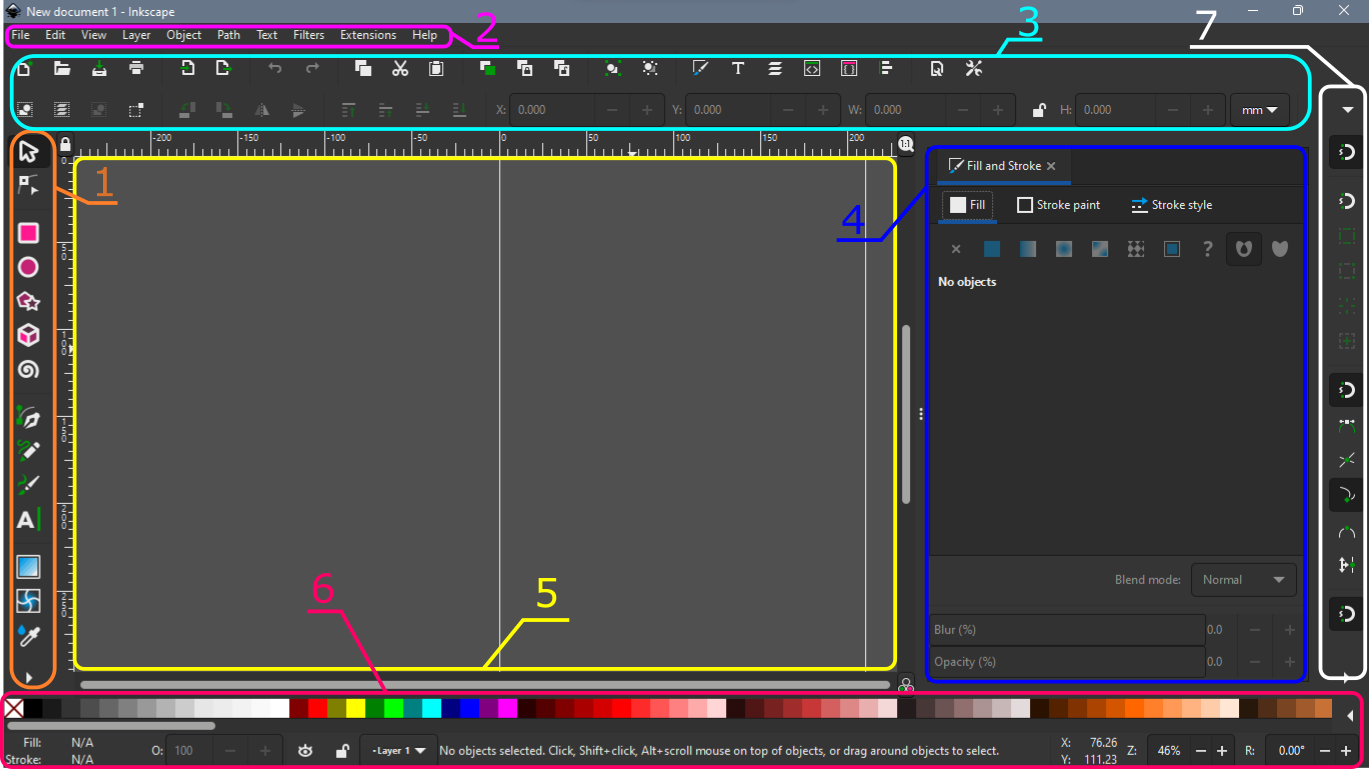
- The left side bar: here you can find the tools used to draw and manipulate vector graphics.
- The top bar: this is where you find literally everything you want, from settings to filters to extensions, it is where all operations on files, objects and paths live, if you want to do something and you don’t know what to use you should either search this bar or just check the manual located in the help menu.
- The region under the top bar: this place encapsulates quick access to many tools; these really boost the workflow as you don’t need to open any menu to access them.
- The main area on the right side: if you opened any menu from the top bar; it will open in this area. If multiple menus are opened, they will appear as tabs at the top of this region.
- The biggest area in the center: this is the area you draw in, by default it will be a blank space with a rectangle in the middle called the canvas it is the main area for drawing, yet you can draw and where you like, there is also an option to hide the canvas page borders.
- The bottom area: this can be divided to two sub-sections: the upper portion contains bunch of color palettes grouped as tones, where it provides a quick way to color the objects you are drawing; and lower portion contains data about either the file you are working in, or a selected object (if you have an object selected): like its color, the layer and the position.
- The rightmost side bar: here lives a quick access to the options of a powerful tool of Inkscape called Snapping, when snapping is turned on and for example snapping to node is also toggled, you can simply place objects near each other by just getting one of then near enough to the other object.
Shortcuts
The shortcuts are easy to learn because I think they are logical, for example, some keyboard shortcuts are:
- Zooming in and out using the two keys = and – respectively.
- Single letters are mapped to tools for ease of access; for example: S is the shortcut for the selection tool, and R is the shortcut for the rectangles tool.
- Pressing Alt and the underlined letter (it will become underlined once Alt is pressed) from the top menu, will open the according sub-menu.
- Most of the sub-menus are mapped to a combination of Shift+Ctrl+{A single letter}, for example, the fill and stroke menu has the shortcut Shift+Ctrl+F, while the Align and Distribute menu has the shortcut Shift+Ctrl+A.
There are some shortcuts for the mouse also; here are some of them:
- The mouse wheel is used to navigate up and down the drawing area.
- Holding Shift and then rolling the mouse wheel lets you navigate left and right to the drawing area.
- Holding Ctrl and then rolling the mouse wheel will zoom-in and out.
- Holding the mouse wheel button makes the curser like a hand to move the drawing area in any direction.
- Holding Alt and then clicking and dragging is an easy way to select objects by dragging a line crossing them.
You can find a full list of these shortcuts in Inkscape web page here.
Files
Inkscape can import many file formats like: SVG, PNG, JPG, AI (Adobe Illustrator’s), CDR (CorelDraw) and GIF.
The default output file in Inkscape is the standard scalable vector graphics file, the extension of the file is (.svg), there are other output formats like (.svgs), EPS, PNG, JPG, PDF and more.
Also, there are addons that make you able to process more file formats like Inkporter.
Practice Makes Perfect
Now you know the basics of vector graphics and Inkscape. What can you do now?
- Download Inkscape for your operating system.
- Practice with real-world projects, for example, create a background for your desktop.
- As you come across any obstacle, search the internet for a solution.
- Make use of what you learn and think of different scenarios where the solution might come in-handy.
Inkscape Resources
Inkscape is used by many professional artists, so there are a lot of artworks created with Inkscape out there; here is where you can find them:
Where to find resources?
Inkscape’s community is very supportive, there are a lot of resources on the internet to learn Inkscape. Here are also some of the best resources:
- Inkscape’s webpage: learn section.
- Logos By Nick YouTube Channel.
- TJ FREE YouTube Channel.
Conclusion
This was a quick way to familiarize you with the basics of Inkscape. We have a more in-depth what is Inkscape tutorial.
