Paths are primary elements in constructing vector graphics. One can say that a path is a set of connected points (called nodes), yet another description is that a path is a general-shaped region enclosed with a boundary.
The region is called the fill (some refer to it as the path itself); the stroke is a tiny strip along the path’s boundary that can be colored separately of the fill color.
Now what is the benefit of having two characteristics to paths (the fill and the stoke)? Adding more parameters to any object make, the object more useful on one hand, and on the other it makes thing organized.
What Does It Mean To Convert the Stroke to a Path?
One parameter of the stroke is its width; which is how much of the boundary (both inside and outside the path) does the stroke cover.
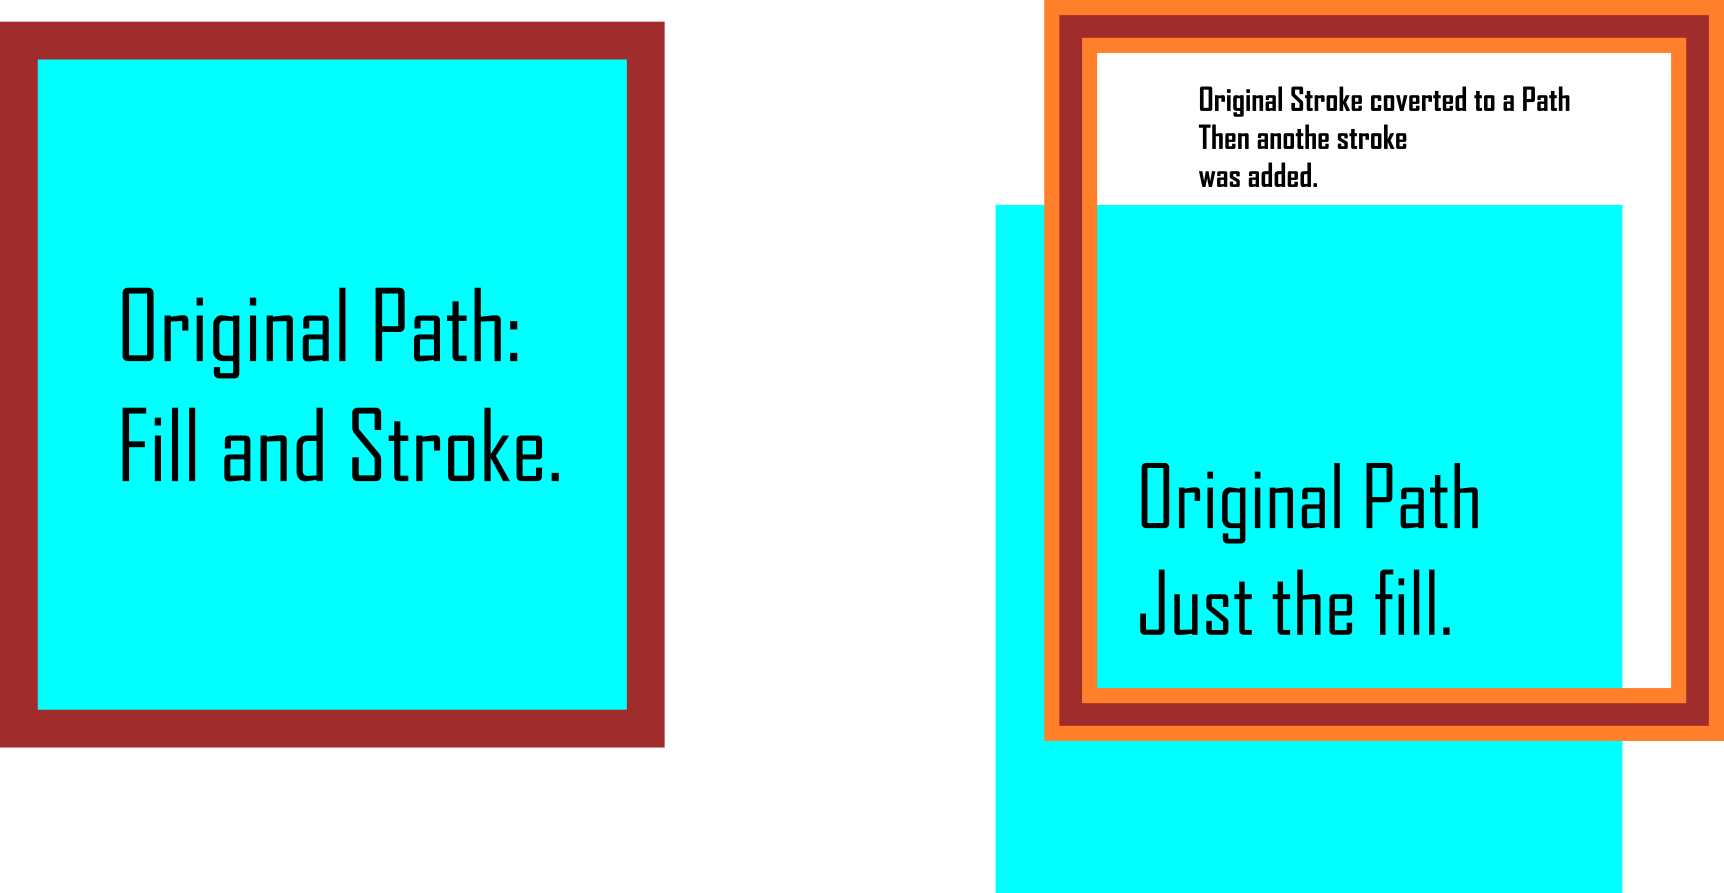
To convert a stroke to a path means that you take that area covered by the stroke and make it a path with a fill color the same as the original path’s stroke color, and the newly generated path will have no stroke (stroke color is set to None), the same happens to the original path (the stroke will also be set to None).
After such an operation you can treat the previous stroke as a path, for example, you can add a stoke to that path, apply any path effect, or apply Boolean operations upon this path and another one (addition, subtraction, intersection, … etc.).
Steps To Convert the Stroke to a Path
The procedure is straightforward, just apply the next two steps in order to convert a stroke to a path:
- Select a path that has a stroke (if it doesn’t, this whole procedure won’t work).
- Go to Path>Stroke to Path, or simply use the shortcut Ctrl+Alt+C.
Once done, the result will be a group of the two paths (the original fill, and the original stroke converted to a path). You can ungroup them by navigating to Object>Ungroup, or alternatively press the combination Shift+Ctrl+G.
Conclusion
In this brief article, defined paths and path criteria, what is the difference between the path (the fill) and the stroke, and we explored how to use Stroke to Path, this topic was somehow complicated, but grasping it will really speed your learning curve.

