XFCE (XForms Common Environment) is a Linux desktop environment that started in 1996 with the main focus on speed rather than looks. Because it is less focused on visually pleasing the user, it is very light on your hardware.
It only requires a RAM of 192 MB and a processor of 300 MHz. XFCE is great for customization and configuration. Many things can be tweaked around easily, from the hardware preferences to the interface. Apart from XFCE, there are other desktop environments like KDE, GNOME, Unity, MATE, etc. XFCE surpasses most in its lightweight and customizable nature.
Installing themes is easy and quick, so you’ll get the theme of your choice in minutes if you follow the steps carefully. We’ll look into how we can install XFCE style themes, and then we’ll also see how we can tweak our icons’ styles by changing the theme.
Install XFCE Themes
You must first browse your home directory and create a .themes folder. Make sure you do not miss the dot preceding the folder name. It hides the folder such that it can’t be seen normally.
mkdir .themes
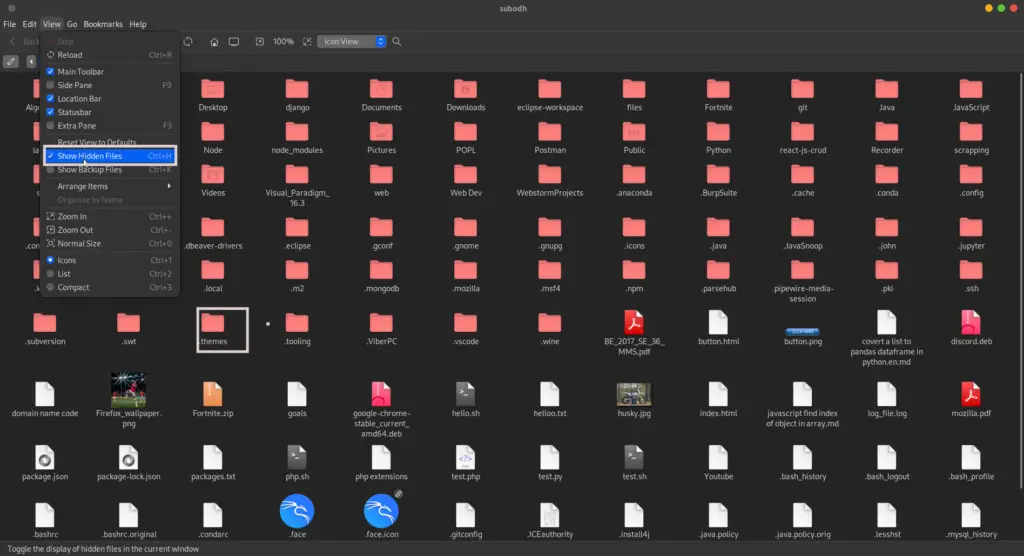
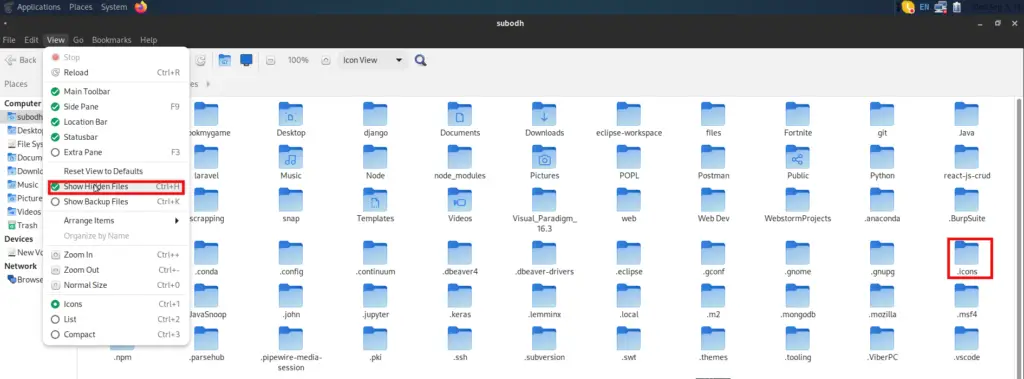
You don’t need to create this folder if you already have one. To check the existence of the directory, click on View and then Show Hidden Files.
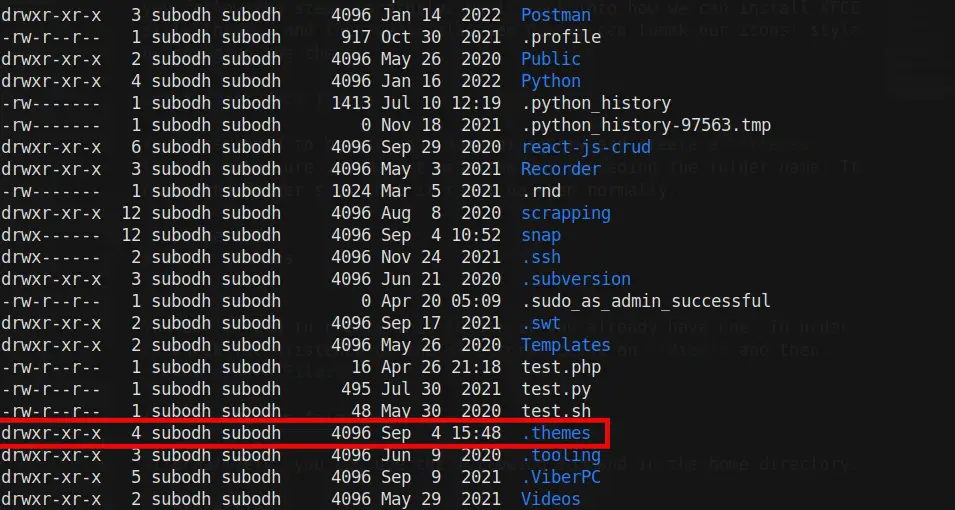
Alternatively, you can use the following command in the home directory to locate the .themes directory.
ls -al
Once the folder is created, you need to add a theme to it by downloading it.
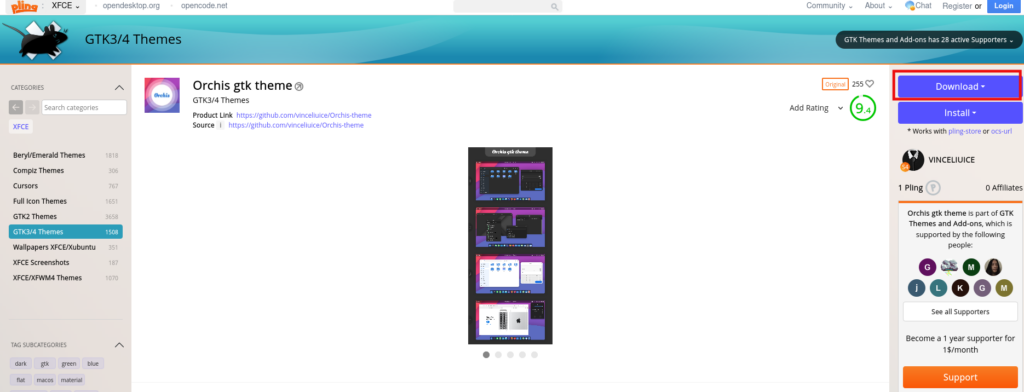
The best place to download a theme for XFCE is the XFCE-look portal. Visit the website, and you will find several themes available to download.
Next, follow these steps.
- Browse the list from XFCE-look portal and pick one of your choices. Download the theme.

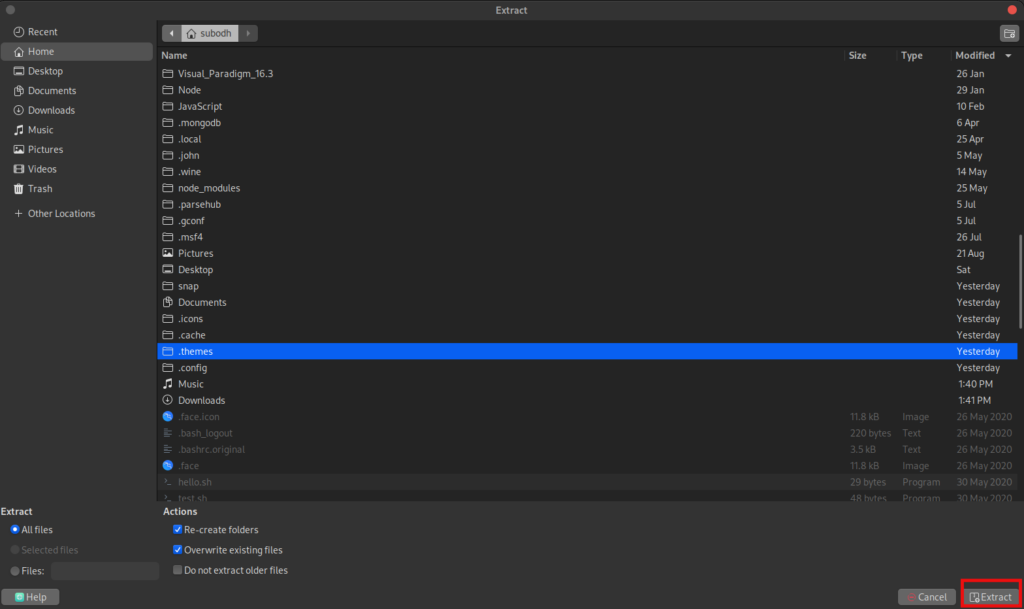
- Once the compressed file is downloaded, extract the file to the .themes directory using your regular zip manager.

 Now, the
 .themesdirectory contains the downloaded theme.

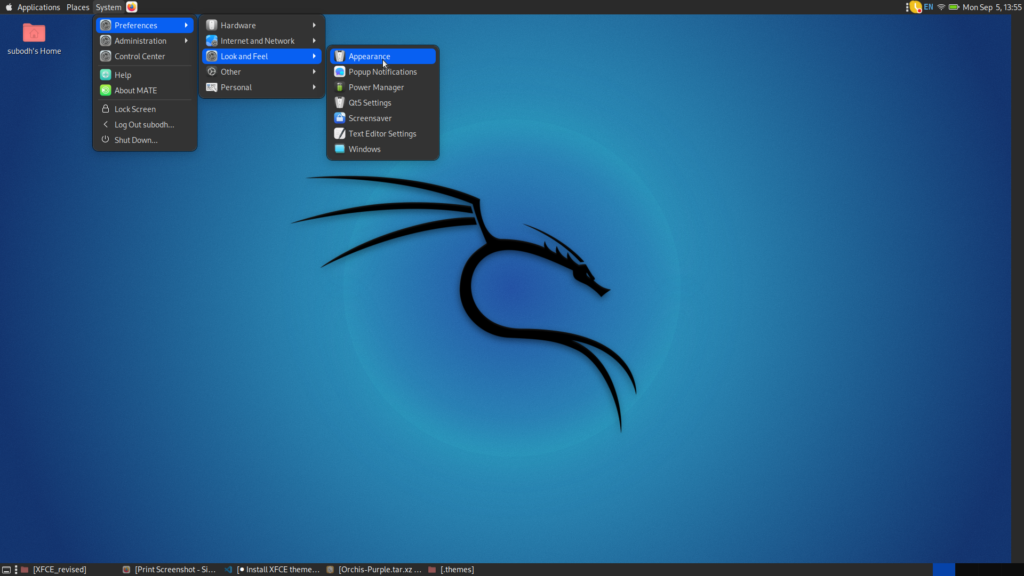
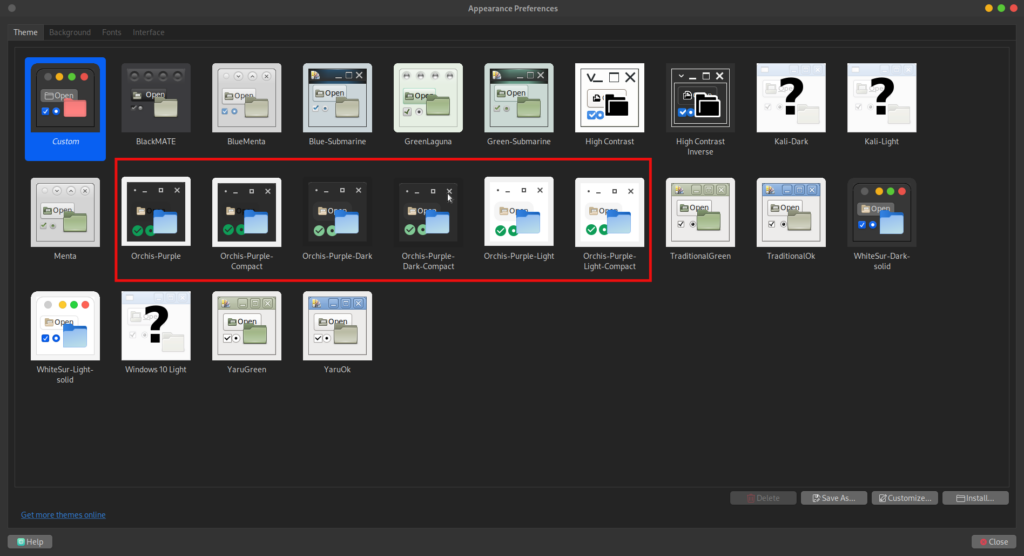
- The theme should appear in the Appearance setting. Go to Settings -> Appearance and check if it’s listed.

- If you have followed all the steps, you should see the downloaded theme appear in the Appearance setting. Select the theme for it to take effect.
 Enjoy the new theme.
In addition to desktop themes, if you also need to customize the icon themes, you need to follow the steps below.
Install XFCE Icon Themes
We will install the compatible icon theme of the theme that we just applied to our desktop environment. For that, follow the steps below:
- Look for the description section of the Orchis theme from the XFC-look portal.

- Follow the link to download the Tela Icon Theme (compatible with Orchis theme).
- Download the zip file and extract it. Copy the extracted folder.

- Go to the
.iconsdirectory inside your home directory. If you can’t see it there, click View and then Show Hidden Files. If you still don’t see it, create one named.icons.
- Paste the copied folder inside the
.iconsdirectory.

- Go to the Appearance settings and click the Customize button.
 You can find the downloaded icon theme in the Icons menu.
 Select the icon theme, and it will be applied.
Note that some theme folders or icon folders might have other folders with different styled themes inside them, and they won’t appear in the Appearance settings. If you want them, you need to copy the inner folder to the .themes or .icons folder directly.
Conclusion
In this article, we learned how to install XFCE themes with a straightforward approach. Then, we also installed the icon themes using a similar method. In these ways, you can customize your system to blend in with your taste.
You can also switch and experiment with the ones you like and those you don’t. Some people prefer traditional and default looks, while others like modern and stylish ones. Find the theme that works the best according to your interests and use it.

