There are many desktop environments available for Debian. Still, XFCE stands out as an excellent choice for people who value ease of use, stability, and reliability yet don’t want to sacrifice the feel and functionality of an excellent Desktop Environment (DE).
This post will provide step-by-step instructions on installing the XFCE desktop environment on Debian 11. Debian 11 is the latest version of the Debian distribution (as of writing this post) and was released on December 16th, 2017.
The XFCE desktop environment is a lightweight Linux GUI that has been around since 1999, predating GNOME by four years. It is available in 32-bit and 64-bit releases for Debian systems.
There are three main methods that you can use to install XFCE on your system.
- Install XFCE during Debian installation
- Install XFCE using Tasksel
- Install XFCE using the APT package manager
We will look at all these three methods.
Table of Contents
Method 1: Install XFCE When Installing Debian
When installing Debian, you will see a screen that will prompt you to select software packages that you need. These include Desktop environments, web servers and other utilities such as the SSH server. See the image below.
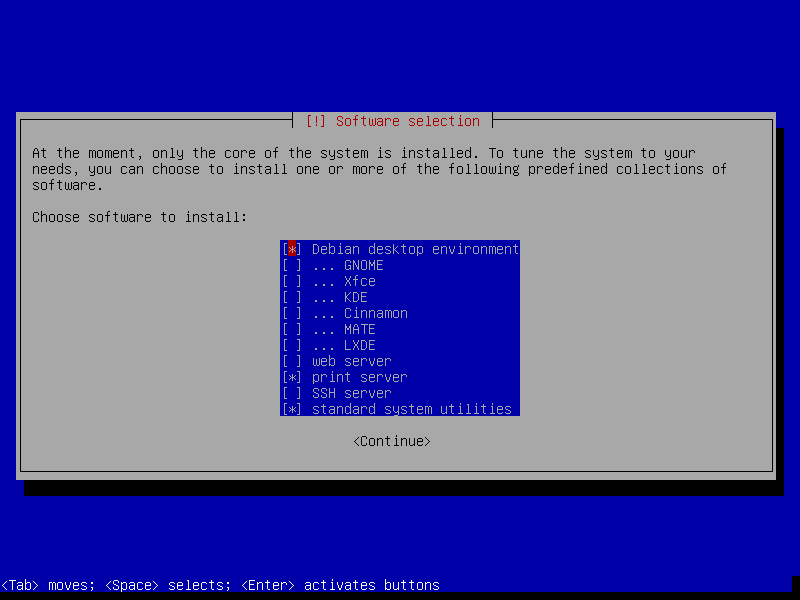
Here, you have an option to select the Desktop Environment you want to use. In our case we are interested in XFCE. But don’t feel limited. You can select as many Desktop Environments as you wish. From my experience, I would advise installing both GNOME and XFCE and you can always switch between the two at the log in screen.
Method 2 – Install XFCE Using Tasksel
Tasksel is a command-line utility for Debian and Ubuntu distributions that allows you to multiple related packages on your system as coordinated tasks. For example, if you want to install the LAMPP stack (Linux, Apache, MySQL, PHP/Perl/Python) instead of one package at a time, Tasksel can install all these packages in a single keystroke.Follow the steps below to install the XFCE Desktop environment using Tasksel.
Step 1: Update Your System
First, ensure your Debian 11 system is fully up-to-date. Use the command below to update any packages on your system to their latest versions:
sudo apt update
sudo apt upgrade
Step 2: Install Tasksel
Tasksel comes pre-installed on most Linux distributions, including Debian allowing you to easily install various Desktop environments and web servers. Execute the command below to check if Tasksel is installed on your system.
tasksel --test
If you have Tasksel already installed, you should see a screen on your Terminal listing the various packages you can install. However, if that’s not the case for you, execute the command below to install Tasksel on you
sudo apt install tasksel -y

Step 3: Install XFCE Using Tasksel
There are two main methods that you can use to install XFCE on Debian using Tasksel. We will look at both of them.
- The first method is installing XFCE using Tasksel directly from the Terminal. Execute the command below.
sudo tasksel install xfce-desktop
- Alternatively, execute the Tasksel command alone to list all the Desktop environments and packages available for installation. See the image below.
sudo tasksel
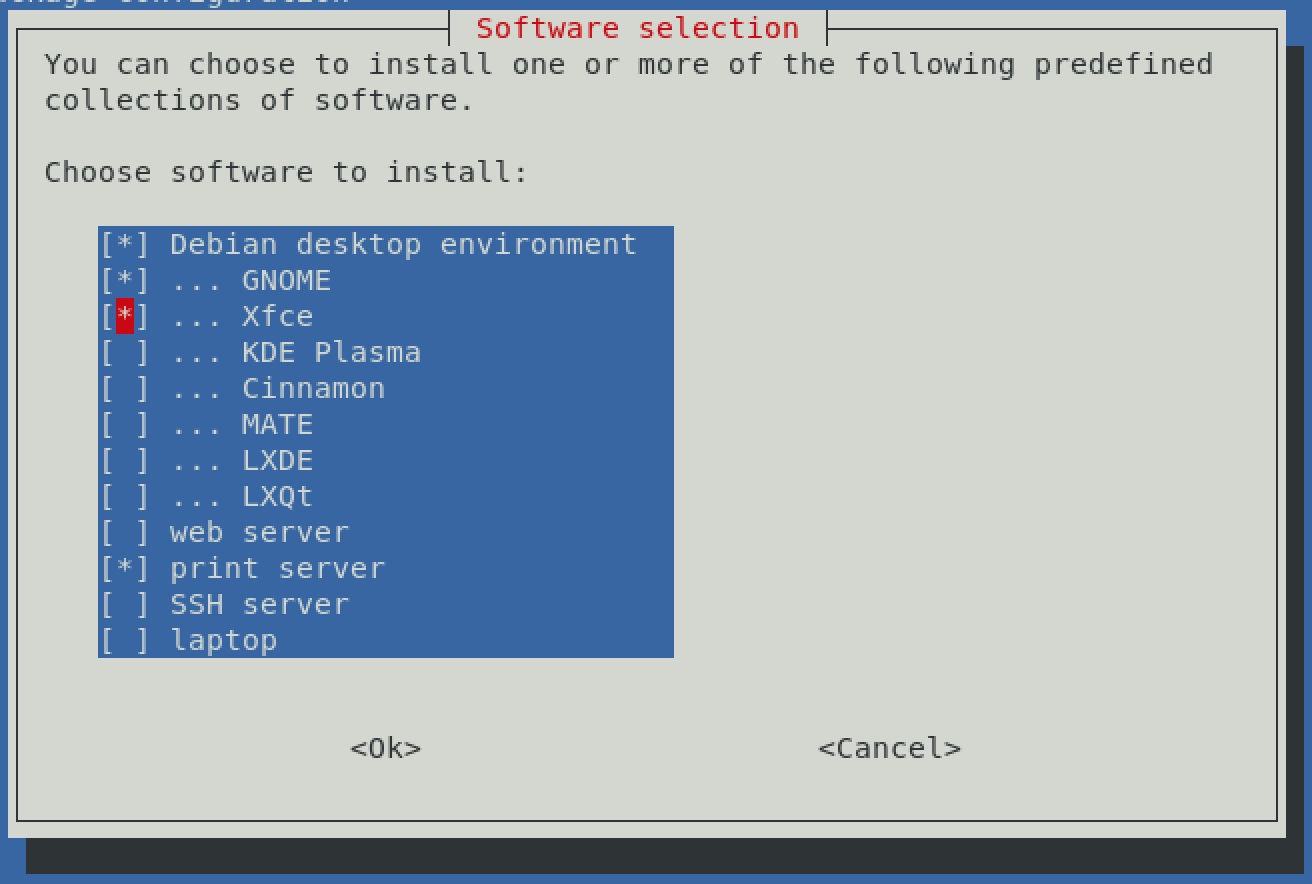
Use the arrow keys to scroll through the various packages and the Space key to select a package you wish to install. Hit “Enter” when done to start installing the XFCE desktop environment.
sudo reboot
Method 3 – Use apt to Install XFCE
The other method you can use to install XFCE on Debian is using the apt package manager. First, launch the Terminal and update the system packages using the command below.
sudo apt update
sudo apt upgrade
When done, execute the command below to install the XFCE desktop environment on your system.
sudo apt install task-xfce-desktop
sudo systemctl get-default

From the image above, you can see we got the output graphical.target. If you get a different output, use the command below to set the boot target to graphical.
sudo systemctl set-default graphical.target
When done, execute the command below to reboot the system and apply the configurations.
sudo reboot
Log into XFCE Desktop Environment
Up to this point, we have successfully installed the XFCE desktop environment on our system. However, you will notice that you still get the GNOME desktop whenever you log in. There is one more thing we need to do so that we can access the XFCE desktop. Follow the steps below.
- Logout if you were already logged into the GNOME desktop environment.
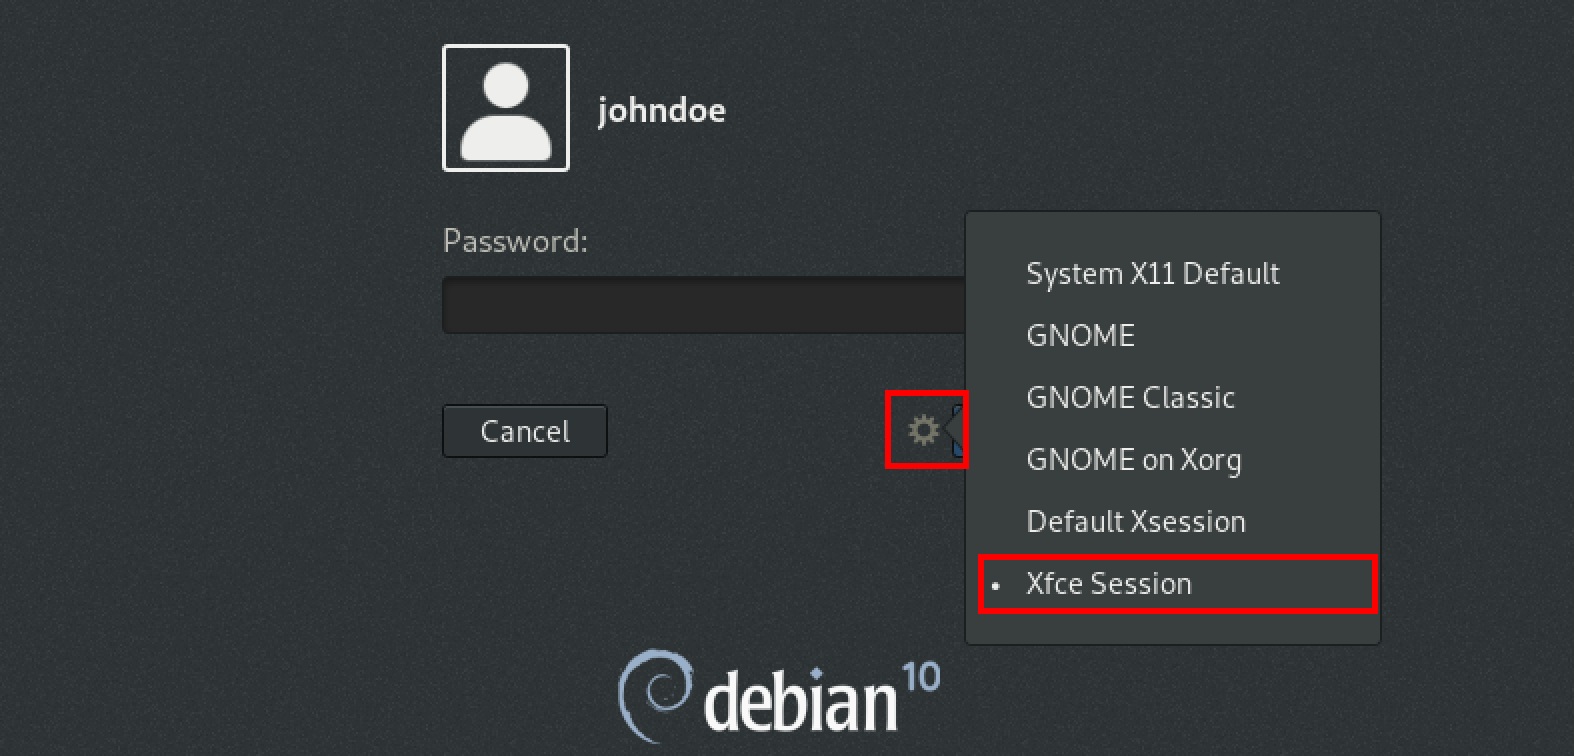
- On the log-in screen, click the Settings button (gear icon) and select the XFCE desktop from the pop-up that will appear. See the image below.

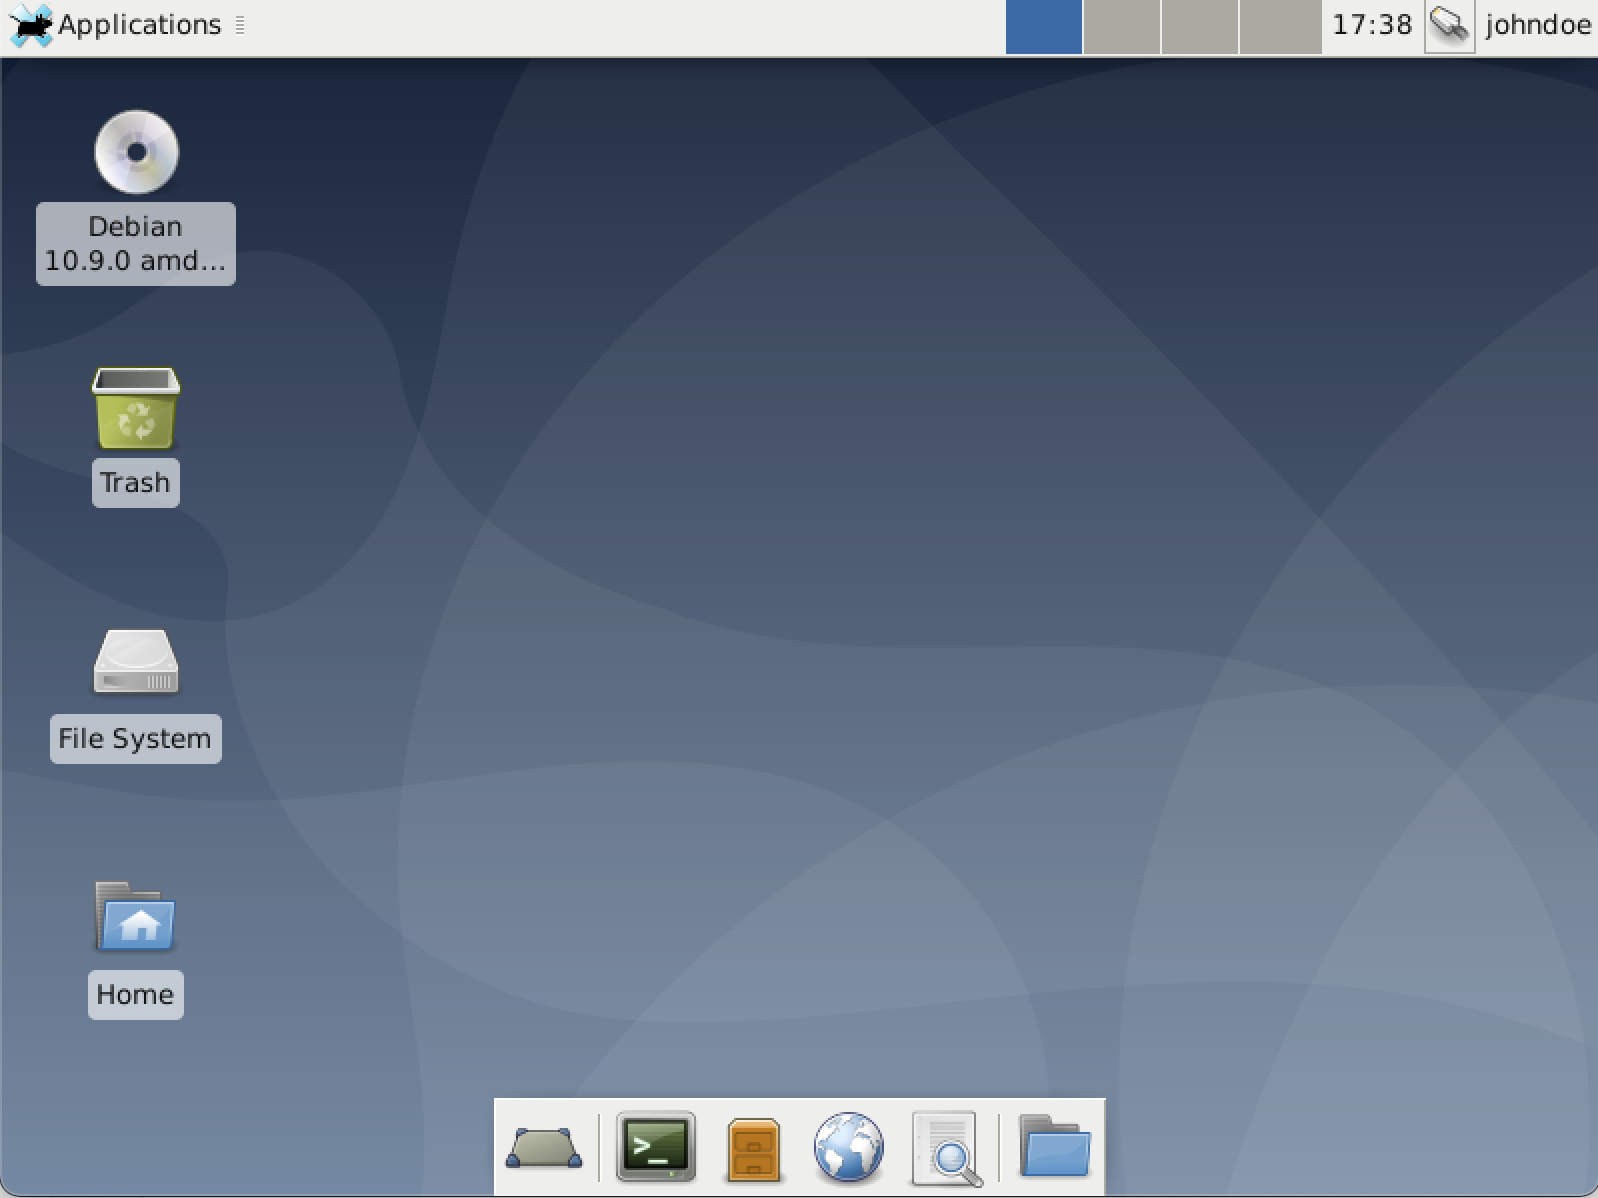
- Now, proceed to type your password and log into your new desktop environment. You should see a desktop similar to the image below.

Conclusion
Congratulations! You now have a Debian XFCE desktop that you can use for years. I hope this tutorial was easy to follow and you successfully installed XFCE on your Debian system. Feel free to comment below if you have any questions about the tutorial or other XFCE-related topics.



There’s no need to reboot
Just tell systemd to start the UI
root@odroidc2:~# systemctl isolate graphical.target
Same as in the past when you’d have said /etc/init.d/XDM start or similar.