Cockpit is an open-source web-based utility that helps administer or monitor the local or remote servers. It also allows you to configure the multiple remote servers and shows the server components statistics in a graphical form. Cockpit has a user-friendly web-based interface through which you can easily monitor system resources, install applications, manage user accounts, and install necessary security updates. The cockpit utility can be installed on almost all Linux distributions such as Ubuntu, Debian, Mint, CentOS, Fedora, etc.
Objectives
We will show you how to install the Cockpit on Ubuntu 20.04. We will also demonstrate how to administer server activities using this cockpit web interface. You can also install cockpit on Debian and LinuxMint distributions by using the same procedure.
Table of Contents
Prerequisites
- An machine running Ubuntu 20.04
- We recommend acting as a non-root sudo user, when possible, since acting as root can result in damaging your system if you’re not careful.
Installation of Cockpit on Ubuntu 20.04
To install the Cockpit utility, perform the following number of steps on the terminal of the Ubuntu 20.04 system
Step 1: Install Cockpit Using Ubuntu apt repository
The Cockpit utility is available in default Ubuntu repositories. Therefore, by using the apt package manager you can install it on Ubuntu 20.04 system. Before installing Cockpit, it is recommended that update the Ubuntu apt packages Index. For this purpose, open the terminal window and type the following command that will update the Ubuntu system apt packages repository:
sudo apt update
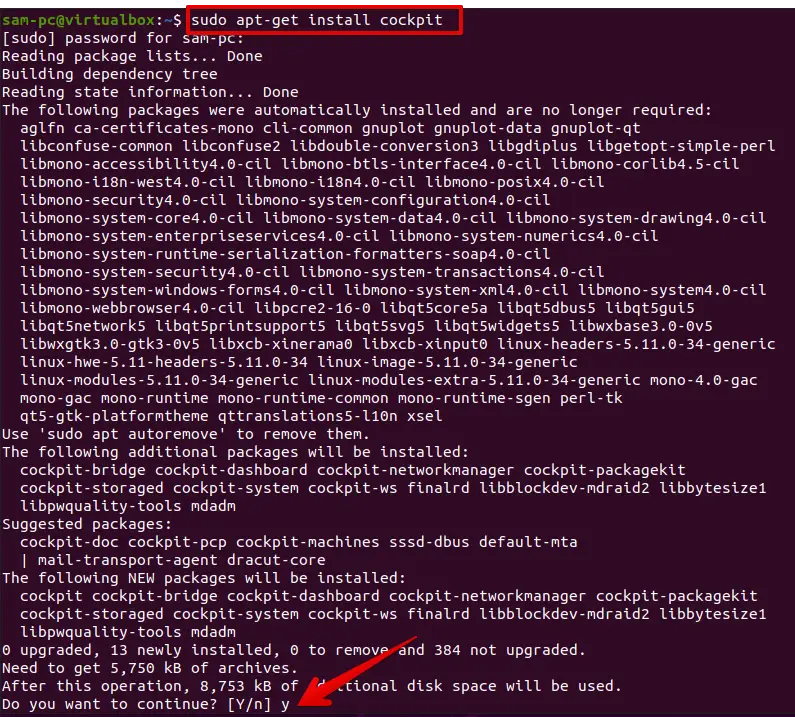
After running the above command, your Ubuntu system is ready for installing the Cockpit utility. So, use the following command to install the Cockpit on Ubuntu 20.04 system:
sudo apt-get install cockpit
Open the sudo password for the current user. During the installation, it will prompt you to type ‘Y/N’. Press ‘y’ and ‘Enter’ from the keyboard to further continue the installation of the Cockpit utility.
Step 2: Enable and Start the Cockpit.socket Service
The cockpit utility uses the systemd socket and it starts automatically on your system after completing the Cockpit installation. But, if it does not start automatically you can manually start and enable the cockpit service by running the following systemctl command:
sudo systemctl enable cockpit.socket
sudo systemctl start cockpit.socket

For verification whether the cockpit service is running on your Ubuntu system properly or not. Use the following command to check cockpit service running status:
sudo systemctl status cockpit.socketWhen you execute the above command, you will notice the ‘running or Active’ status shows in the terminal window:

Step 3: Firewall Configurations
Cockpit is a web-based utility that uses the TCP port 9090 for running in your browser. Therefore, to allow external connection to use port 9090, you have to modify the firewall configuration rules to allow port 9090 access for external connections:
Execute the following command to modify the firewall configuration rules:
sudo ufw allow 9090

Step 4: Launch Cockpit web interface using the browser
You can access the cockpit web interface using any of your favorite browsers such as Mozilla Firefox, Chrome, etc. To access the features of the Cockpit utility, type the following URL in the address bar of your browser:
http://localhost:9090
If you want to access the cockpit web interface from another system then, use the IP address or hostname of the system on which machine you installed the Cockpit utility:
http://hostname-or-ip-address:9090
The following cockpit web interface shows in your browser:
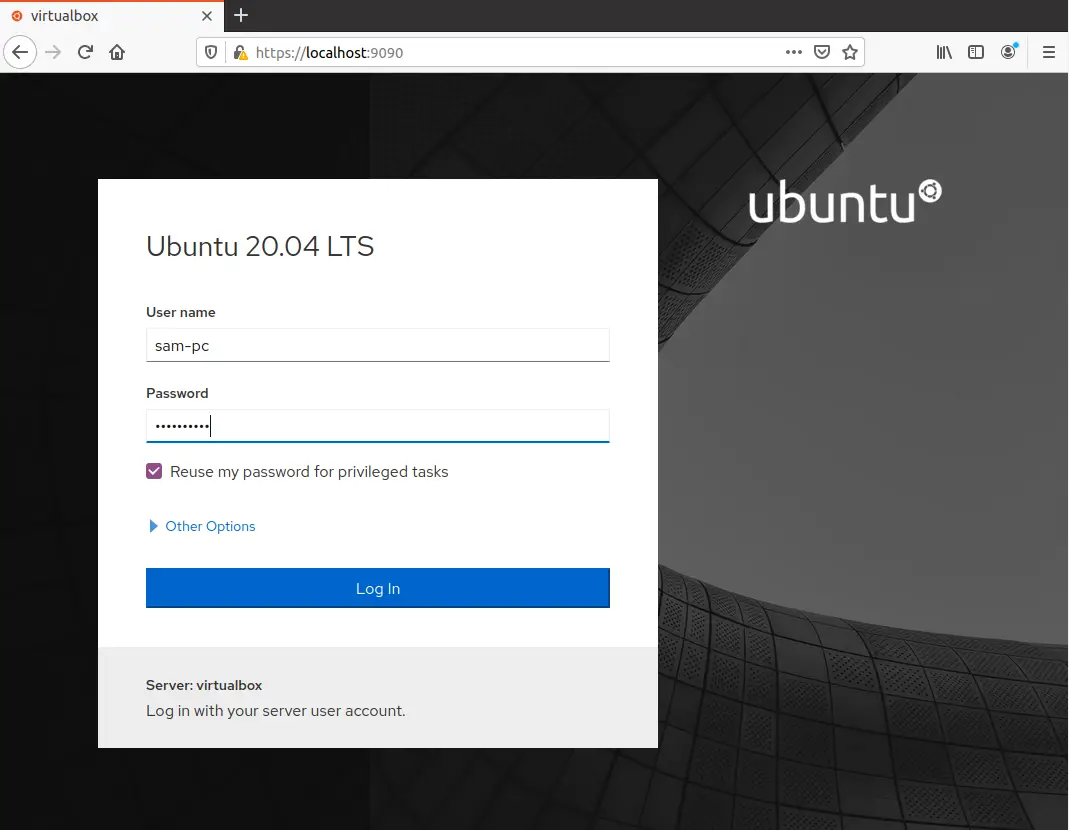
When you log in on localhost, you can use the Ubuntu system user credentials that you use directly to log in to your Ubuntu 20.04 system. Enter the information in the user name and password fields to log in to the Cockpit web interface. If you want to allow an external connection to use your system remotely then, check the box Reuse My Password for Remote Connections.
When you log in to the Cockpit web interface, you will see only one server in a Dashboard. This is the name of the server on which you installed the Cockpit.
How to use Cockpit and Add Server or Virtual Machines for monitoring?
You can also add more virtual machines or servers for monitoring the cockpit. The servers that you want to monitor or manage should have installed cockpit utility, if your secondary server is Debian, Ubuntu, or LinuxMint then, by following the preceding steps you can install cockpit on them. Click on the (+) plus sign to add a new virtual machine.
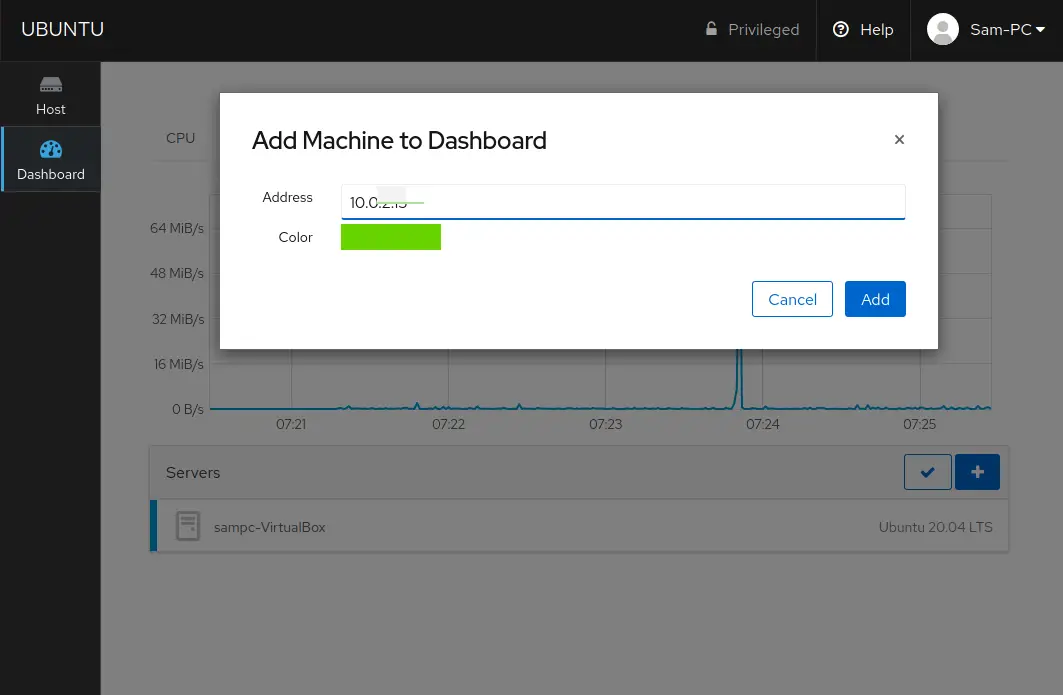
If you have different distribution on the secondary server then you can get help using the official cockpit guide.
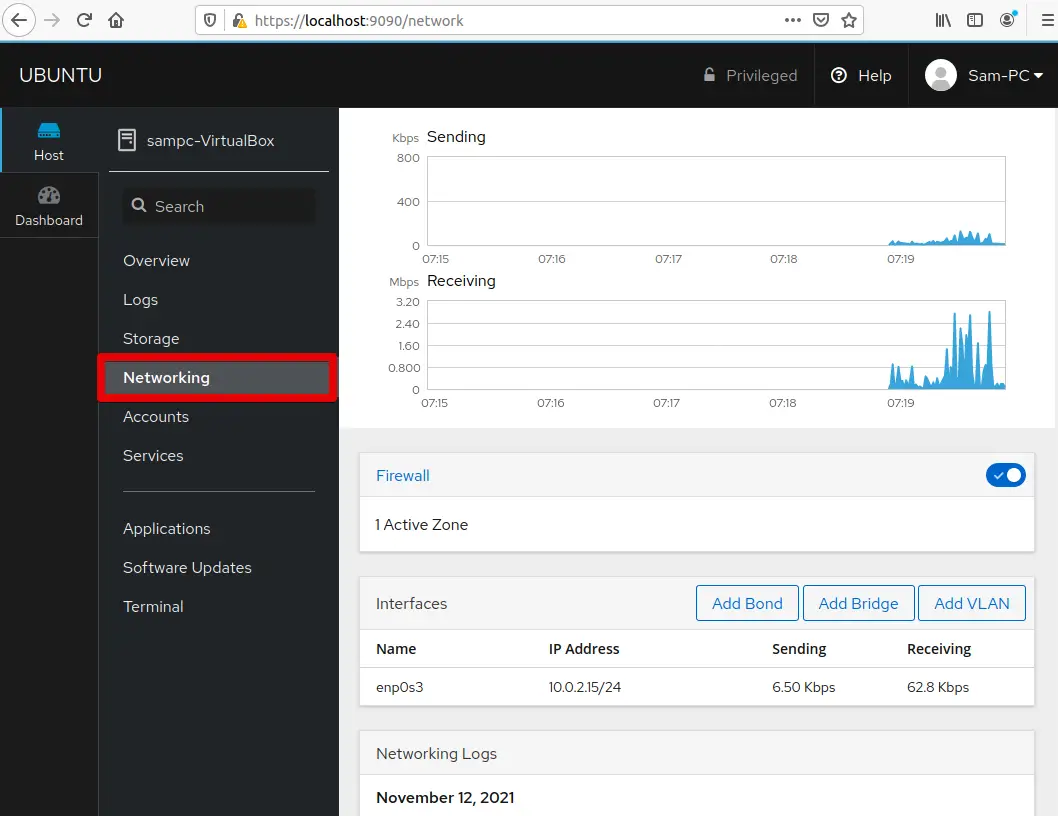
When you logged in into the cockpit application, the following cockpit web interface shows in your browser:
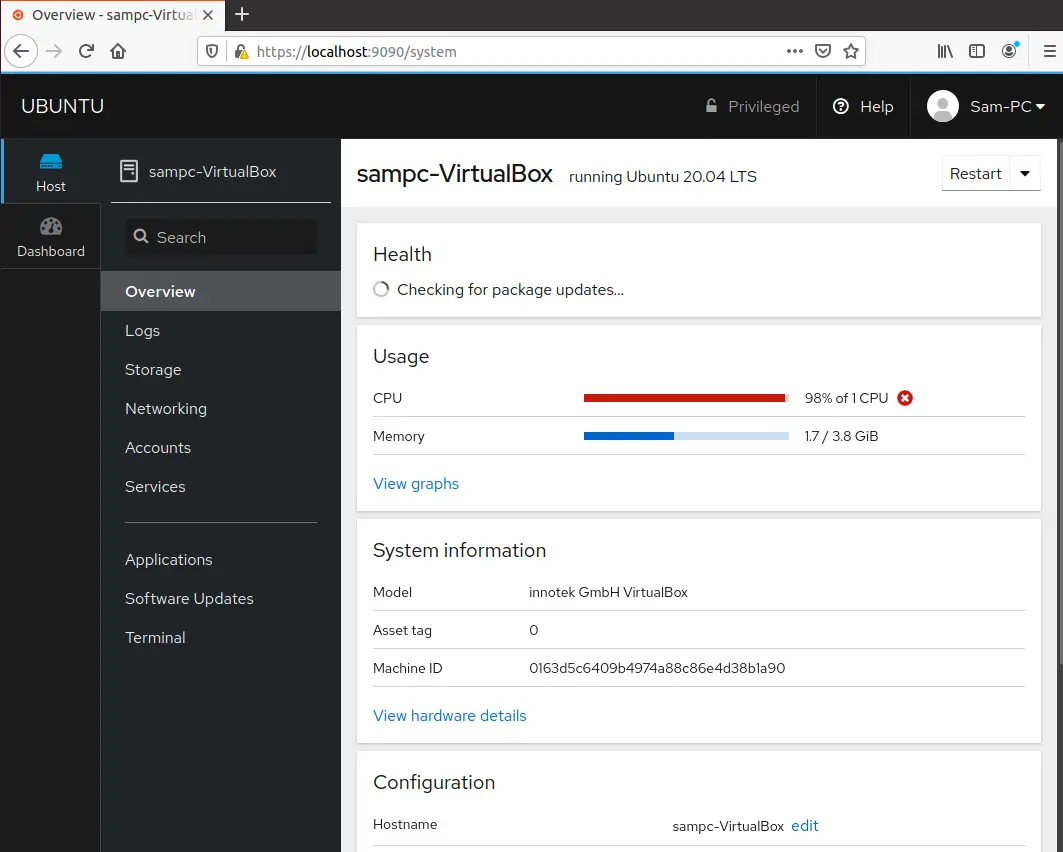
As you can see in the above screenshot, you can check the system’s whole overview of CPU statistics, Resource usage, system information, and configuration details.
More tasks that you can monitor using the cockpit applications are Networking, installing applications and updates, viewing system logs, local user accounts, etc. Moreover, you can also access the system terminal using the cockpit utility. You can also add more than one KVM machines using this cockpit web interface.
Uninstall Cockpit from Ubuntu
The cockpit program can be easily uninstalled or removed from your system by running the following command:
sudo apt-get purge --remove cockpit
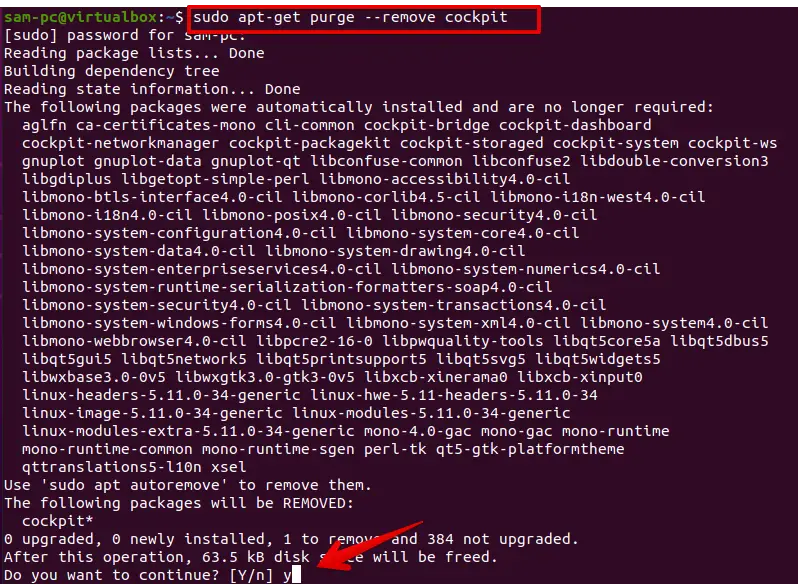
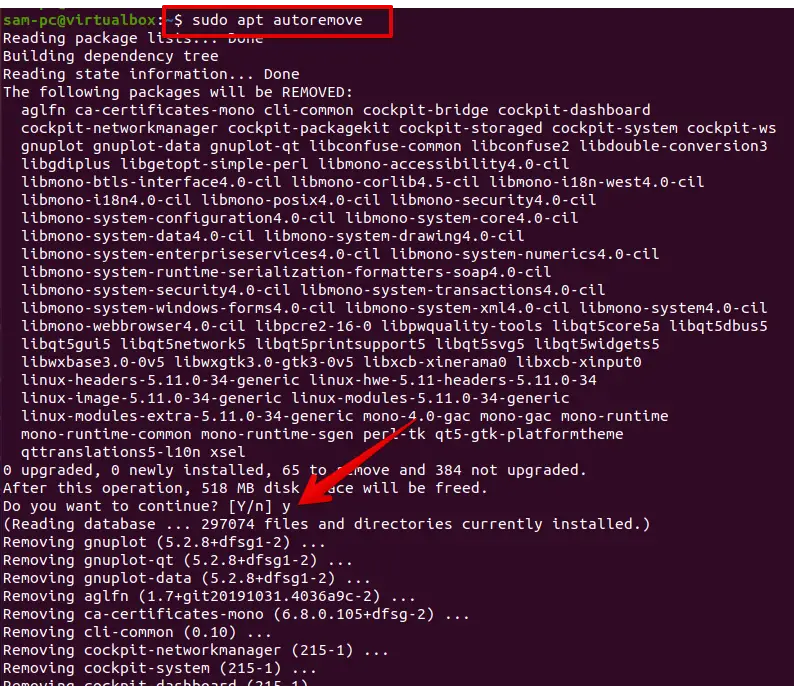
To uninstall all related extra packages use the following command:
sudo apt-get autoremove
Conclusion
We installed Cockpit utility on the Ubuntu 20.04 system using the command line in this article. We explored different features for managing the local servers using the cockpit web-based utility.


