In a Linux system, you will have hundreds of processes running. The Linux kernel manages these processes in terms of allocating the CPU time.
It is the kernel that allocates the CPU time for each of the running processes. The order of process execution depends on the process priority.
It is needless to say that each process does not and should not run with the same priority. Different processes may require different priorities.
For example, a Webserver process needs a higher priority than a printer process.
Objectives
In this tutorial, we will learn to use the nice and renice commands in Linux to set process priorities, using various examples.
Table of Contents
Prerequisites
- Access to a Linux machine
- Acting as a non-root sudo user to ensure a secure environment
Introduction to Priorities
Priority is a value, or a number assigned to each process, and the kernel uses this value to schedule the execution of the process. The priorities are split into two parts:
- 0 – 99: This is the value that is used for real-time priority assignments.
- 100 – 139: These are the values that the users assign.
Besides the priority value, you also have a nice value, which works with the range of -20 to +19.
The value of -20 is the highest, and 19 is the lowest value.
The value of -20 is for the highest priority, and the value of 19 represents the lowest priority.
It is important to note that when it starts, a process gets the default priority of 0.
It starts with the default priority of 0.
For example, let’s assume that we have a Website running with priority -20 and a printer spooler process running with 0 priority. It is the Webserver process that has a higher priority than the printer spooler.
To make things clearer, it is the negative value, such as -20 or -10 that will have higher priority over a positive value, such as 0, 5, or 19.
Relationship Between Priority and Nice Values
The biggest question is the relationship between priority value and nice value. It is quite simple. To get the priority value, you need to add 20 to the nice value.
For example, the nice value is 0, then the priority value is 20, which is 0 + 20 = 20. It is the priority value that the kernel will use for a specific process.
Let’s take a look at an example. The screenshot below shows that the kworker/0:0H-kblockd process (process 6) is highlighted and has the highest value, which is -20. The priority value is set to 0 because if you add 20 to -20, you value 0.
Also, notice the process number 2762, which is again for the kworker/0:5-events process. It has a nice value of 0. Therefore, the priority value is now 20.
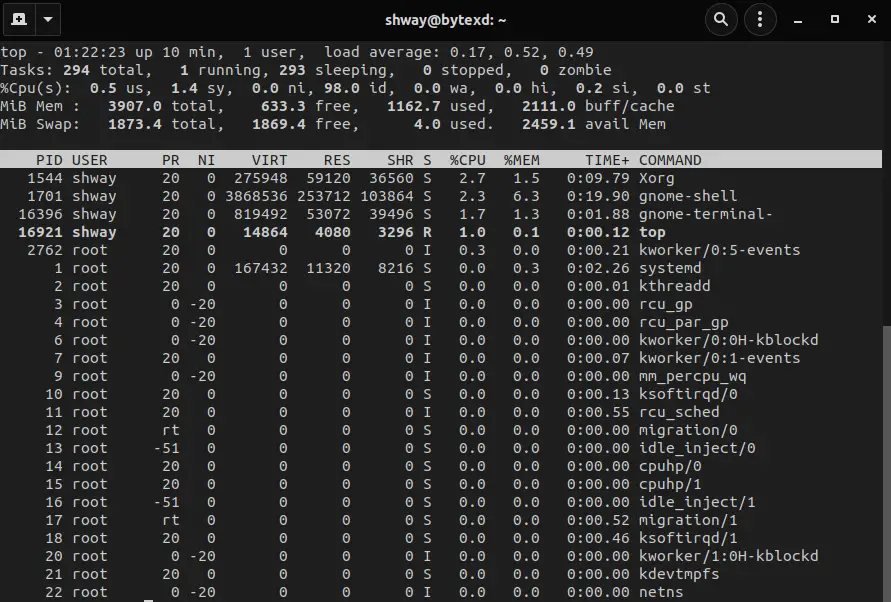
Various commands can help you do this. Let’s quickly look at these commands:
- ps: is a tool that displays the current processes. It is non-interactive and provides a static list of the processes. This tool is readily available in all variants of Linux.
- top: is a tool that displays detailed information about the processes. It also displays the memory and CPU consumption used by the processes. This tool is readily available in all variants of Linux.
- htop: is a tool that displays the real-time status of the processes. It keeps on updating the information in real-time.
To find the nice or the priority values, you can use any of these commands. For example, you can run the top command to view the processes and their related information.
The nice value is in the NI column:

Changing the Priority Value
When a process starts, a priority is assigned by the kernel. The question is can you change the priority of a process? You might want to assign higher priority to a processor and lower the priority of another process.
Can it be done? The answer to this question is a big yes.
It can be done with the help of the following commands:
nice: is mainly used to start a process with a defined priority. By default, nice sets the priority of 10 if no value is defined. When you run a program without any defined priority, the default priority of 0 is assigned. Using the nice command, a user can only lower the priority. However, to increase the priority, increasing the negative value, you need to have root access.renice: is mainly used to modify the priority of a running process
Let’s look at each of these commands.
The Nice Command
To start with nice, we can verify the default value of nice from the terminal window. To do this, execute the following command without any parameter:
nice
The output displays the value of 0.
0
We will now start htop and will check its priority. To start htop, enter the following command:
htop
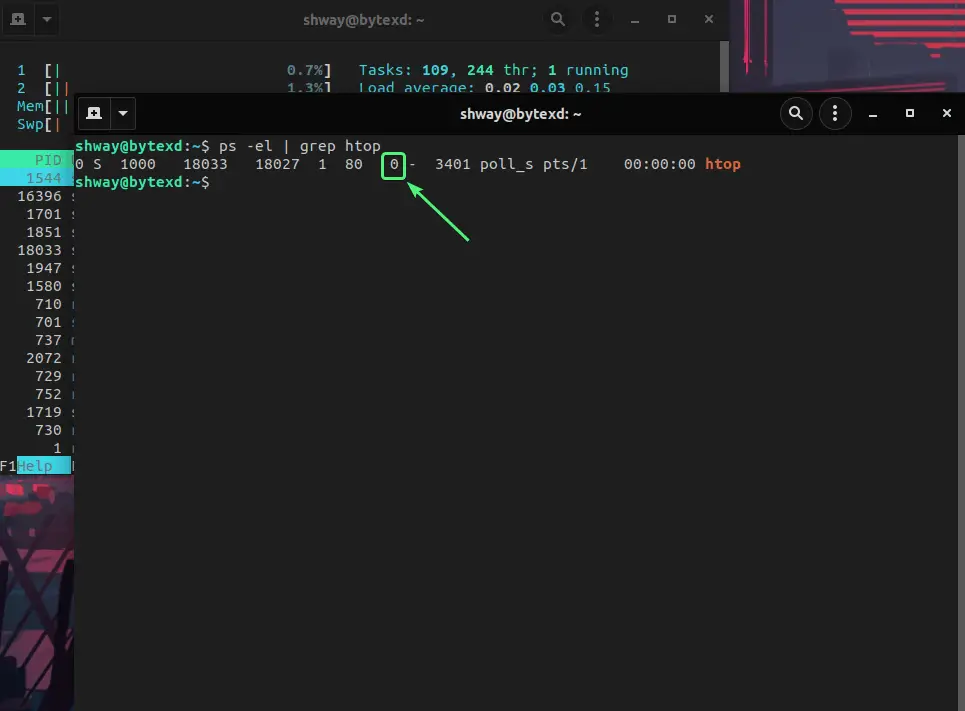
It starts with the default priority of 0. In another terminal window, we run the following command:
ps -el | grep htop
Notice that the priority is set to 0. This is the 8th field from the left in the given output.
Remember, nice cannot change the priority of a running process.
We first terminate htop and then run the nice command in the following manner:
nice -10 htop
This will assign the priority value of 10 to htop.
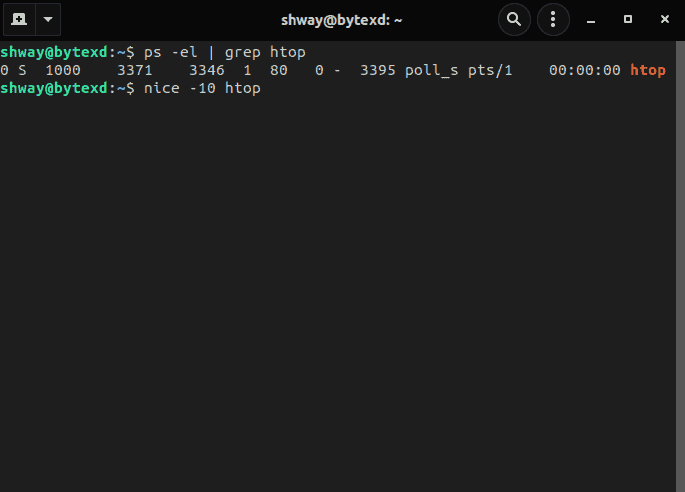
ps -el | grep htop
The output displays the priority of 10.
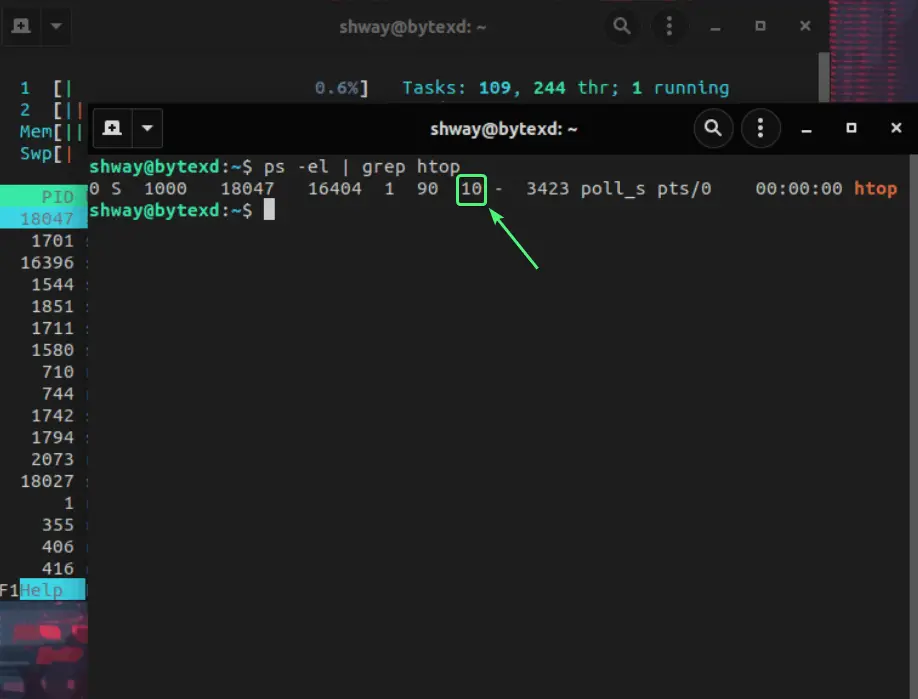
This is because, we as a user, are decreasing the priority of a process.
Another important point to note is that you need to use double negative (--) with the priority value you want to assign. To increase the priority, we can use the following command:
sudo nice --20 htop
You can now see that htop has a priority of -20.
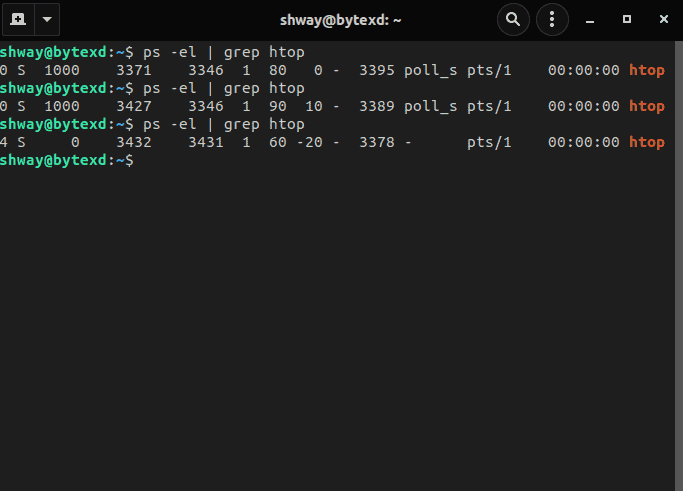
- The nice command, a user can decrease the priority, but you need to have administrative privileges for increasing the priority. We can use the
sudocommand for this purpose. - Another point to remember is that we need to start the process with a
nicecommand. - Using nice, you cannot change the priority of a running process.
The Renice Command
Let’s now move to renice.
We had a good overview of the nice command. We will now work with renice to see how we can change the priority of a running process. For this purpose, we will use htop, which is already running.
Let’s quickly verify the existing priority using the following command:
ps -el | grep htop
Notice that the output displays the priority as -20. This is what was set with the nice command.
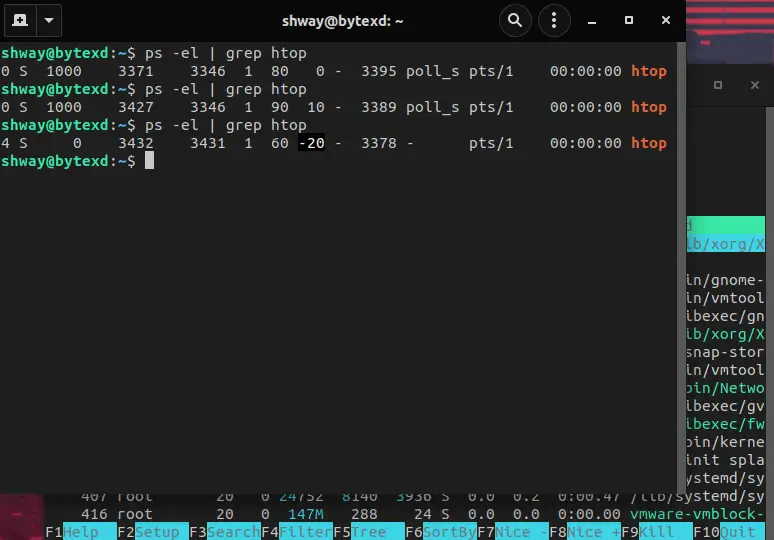
If we run this command, we get an error stating that there are not enough arguments.
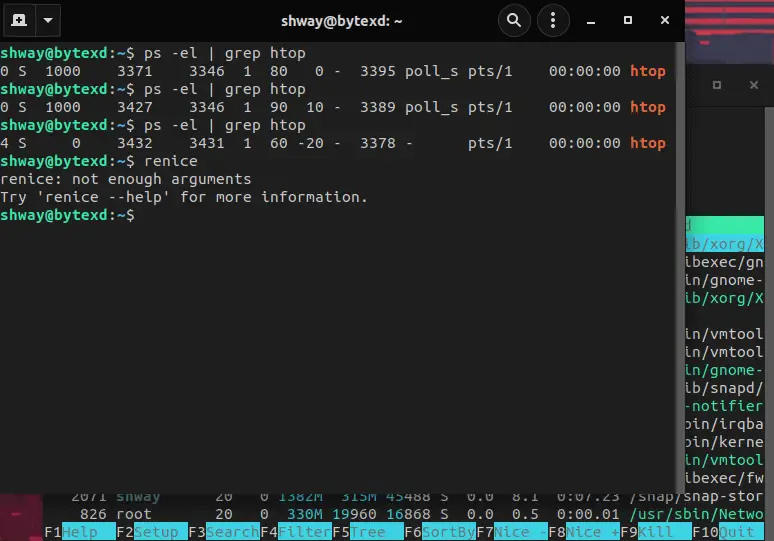
Change Process Priority with Renice Based on Process ID
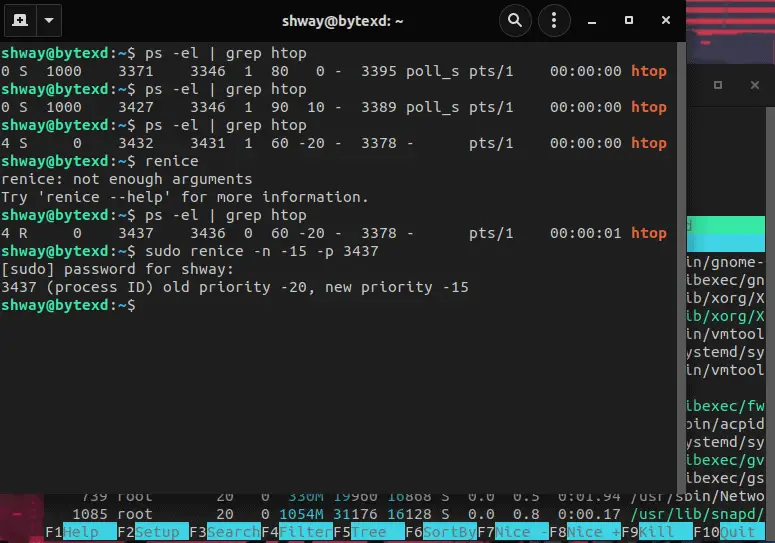
sudo renice -n -15 -p 3437
In this command, you are setting the new priority as -15. The -p parameter is used for the process ID, which is 3437 in this scenario.
[sudo] password for shway:
3437 (process ID) old priority -20, new priority -15
Change Process Priority with Renice Based on User ID
The method mentioned above is not the only method. You can even change the process priority based on a user ID, which is UID. Let’s run the following command:
sudo renice -n -20 -u 1000
Let’s break down this command. The -n parameter defines the priority that you want to change from an existing priority. For example, if the existing priority is -15, you will change it to -20. The -u parameter is for the UID. You can find the UID for a user account using the following command:
id -u shway
1000
Conclusion
Well done. Hopefully, this tutorial helped you understand the nice and renice commands in Linux. If you encountered any issues, please feel free to leave a comment or contact us, and we’ll get back to you as soon as we can.
