Every Linux administrator is well versed with various command-line utilities used to access and manage remote servers. Two of the most popular utilities are SSH and SCP. SSH or Secure Shell is a cryptographic protocol that enables you to remotely access a remote device securely over a network.
SCP on the other hand works similar to the normal CP command you use to copy files on your system. The major difference is that SCP is used to securely copy files between a local and a remote system or across two remote systems.
When you look at the two utilities (SSH and SCP) you will notice one major similarity – security. Both are trying to create a secure channel of communicating with other systems. What if you could combine the two? Well, that would definitely guarantee a maximum level of security.
That’s what you are going to learn from this post – How to Use SCP To Transfer Files with SSH Keys (PEM File).
What is a PEM File?
A PEM (Privacy Enhanced Mail) file is a type of file that contains a variety of encrypted and encoded data, including certificates, private keys, and other relevant information.
PEM files are commonly used to store certificates and keys in a format that can be easily read by cryptographic tools and applications. They are often used to secure network communications and to authenticate the identity of a server or client. PEM files typically have a .pem or .crt file extension.
How to Generate a PEM File
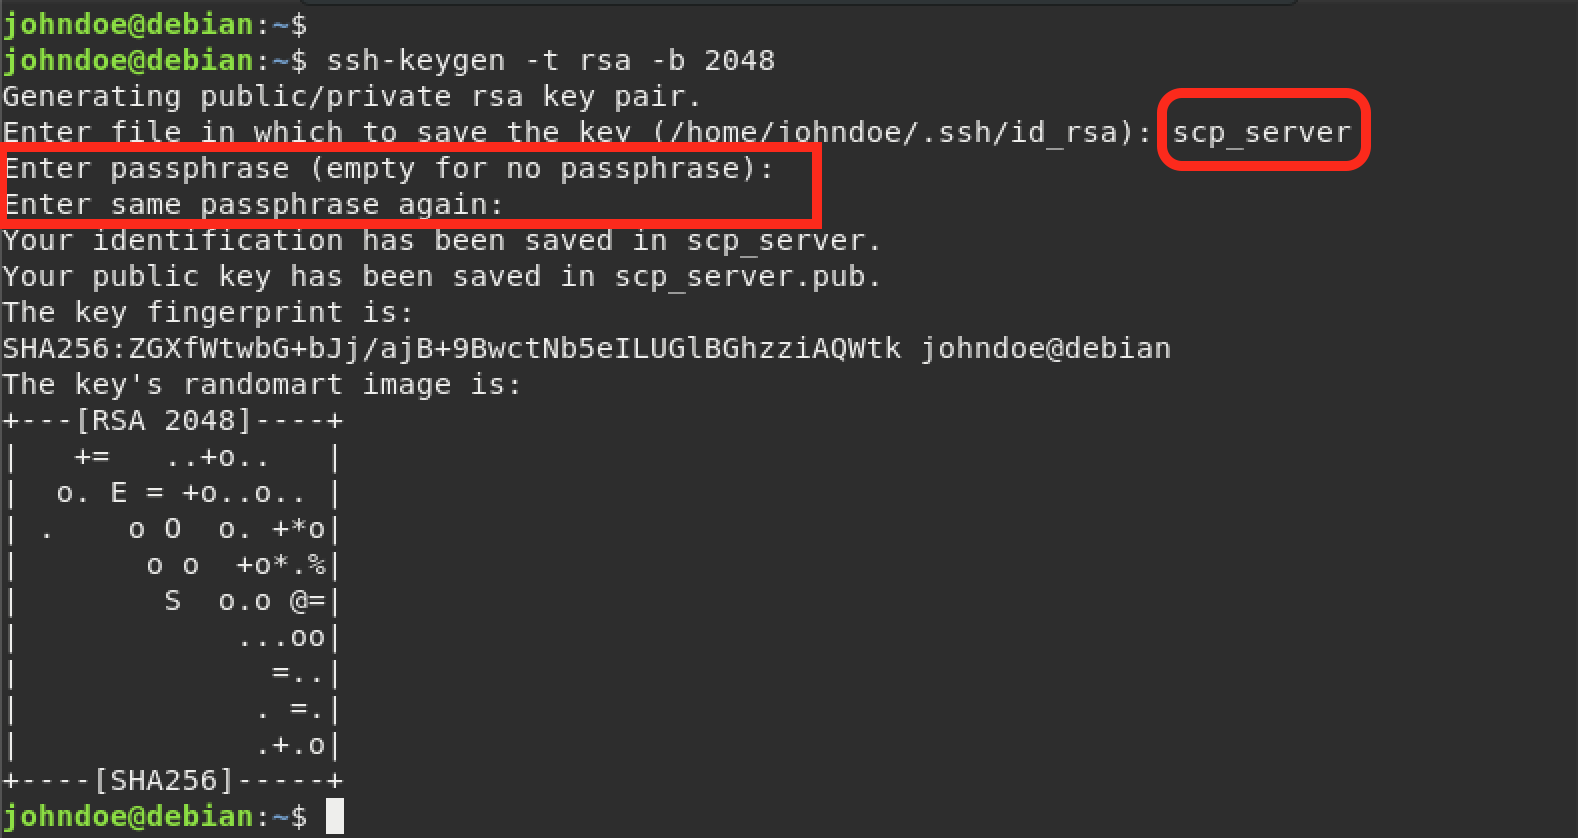
The first thing we need to do is generate the SSH keys. Execute the command below on your local machine.
ssh-keygen -t rsa -b 2048
The -t option is used to set the encryption algorithm you want to use for your SSH keys. There are four algorithms you can choose from – RSA, DSA, EDSA, and ED25519. This post will use RSA. The -b option is used to specify the key size.
After executing the command above, you will see several prompts:
- Enter the
file namewhere you want to save the key. If you don’t specify a file name, the key will be saved in the SSH directory with the nameid_rsa. For this post, we will set the file name asscp_server. - You will also see a prompt to set a passphrase for the generated SSH keys.
The ssh-keygen utility will generate the SSH keys as shown in the image below.
When you run the ls command, you will see two files that were generated by the ssh-keygen utility.
Scp_server.pub: The SSH public key.scp_server: The SSH private key.
See the image below.

Now, you need to generate a PEM file from the private key. Use the command below.
cp -p scp_server scp_server.pem
Now, when you run the ls command, you should see a new file with the name scp_server.pem.

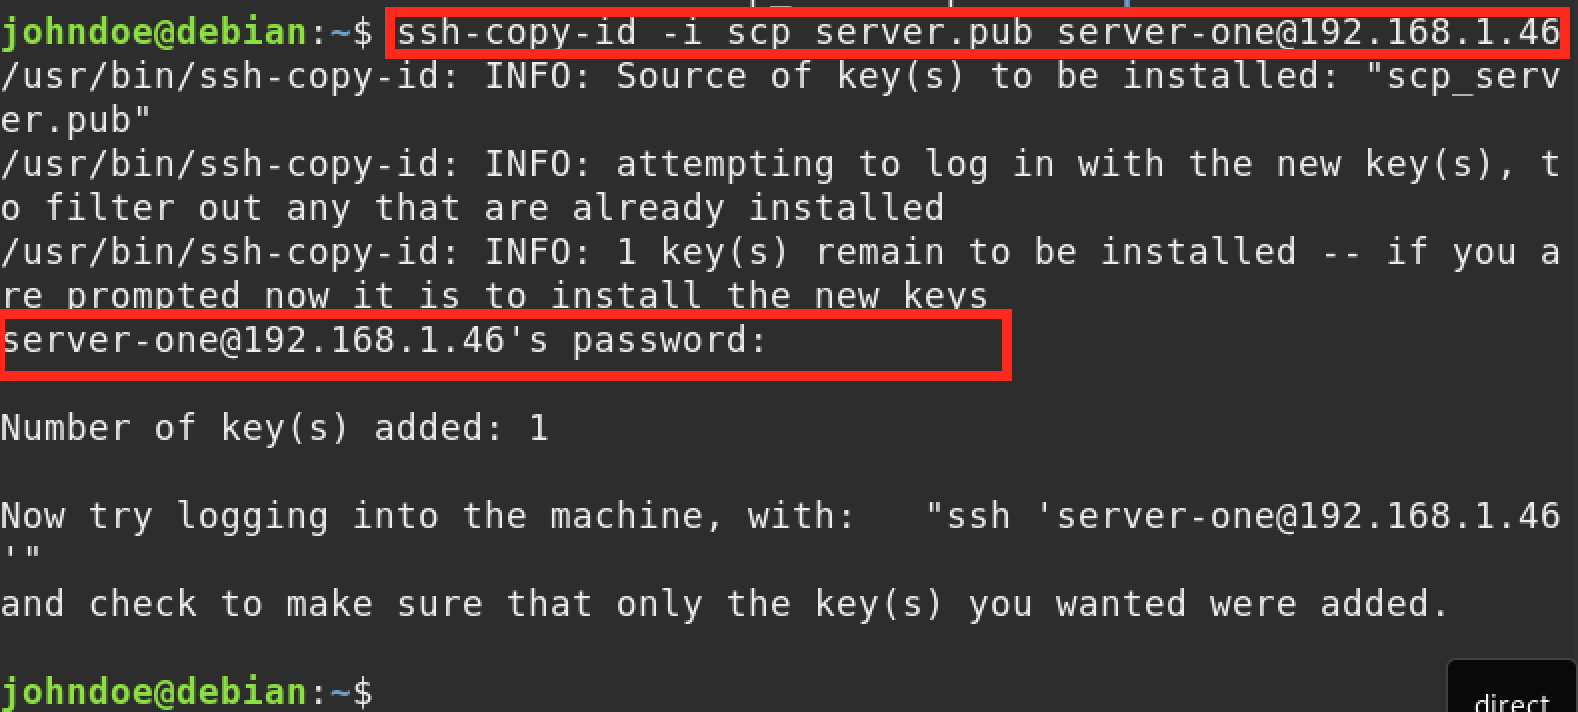
Now you need to copy the public key (scp_server.pub) to the server that you want to access. In our case, the server uses the Username: server-one and IP-address: 192.168.1.46. Use the ssh-copy-id utility to copy the public key as shown below.
ssh-copy-id -i scp_server.pub server-one@192.168.1.46
You will see a prompt to enter the password of the remote password. Type the password and hit enter to continue. You should see an output similar to the image below.
Finally, change the user-access permissions of the PEM file on your local machine using the command below.
sudo chmod 400 scp_server.pem
Before starting to use SCP with the PEM file, it would be great to check if everything is okay. To do so, try logging in to the remote server using the PEM file for authentication. Use the syntax below.
ssh -i scp_server.pem server-one@192.168.1.46
You should see a prompt to enter the passphrase that you set for your SSH keys. The server should not prompt you to enter the server password. See the image below.
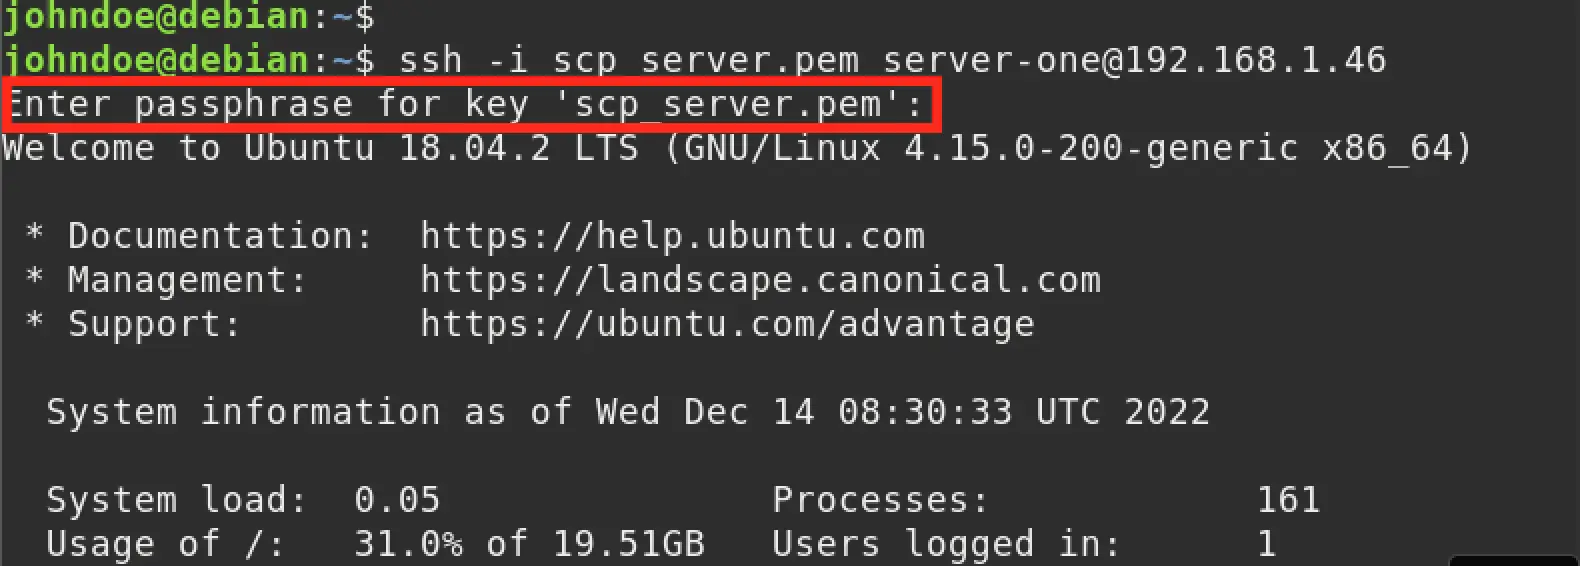
If you logged in successfully, that means you can now proceed with the PEM file for authentication with the SCP command.
How to Use SCP command with PEM File
To use the SCP (Secure Copy) command with a PEM file, you will need to specify the path to the PEM file using the -i option. For example, if your PEM file is located at /path/to/file.pem, you would use the following command to copy a file from your local machine to a remote server:
scp -i /path/to/file.pem /path/to/local/file username@remote.server.com:/path/to/remote/destination
In this example, username is the user on the remote server, remote.server.com is the domain or IP address of the remote server, and /path/to/local/file is the path to the file on your local machine that you want to copy. /path/to/remote/destination is the path to the location on the remote server where you want to copy the file.
Let’s look at several SCP examples that utilize SSH keys (PEM) for authentication.
Copy a Single File to a Remote Server with SCP
As an example, we will create a file on our local system and name it test-file-one. To copy this file to a remote server using the SCP command with a PEM file for authentication, we will use the command below.
scp -i scp_server.pem test-file-one server-one@192.168.1.46:/home/server-one/
You will see a prompt to enter the passphrase for your SSH keys. See the image below.

When we log in our remote server, we can see that the test-file-one was copied successfully.

Copy an Entire Directory to a Remote Server with SCP
Let’s create a sample directory on our local machine using the mkdir command as shown below.
mkdir Test-Directory
We will use the SCP syntax below to copy this directory to our remote server.
scp -i scp_server.pem -r Test-Directory server-one@192.168.1.46:/home/server-one/
Notice that we added a -r parameter which allows us to copy the directory recursively. See the image below.

Copy a File from a Remote Server to Your Local System
The general syntax for copying a file from a remote system using SCP is:
scp <options> remote-server@ip-addres:/path-to-file <folder_local_system>
We have a file called image.jpeg on our remote server. We will use the command below to copy this file to our local system.
scp -i scp_server.pem server-one@192.168.1.46:/home/server-one/image.jpeg /home/johndoe/
When we ran the ls command, you can see that the image.jpeg file was successfully copied.

Conclusion
SCP is a great utility that allows you to copy files across two systems over a network using an encrypted SSH tunnel. Using SSH keys for authentication enhances security compared to using the user password for the remote system. This post has given you a comprehensive guide on How to Use SCP To Transfer Files with SSH Keys (PEM File).
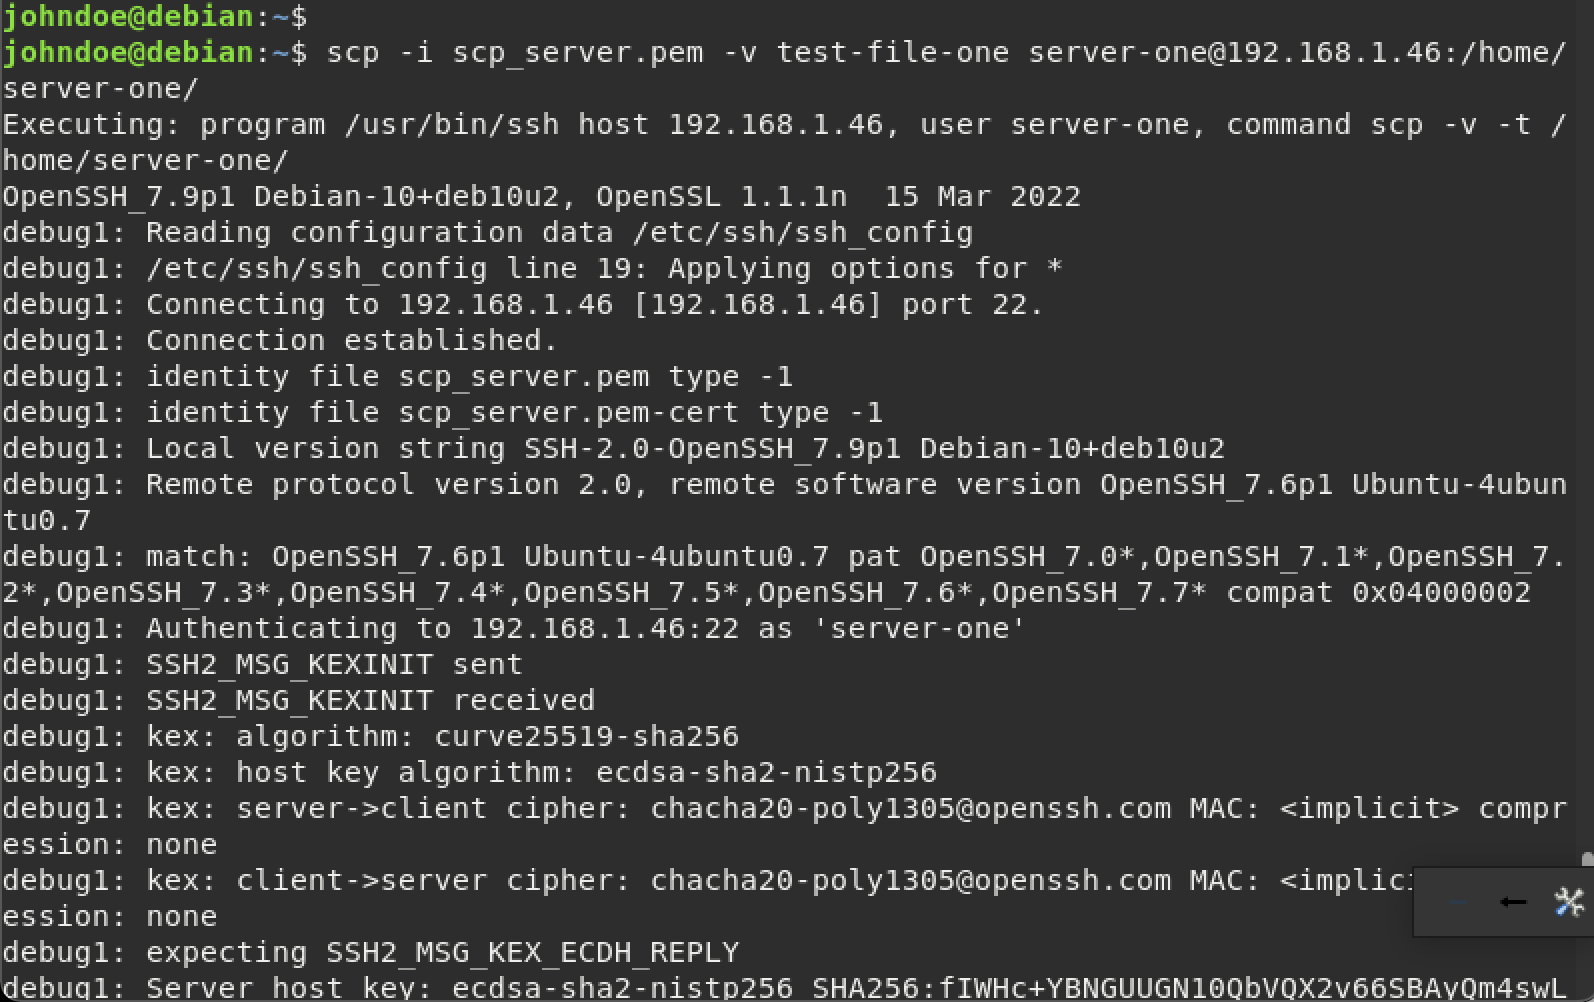
When you add the -v (verbose) parameter, you can be able to see the whole authentication process that is taking place in the background. Look at the example below.
scp -i scp_server.pem -v test-file-one server-one@192.168.1.46:/home/server-one/
The image below shows the whole process for establishing a connection and authentication.
Do you have any comments or questions regarding this post? Please don’t hesitate to let us know in the comments section.
