One of the biggest hurdles for Windows users switching to Linux is the application compatibility issue.
Some of the apps that you could efficiently run on Windows don’t include support for Linux systems. Some of the most affected categories of users are gamers and graphic designers.
A very high percentage of all the games and graphic software developed only support Windows and maybe macOS. Games and apps like Adobe (Photoshop), Microsoft Office, .NET Framework, Starcraft, and many more are only available for Windows.
If your laptop or PC has enough system resources (more than 4 GB of RAM) and supports virtualization technology, one of the first recommendations is to create a Windows 10/ 11 Virtual machine (VM) and install all the apps you need on the VM.
This solution is one of the best since your applications run directly on a Windows system, and there is no compatibility layer.
Before we learning more about Bottles, we should first understand what Wine is.
Table of Contents
What is Wine?
If using a virtual machine is not an option for you – maybe you have a few Gigabytes of memory or the system doesn’t support virtualization technology, there are a few workarounds that you can apply.
We have a program called WINE which is sort of a Windows Emulator even though the initials stand for “Wine Is Not an Emulator.”
After using Wine for some time now, I can confidently say it works flawlessly for most Windows software out there. Of course, there are some which won’t work at all with Wine or some features won’t be available.
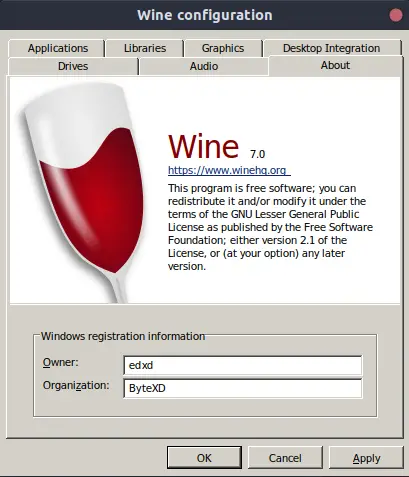
Wine is an almost complete implementation of multiple Windows APIs in a format that Linux can understand.
When a Windows program runs with Wine, it talks to the system like it would talk to Windows. Wine basically grabs these system calls and tells your Linux system to execute something it can understand.
Here, you are not running a virtual machine or an emulator. You have the whole Windows environment on your Linux system except that it’s not developed by Microsoft. Wine creates a fake ‘C’ drive similar to that in Windows where it stores all the installed applications.
What is “Bottles”?
Now that you have a good understanding of Wine let’s look at Bottles.
One of the major issues with Wine is that running programs annually can be quite a hassle especially if you want to run multiple apps with different preferences, different Windows versions, and different libraries.
To solve some of these issues, developers came up with PlayOnLinux but from what I could find online, I don’t think this project is maintained anymore. Fortunately, we now have Bottles.

A bottle here refers to the Wine prefix with different rules, different libraries, different dependencies, and settings. Therefore, you can run every single application optimally without the risk of breaking the other installed applications. Bottles also allow you to use Proton to run games that aren’t available on Steam.
Other features include:
- It has automated installers for several applications and games
- Bottles allow you to run ‘.exe’ and ‘.msi’ executables in the bottle of your choice
- It enables you to easily manage multiple versions of Wine or Proton to use the right one for each application.
- Import Wine prefixes from other managers
- Integrated Task Manager for Wine processes
- It supports gaming performance enhancements
- Backup and import bottles
- Allows you to install dxvk and vkd3d allowing you to run 3D applications.
- You can set custom paths for your Bottles. For example, you can decide to place them on another hard drive or partition.
- You can also enable Proton prefixes even though as of writing this post, that is still an experimental feature.
Installing Bottles on Linux
Bottles is available in various package formats. These include:
- Flatpak (Recommended)
- AppImage
- Snap
- AUR
- Deb
If your system supports Flatpak, we highly recommend using this method as it is the only package that is fully sandboxed with all dependencies and tools required to run Bottles on your Linux system.
To install Flatpak check out the official Flatpak setup section, where they cover installing it on most distros.
For our example we’ll install Flatpak on Ubuntu.
If you are running Ubuntu 18.04 LTS or later, execute the commands below.
sudo apt update
sudo apt install flatpak
If you are running any earlier versions like Ubuntu 16.04 LTS and below, use the commands below to install Flatpak.
sudo add-apt-repository ppa:flatpak/stable
sudo apt update
sudo apt install flatpak

When done, run the command below to install the GNOME Software Flatpak Plugin. This plugin allows us to install Flatpak packages directly from Flathub without the need to run any commands on the Terminal.
sudo apt install gnome-software-plugin-flatpak
When done, open the link below on your browser and enter the URL below.
https://flathub.org/apps/details/com.usebottles.bottles
That will open the Bottles Flathub page. Click the ‘Install’ button to install Bottles on your system.
Alternatively, you can install the Bottles Flathub package from the command-line using the command below.
flatpak install flathub com.usebottles.bottles
When done, launch the program using the command below.
sudo flatpak run com.usebottles.bottles

This might take a few minutes depending on the speed of your internet. Please be patient. When the download completes successfully, launch Bottles with the command below.
flatpak run com.usebottles.bottles
That will open the Bottles welcome window on your system as shown below.

Click Next. You will see an installation screen with an Install button. This allows you to download additional components and files that couldn’t be downloaded with Bottles. Click Install.

This process might take a few minutes. When done, you will see the screen similar to the image below. Click Close.

Creating a New Bottle
The first step to install anything with Bottles is to create a new Bottle which you will use to run the application. If you are running the latest version of Bottles, click the Create a new bottle button on the Bottles Window. If you already had created other bottles, click at the Plus sign at the top to add a new bottle.

You will see a prompt to enter a file name and select the environment in which you want to run your application. There are three environments to choose from:
- Gaming bottle: This creates a gaming focus bottle which comes with a lot of tweaks specifically for running games.
- Application bottle: This bottle comes with improvements for running Windows Desktop apps.
- Custom bottle: This creates a custom bottle with no specific tweaks so that you can experiment yourself.
As an example, we will try to install PowerISO which is a powerful Windows application used to process CD/ DVD and BD images. We will name our new bottle as PowerISO-Bottle.

When you click the Create button, Bottles will generate a configuration file with the best tweaks for your new application. When done, you will see the popup message Bottle Created appear on your screen. Close that window.
On the Bottle main screen you will see the new bottle you just created.

Click on this bottle to open the configuration page. To install PowerISO, click on the Run Executable button at the top. That will open your system’s file manager and you can select the PowerISO.exe file.
After a few seconds, you will see the PowerISO installation screen popup on your screen. Follow the on screen instructions to install the application as shown below.
That’s it! You can now run PowerISO on your system flawlessly with Wine.

While still on this window, you will see a “utilities” section with several interesting features that you wouldn’t find on Wine or PlayOnLinux.

Here, you can decide to browse the fake C drive created by Wine, execute commands inside this bottle, edit the registry editor for this particular bottle and do much more from the various options provided.
To launch the installed applications, first click on the Bottle running your app then click on the Programs menu on the left-hand side pane.
If you just installed an application and you can’t find it on the Programs screen, click the refresh icon at the top to update the entries.

Here you will see an option to start or stop your application. That’s it! You now have a good understanding of how to run a windows application with Bottles. But there is one problem. Some applications won’t work at all or will require manual tweaks. That brings us to Bottles’ automated installers.
Automated Installers
As of writing this post, Bottles only has a few application installers which are mostly gaming related. However, that list expands frequently since any developer can contribute one of these.
Therefore, don’t be surprised when you see more installers appearing soon especially from some of the most commonly used Windows applications.
Similar to most other installers you would find out there e.g Proton DB, these installer scripts have a rating from Platinum -> Gold -> Silver -> Bronze. That gives you an idea of how well this program will run on your system.
Let’s install Epic Games Store. It is rated Platinum.

This might take a few minutes to install. When done, click on the Programs menu on the left and launch the application. You should see a window similar to the image below. Here, you can install some of your favorite games.

Conclusion
Bottles enables you to comfortably run Windows applications on your Linux system. If you have worked with Wine, then you might have already noticed that Bottles provides quite an easy-to-use user interface which is easier to navigate and install additional features.
There are more features and functionalities available in Bottles that we might have not handled in this post.
However, I believe at this point you can easily create a bottle and install an application. Feel free to share with our readers your take on Bottles and any additional tips and tricks they might need to know in the comments below.




How to install Microsoft Office on this application