The (capital) -P option lets you show the progress during file transfer with Rsync.
You can show the progress while transferring files locally or during a local-remote file transfer.
rsync -P <source> <destination>
rsync -P <local source> <remote username>@<domain name or IP address of remote machine>:<remote destination>
This tutorial walks you through showing progress during file transfer. You will know how to combine the -P option with other options and connect local and remote machines before transferring files comfortably.
Other Options
You will mostly combine the -P option with others to control the transfer depth and convenience. Here are some of the options.
-n: mainly works with the -v option to determine the transfer impact without actually making changes.-v: print detailed information about the process.-r: sync files and subdirectories recursively.-a: sync regular and subdirectory files with their configuration, ownership, and modification details.-z: compress massive files during the transfer and decompress them at the destination.
Let’s set up a lab environment before practically using the options.
Install and Configure Tools
We use Ubuntu for the demos.
Rsync
Although Rsync should be preinstalled on most distros, yours could lack it. That is why it would be best to check for its availability rsync –version or install it with apt, apt-get, or aptitude.
sudo apt update
sudo apt upgrade
sudo apt install rsync
sudo apt update
sudo apt upgrade
sudo apt-get install rsync
sudo apt update
sudo apt upgrade
sudo apt install aptitude
sudo aptitude install rsync
Now that you have installed Rsync on local and remote machines, the next step is to connect the two machines. Although there are multiple ways to connect and transfer files across local and remote machines, we will use SSH keys for the connection.
SSH
First, check SSH availability or install and configure it.
sudo apt install openssh-server
sudo systemctl enable --now ssh
sudo ufw allow ssh
sudo ufw enable
sudo ufw status
We just installed the OpenSSH server, enabled it, and asked the firewall not to block the connection port.
Next, let’s connect the local and remote machines.
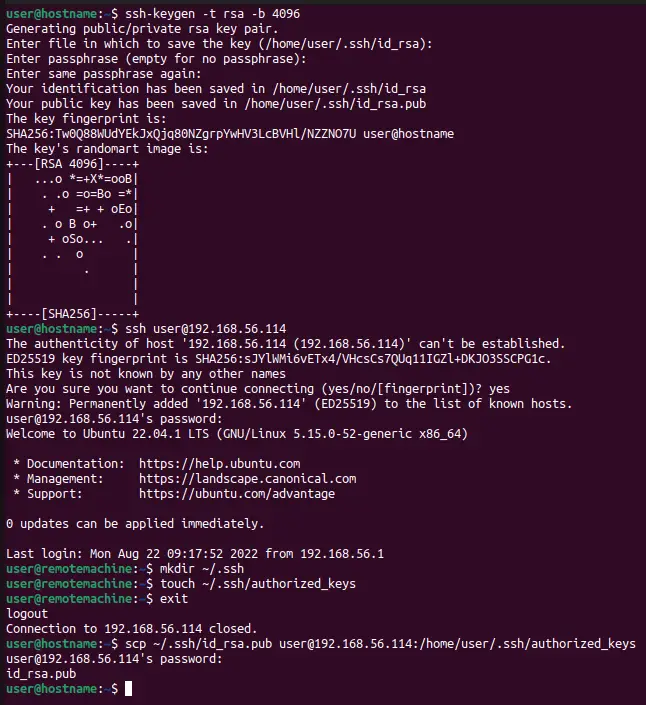
ssh-keygen -t rsa -b 4096
ssh user@192.168.56.114
mkdir ~/.ssh
touch ~/.ssh/authorized_keys
exit
scp ~/.ssh/id_rsa.pub user@192.168.56.114:/home/user/.ssh/authorized_keys
We generated SSH keys on the local machine, logged into the remote machine, created a directory to store the public SSH keys, returned to the local machine and transferred the keys to the remote destination using the scp command.
Note: Replace 192.168.56.114 with your remote machine’s IP address.
Now we can log into the remote machine without a password and transfer files.
Identify Files to Transfer
In this section, we will create the files with their transfer destinations.
Local Machine
Lastly, let’s install the tree tool for a better hierarchical view of a directory’s contents.
sudo apt install tree
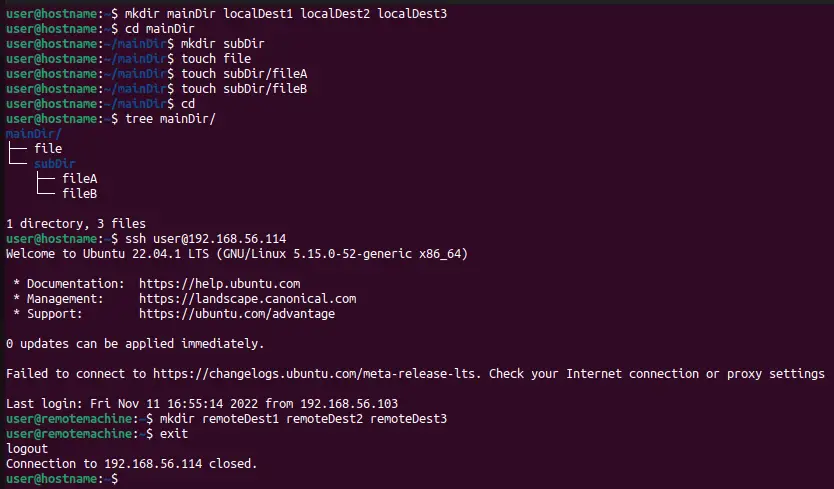
Now create the directories and files.
mkdir mainDir localDest1 localDest2 localDest3
cd mainDir
mkdir subDir
touch file
touch subDir/fileA
touch subDir/fileB
Remote Machine
mkdir remoteDest1 remoteDest2 remoteDest3
Transfer Files While Showing Progress
Local to Local File Transfer
Files Only
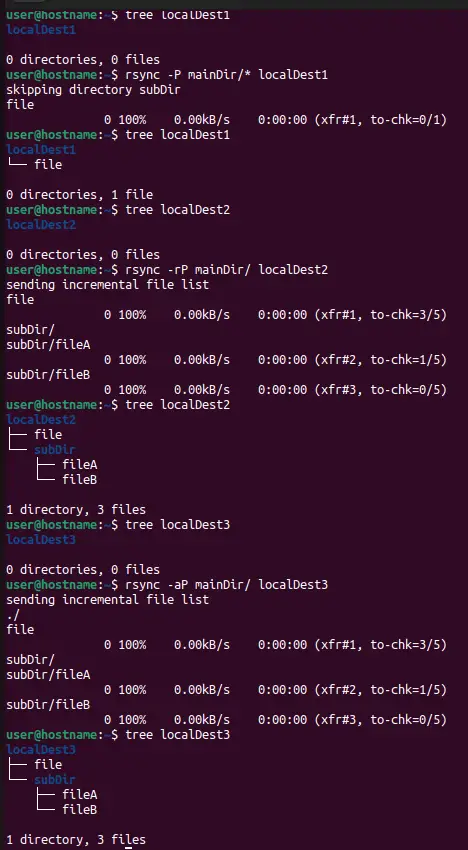
We can transfer regular files only without using the -r or -a options.
tree localDest1
localDest1

0 directories, 0 files
rsync -P mainDir/* localDest1
skipping directory subDir
file
              0 100%    0.00kB/s    0:00:00 (xfr#1, to-chk=0/1)
tree localDest1
localDest1
└── file

0 directories, 1 file
The trailing slash/enables transferring the directory’s contents, not itself; the star * leads to transferring all files.
The columns represent the (1) transfer rate, (2) sent/received bytes, (3) speed of transfer, and (4) total file size, respectively.
Files and Directories Recursively
We can transfer a nested tree of directories and files using the -r option.
tree localDest2
localDest2

0 directories, 0 files
rsync -rP mainDir/ localDest2
sending incremental file list
file
              0 100%    0.00kB/s    0:00:00 (xfr#1, to-chk=3/5)
subDir/
subDir/fileA
              0 100%    0.00kB/s    0:00:00 (xfr#2, to-chk=1/5)
subDir/fileB
              0 100%    0.00kB/s    0:00:00 (xfr#3, to-chk=0/5)
tree localDest2
localDest2
├── file
└── subDir
    ├── fileA
    └── fileB

1 directory, 3 files
All Details
Apart from transferring files and directories, we may want to maintain the history of the files during and after the transfer. For example, we may want to conserve the ownership and modification timestamps.
We can do that by combining the -P with the -a options.
tree localDest3
localDest3

0 directories, 0 files
rsync -aP mainDir/ localDest3
sending incremental file list
./
file
              0 100%    0.00kB/s    0:00:00 (xfr#1, to-chk=3/5)
subDir/
subDir/fileA
              0 100%    0.00kB/s    0:00:00 (xfr#2, to-chk=1/5)
subDir/fileB
              0 100%    0.00kB/s    0:00:00 (xfr#3, to-chk=0/5)
tree localDest3
localDest3
├── file
└── subDir
    ├── fileA
    └── fileB

1 directory, 3 files
Local to Remote File Transfer
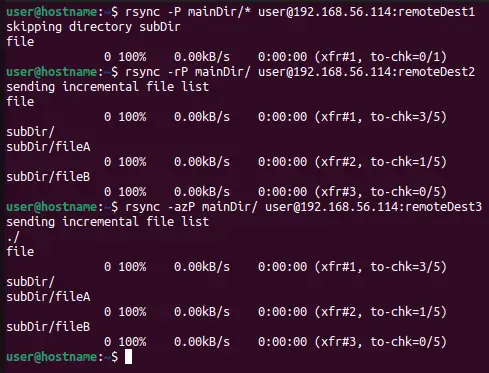
Let’s repeat the three processes we did in the local setting in the local-remote setting.
rsync -P mainDir/* user@192.168.56.114:remoteDest1
skipping directory subDir
file
              0 100%    0.00kB/s    0:00:00 (xfr#1, to-chk=0/1)
rsync -rP mainDir/ user@192.168.56.114:remoteDest2
sending incremental file list
file
              0 100%    0.00kB/s    0:00:00 (xfr#1, to-chk=3/5)
subDir/
subDir/fileA
              0 100%    0.00kB/s    0:00:00 (xfr#2, to-chk=1/5)
subDir/fileB
              0 100%    0.00kB/s    0:00:00 (xfr#3, to-chk=0/5)
rsync -azP mainDir/ user@192.168.56.114:remoteDest3
sending incremental file list
./
file
              0 100%    0.00kB/s    0:00:00 (xfr#1, to-chk=3/5)
subDir/
subDir/fileA
              0 100%    0.00kB/s    0:00:00 (xfr#2, to-chk=1/5)
subDir/fileB
              0 100%    0.00kB/s    0:00:00 (xfr#3, to-chk=0/5)
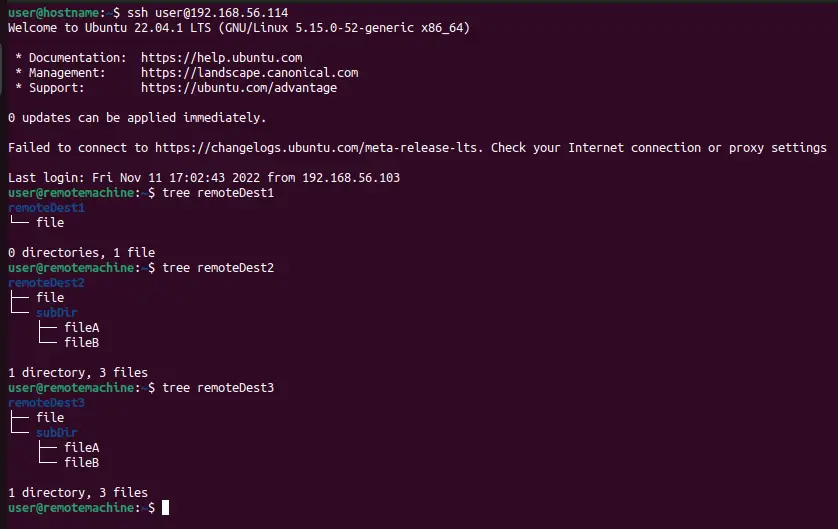
We can log in to the remote machine and confirm the file transfer.
ssh user@192.168.56.114
tree remoteDest1
remoteDest1
└── file

0 directories, 1 file
tree remoteDest2
remoteDest2
├── file
└── subDir
    ├── fileA
    └── fileB

1 directory, 3 files
tree remoteDest3
remoteDest3
├── file
└── subDir
    ├── fileA
    └── fileB

1 directory, 3 files
And voila, the files were transferred as we expected!
Conclusion
Use the -P option to show the progress during file transfer with Rsync. It would be best to combine the option with others to customize the view and depth of file transfer.

