Apache Web Server is one of the most popular web servers available and is used by many of the world’s largest websites. A web server is a computer application that can process requests for web pages, download files, and serve up content over a network connection.
Apache is compatible with multiple operating systems, including Windows, Mac OS X, Linux, and Unix. It can be modified and used for both commercial and noncommercial purposes.
Apache is very customizable and can host both static and dynamic content. It’s typically used to host websites but can also be used for other applications such as streaming media, mail services, and more. Additionally, it is reliable, safe, and very mature, making it one of the best choices for web hosting.
This tutorial shows you how to install the Apache web server and use it to create a website. Section 1 takes you through Apache installation.
Section 2 shows you how to use the web server with and without PHP and MySQL.
Section 1: Install Apache Web Server on Linux Step-by-Step
Install Apache on Debian/Ubuntu
Here is how to install the Apache web server on a Debian-based distribution.
sudo apt update
sudo apt install apache2
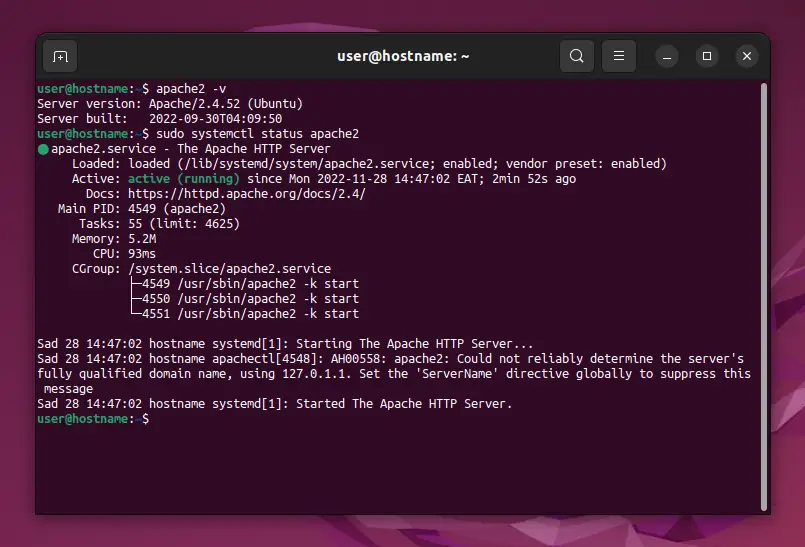
We use Ubuntu 22.04 for the demos. We update the system before installing the Apache web server. We can verify the installation using the -v option after the apache2 command.
apache2 -v
Server version: Apache/2.4.52 (Ubuntu)
Server built:   2022-09-30T04:09:50
Now check whether the Apache web server is running.
sudo systemctl status apache2
● apache2.service - The Apache HTTP Server
     Loaded: loaded (/lib/systemd/system/apache2.service; enabled; vendor preset: enabled)
     Active: active (running) since Mon 2022-11-28 14:47:02 EAT; 2min 52s ago
       Docs: https://httpd.apache.org/docs/2.4/
   Main PID: 4549 (apache2)
      Tasks: 55 (limit: 4625)
     Memory: 5.2M
        CPU: 93ms
     CGroup: /system.slice/apache2.service
             ├─4549 /usr/sbin/apache2 -k start
             ├─4550 /usr/sbin/apache2 -k start
             └─4551 /usr/sbin/apache2 -k start

Sad 28 14:47:02 hostname systemd[1]: Starting The Apache HTTP Server...
Sad 28 14:47:02 hostname apachectl[4548]: AH00558: apache2: Could not reliably determine the server's fully qualified domain name, using 127.0.1.1. Set the 'ServerName' directive globally to suppress this message
Sad 28 14:47:02 hostname systemd[1]: Started The Apache HTTP Server.
The following line shows the Apache web server is active.
Active: active (running) since Mon 2022-11-28 14:47:02 EAT; 2min 52s ago
You can also start or restart Apache if it is stopped.
sudo systemctl restart apache2
Install Apache on CentOS/RHEL
Install the Apache web server.
yum install httpd
Check the version of Apache installed.
httpd -v
Check the (running) status of the Apache web server.
systemctl status httpd
Restart the Apache web server if it is stopped
systemctl restart httpd
Now that you have installed Apache on your device, it would be best to practice using it, as shown in the section 2 of this tutorial.
Section 2: Use Apache Web Server on Linux
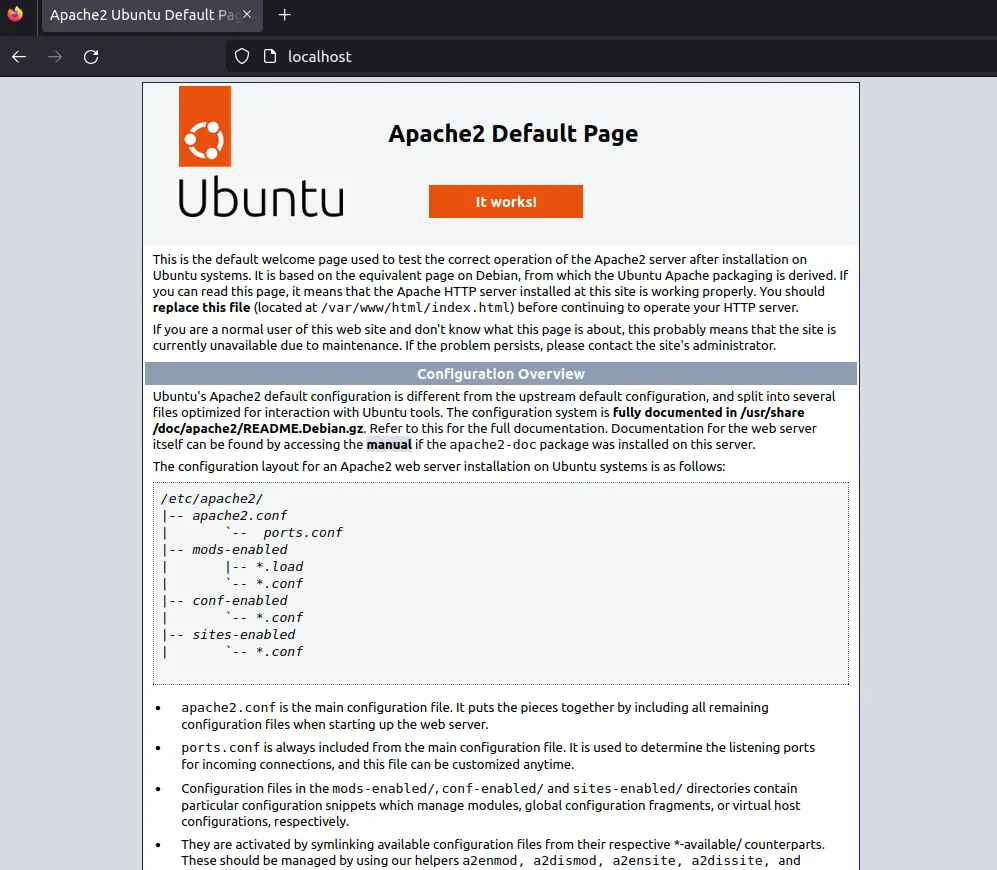
We can also check whether the web server is running by requesting a page from Apache. We do that by searching the machine’s IP address on a browser’s address bar.
http://<your IP address>
OR
localhost
We get the default Apache web page.
Before that, you may need to know the machine’s IP address. Use one of the following commands.
hostname -I
ifconfig -a
Scenario 1: Create a Static Website
The default Apache web page is stored at /var/www/html/index.html.
cd /var/www/html
ls
cat index.html
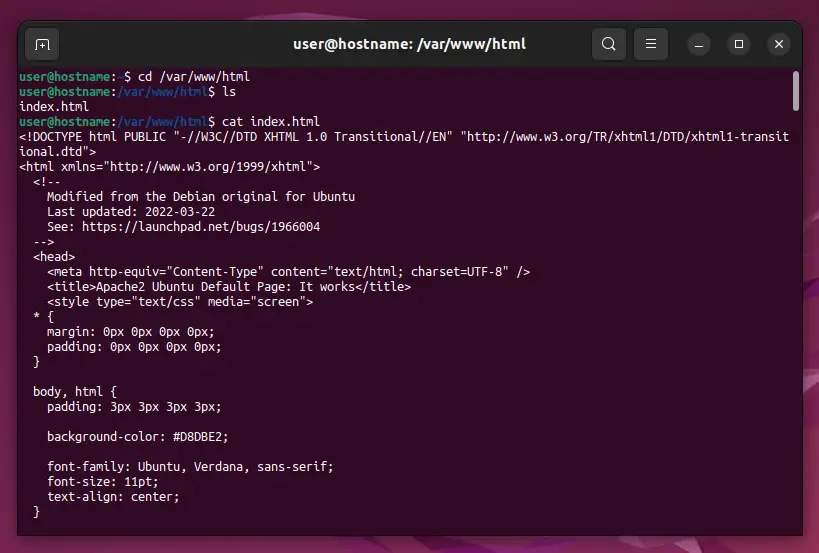
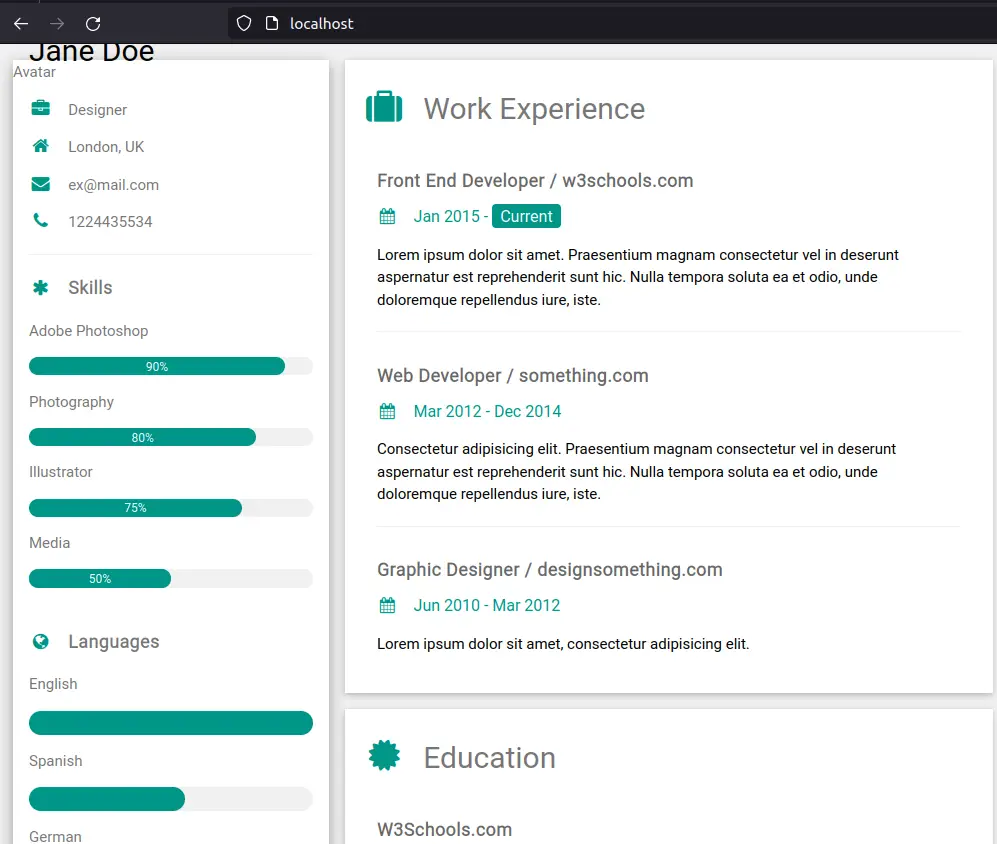
We can create a custom website by replacing the index.html file with ours. For example, let’s replace it with this template from w3 schools, then refresh the page.
The landing page has a new look.
Scenario 2: Create a dynamic Web Application (Apache + MySQL + PHP)
Assume we want to register and view an application’s users’ names and emails. We can achieve that with Apache, MySQL, and PHP. First, let’s install MySQL and PHP.
Install and configure MySQL
sudo apt install mysql-server
Next, log in as the root user before setting a password for the user.
sudo mysql
alter user 'root'@'localhost' identified with mysql_native_password by 'myMySQLPwd';
I have set the root user’s password to myMySQLPwd.
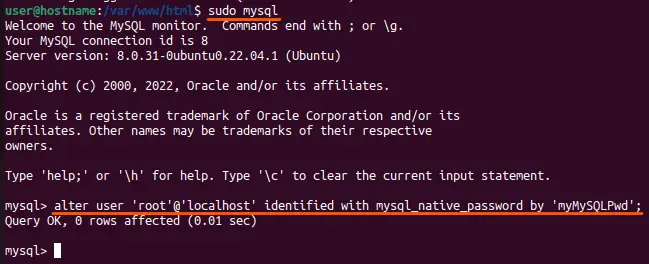
You may get the following error while setting the password: ERROR 1819 (HY000): Your password does not satisfy the current policy requirements. If that happens, check the password policy requirements and try setting it with all the requirements.
SHOW VARIABLES LIKE 'validate_password%';
You may get a table similar to the following:
+--------------------------------------+--------+
| Variable_name                        | Value  |
+--------------------------------------+--------+
| validate_password.check_user_name    | ON     |
| validate_password.dictionary_file    |        |
| validate_password.length             | 8      |
| validate_password.mixed_case_count   | 1      |
| validate_password.number_count       | 1      |
| validate_password.policy             | MEDIUM |
| validate_password.special_char_count | 1      |
+--------------------------------------+--------+
7 rows in set (0.03 sec)
The MEDIUM policy requires a new password to be at least 8 characters long. The 8 characters should include a number, a special character, a capital, and a small letter.
Next, exit the prompt and secure MySQL deployments.
exit
mysql_secure_installation
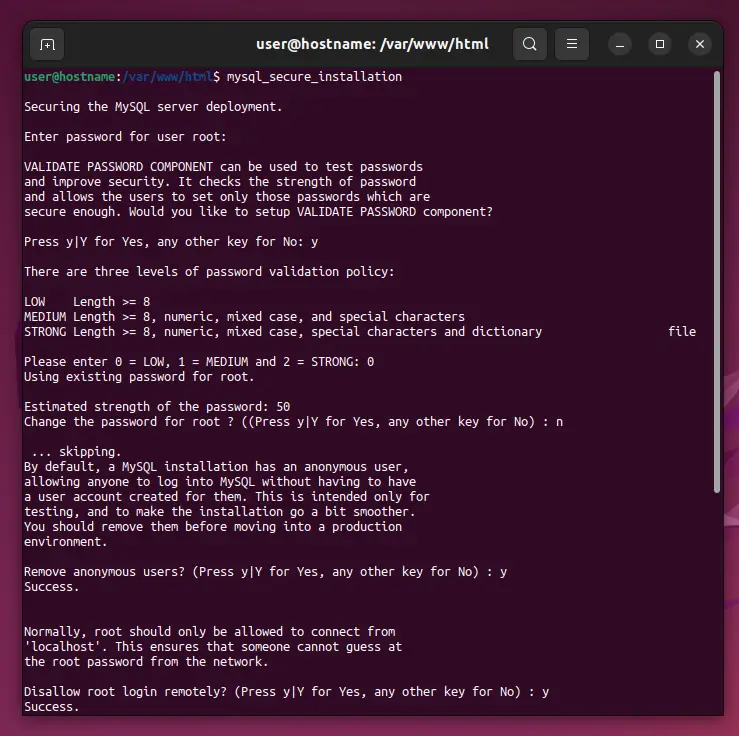
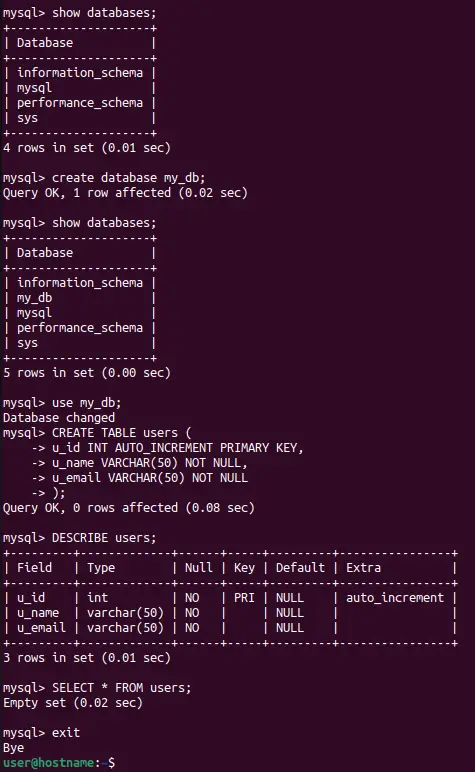
Now we can only log in to MySQL with a password. Let’s log in and create a new database called my_db.
mysql -u root -p
show databases;
create database my_db;
show databases;
We log in with the root user after a password prompt. We then list the databases before and after creating a new one.
Next, create users table and inspect its contents before exiting the prompt.
use my_db;
CREATE TABLE users (u_id INT AUTO_INCREMENT PRIMARY KEY, u_name VARCHAR(50) NOT NULL, u_email VARCHAR(50) NOT NULL);
DESCRIBE users;
SELECT * FROM users;
exit
Install PHP and and PHPMyAdmin
sudo apt install php
sudo apt install phpmyadmin
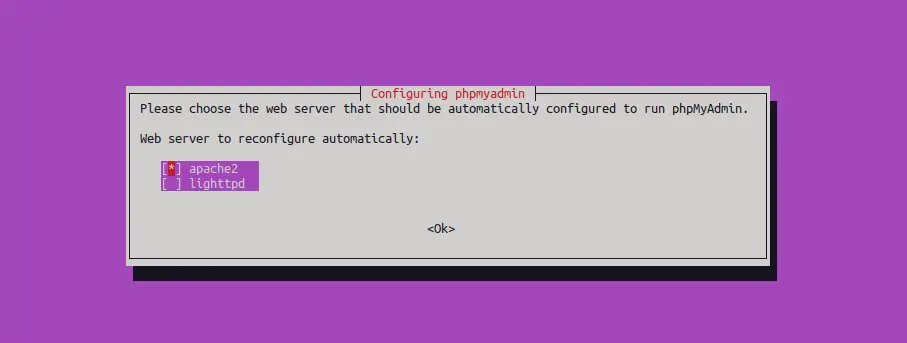
During the PHPMyAdmin installation, choose Apache2 as the web server before proceeding with the configuration.
Visit localhost/phpmyadmin and log in to PHPMyAdmin with the details you just configured.
Now that Apache, MySQL, and PHPMyAdmin are working, let’s save the user details in the my_db. The full path of the script is /var/www/html/index.php
<?php

 // Connect to the MySQL database
 $conn = mysqli_connect("localhost", "root", "myMySQLPwd", "my_db");
 if (!$conn)
    die("Database connection failed: " . mysqli_connect_error());


 // Receive data from the form
 if(isset($_POST['register'])){

    // Sanitize the data
     $username = mysqli_real_escape_string($conn, htmlspecialchars($_POST['u_name']));
     $email = mysqli_real_escape_string($conn, htmlspecialchars($_POST['u_email']));

     // Is the email taken?
     $check = mysqli_query($conn, "SELECT * FROM users WHERE u_email='$email'");

     if(mysqli_num_rows($check) > 0) {

         echo('
             <script>
                 alert("email taken");
                 window.location.href = "index.php";
             </script>
         ');

        exit();
     }


    // Save the details
    $new_user = mysqli_query($conn, "INSERT INTO users (u_name, u_email) VALUES ('$username', '$email') ");

    if($new_user) {

            echo('
                <script>
                    alert("User registered successfully!");
                    window.location.href = "index.php";
                </script>
            ');

        exit();
    }

}


?>


<!DOCTYPE html>
<html lang="en">
<head>
    <meta charset="UTF-8">
    <meta http-equiv="X-UA-Compatible" content="IE=edge">
    <meta name="viewport" content="width=device-width, initial-scale=1.0">
    <title>LAMP Stack</title>
</head>
<body>

<form action="<?php echo $_SERVER['PHP_SELF'] ?>" method="POST">
    <input type="text" name="u_name" placeholder="Name"> <br><br>
    <input type="email" name="u_email" placeholder="Email"> <br><br>
    <button name="register">Register</button>
</form>

</body>
</html>
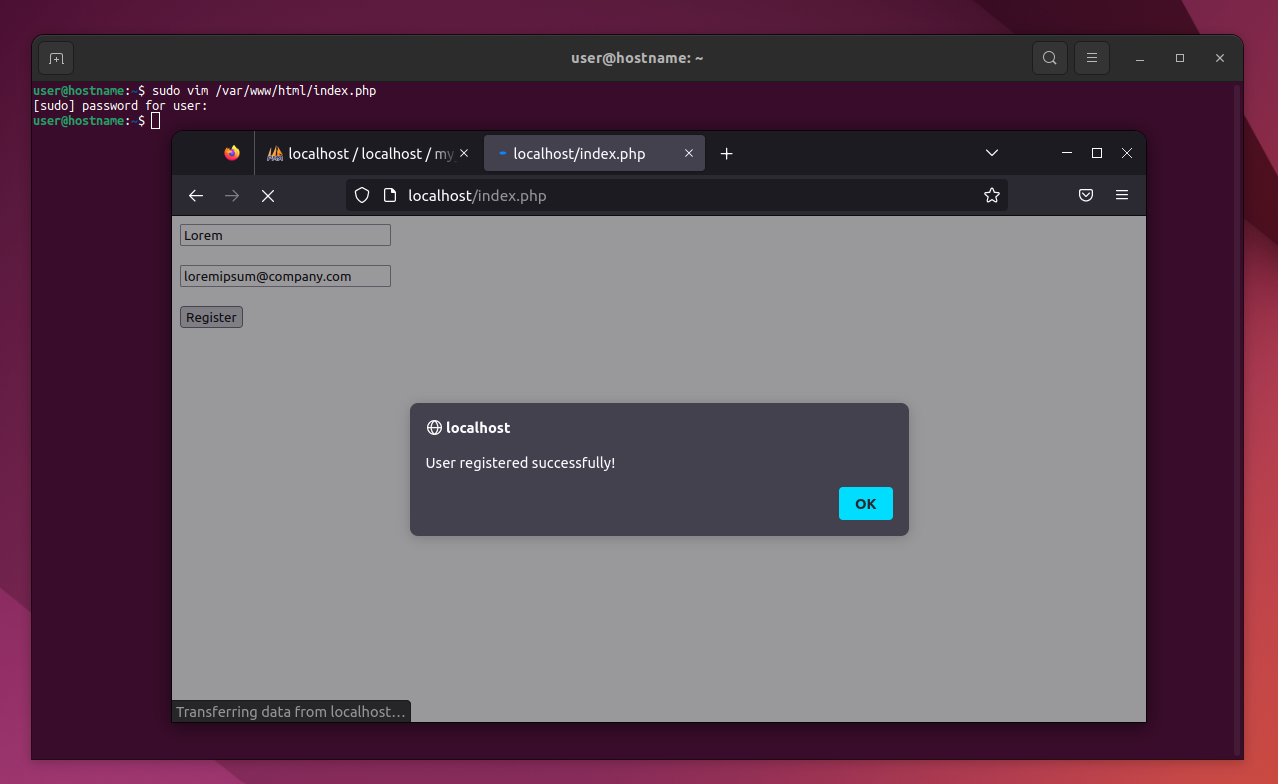
Now relaunch the web page and save users in the database.
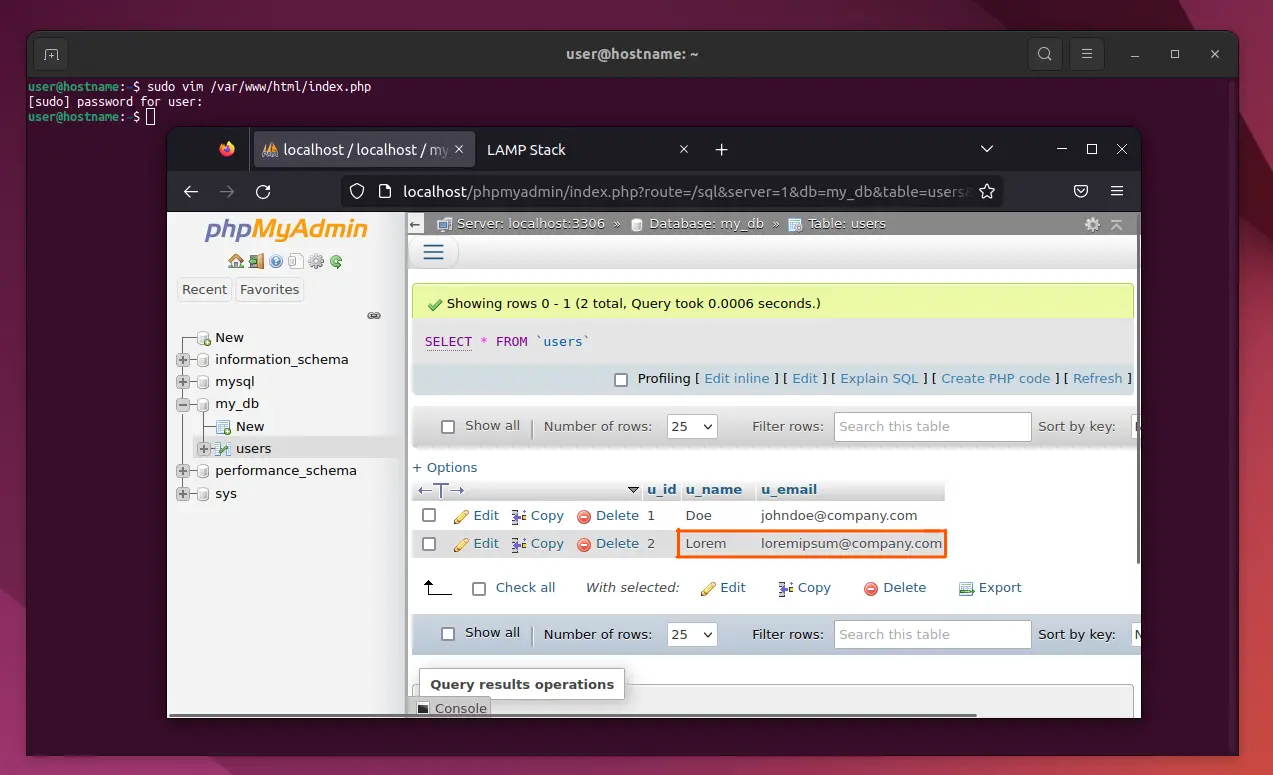
Then, refresh the users table on the PHPMyAdmin page.
Conclusion
Serving resources is easy after installing Apache. As shown in this tutorial, you can then apply the web server with other technologies like PHP and MySQL.


