X2Go is an open-source remote desktop software for Linux distributions that uses a modified NX3 protocol. It enables users to remotely access a computer’s graphical interface over a low (or high) bandwidth network.
There are two components of X2Go:
X2Go Server: it’s a host also known as the remote machine. The sessions/applications are started and maintained on the X2Go server. The session/application interface is accessed by the X2Go client. X2Go server can only be used with Linux distributions.
X2Go Client: It’s an application that connects with the X2Go server and displays the graphical remote session interface. X2Go client is available for Windows, Mac OS X, and almost all Linux distributions.
Alternative remote desktops for CentOS (and CentOS based distros, such as Rocky Linux and AlmaLinux) that we have written about are VNC (Virtual Network Computing) or Remote Desktop Protocol (via a software called xRDP).
Table of Contents
Basic Features of X2Go
A few basic features of the X2Go remote desktop software are:
- Provides graphical remote desktops on low and high-bandwidth network
- Voice transmission and file sharing
- Easy to manage sessions
- Secure traffic is tunneled through SSH
- Supports multiple clients simultaneously
- Multiple desktop environments (e.g. GNOME, MATE, KDE)
- Desktop sharing
We’ll be using DNF (Dandified YUM) instead of yum in this tutorial. DNF is a next-generation yum and intended to replace YUM in RPM-based operations Linux distributions. It’s a powerful software package manager and can easily maintain groups of packages and automatically resolve dependency issues.
In this tutorial, we’ll explain the step-by-step process of connecting to a CentOS 8 remote desktop using X2Go, along with video demos. We’ll demonstrate the installation process of the X2Go server and X2Go client and how the X2Go client connects to three different desktop environments, i.e., XFCE, KDE Plasma, and MATE. Let’s begin!
Prerequisites
- A server running CentOS 8 with a minimum of 2GB RAM. Recommended RAM is 4GB or more. (I use a cheap 12GB RAM VPS from Contabo)
- A non-root sudo user with sudo privileges and access either password or SSH key. We don’t recommend accessing X2Go as a root user because the root user can add, delete, or edit any application or file. This can compromise the integrity of your system. Unless you know EXACTLY what you’re doing, it’s better to stay clear of the root.
Step 1 – Install X2Go on the CentOS 8 Server
The first step towards running X2Go on the server is to update the package index:
sudo dnf -y update
Install the EPEL Repo, if it’s not pre-installed on your server:
sudo dnf install https://dl.fedoraproject.org/pub/epel/epel-release-latest-8.noarch.rpm
EPEL (Extra Packages for Enterprise Linux) is an open-source package repository. In CentOS and RHEL, it provides the extra packages that are not available in the default repositories of CentOS and RHEL. You need to install the ‘x2goserver-xsession’ package also if you’re installing EPEL6 or EPEL7.
Install the X2Go Server Component on your CentOS 8 Server:
sudo dnf install -y x2goserver-xsession
Step 2 – Install Your Preferred Desktop Environment
Linux is nearly always associated with the command line, even though almost all Linux distributions have an attractive GUI on top of its powerful shell. What’s different about Linux is that you can choose your own desktop environments, but do not confuse Linux distribution with desktop environments.
Linux distribution is an operating system made from a collection of software running on the Linux kernel. Some distributions even look similar to each other and can be mistaken. For example, Ubuntu and Linux Mint. You can differentiate the Linux distribution by a number of factors such as the goal of distribution, package manager, ease of use, etc.
Desktop environments are installed and run on the Linux distributions as a software. The purpose of desktop environments is to make Linux more user-friendly. Basically, Linux GUI consists of four layers:
- X-server
- X-client
- Windows manager
- Desktop environment
All four layers play their part in putting together the final picture that we see on the screen.
Variety in Desktop Environments, Why?
Windows OS uses a built-in interface on all personal computers. In Windows 10, it was titled Fluent. Linux offers flexibility and customization in all areas, including desktop environments. Each desktop environment focuses on fulfilling a specific purpose. This helps users make a choice based on what they want, not what the company offers.
In this tutorial, we’ll be using lightweight desktop environments i.e., XFCE, KDE Plasma, MATE, and GNOME. X2Go doesn’t work on GNOME, but if you want to try it out, we’ve added the installation process down below.
Install XFCE Desktop Environment
XFCE is one of the most lightweight desktop environments for UNIX-like operating systems. It’s fast, visually appealing, and requires fewer resources to provide the core functionality. To connect with the X2Go server, it’s one of the best desktop environments. XFCE is the default desktop environment for Xubuntu distribution.
The Xfce package group is available in the EPEL repository. We need to enable it if it’s not already:
sudo dnf install epel-release
Now we can install XFCE. To do this, run:
sudo dnf groupinstall -y "Xfce"
Press Y and ENTER if prompted.
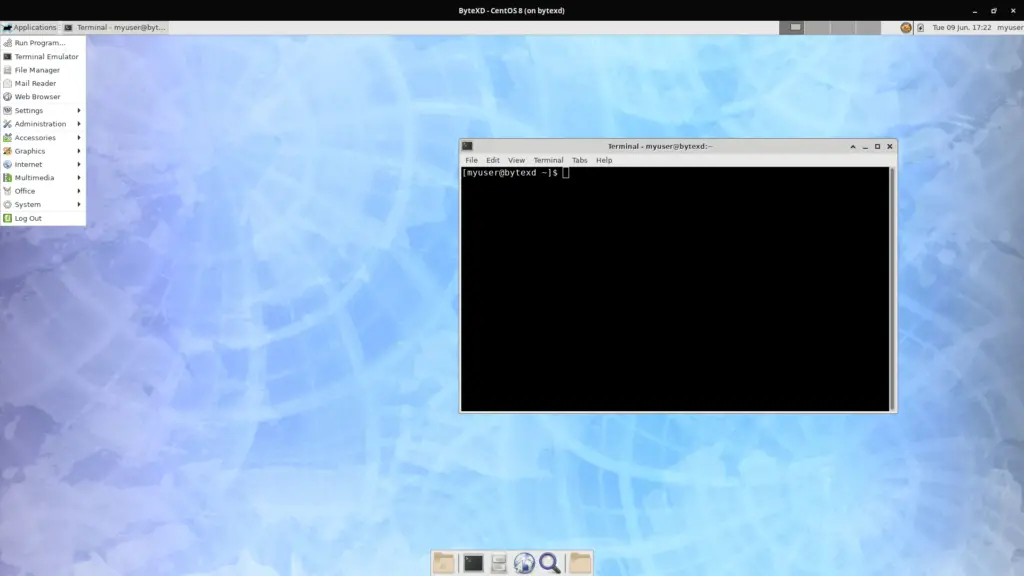
Here is how XFCE will look:
Install KDE Plasma Desktop Environment
KDE (K Desktop Environment) Plasma is one of the most popular (and relatively fully-featured) Linux desktop environments. It’s not as light-weight as XFCE and uses the KWin window manager. KDE provides a Windows-like desktop environment and is the default desktop environment for OpenSUSE, Slackware, and Mandriva.
To install KDE Plasma, we’ll need to have the EPEL repository as well as the PowerTools repository:
sudo dnf install epel-release
sudo dnf config-manager --set-enabled powertools
Next, install KDE Plasma run:
sudo dnf groupinstall -y "KDE Plasma Workspaces"
Press Y and ENTER if prompted.
We’ll need to make a few more edits. This is because there’s currently an issue when, even if you log in with a non-root sudo user, you may keep getting nagged by a prompt Authentication is required to create a color-managed device.
This error is not limited to using X2Go with CentOS 8, and you can find more information on it online.
For the purposes of this tutorial, we’ll use a quick fix. It gets the job done and can be considered the best fix for the time being. We’ll update this tutorial when we find a better solution. If you have a better solution, then please let us know in the comments!
Our recommended solution requires a few edits in one of the files, for which you’ll need a text editor. I’m a nano guy, but you can go with your favorite editor. So we’ll start by installing nano:
sudo dnf install nano
Now we can edit the file by running:
sudo nano /usr/share/polkit-1/rules.d/11-fedora-kde-policy.rules
Add the following code to the file:
polkit.addRule(function(action, subject) {
   if ((action.id == "org.freedesktop.color-manager.create-device" ||
        action.id == "org.freedesktop.color-manager.create-profile" ||
        action.id == "org.freedesktop.color-manager.delete-device" ||
        action.id == "org.freedesktop.color-manager.delete-profile" ||
        action.id == "org.freedesktop.color-manager.modify-device" ||
        action.id == "org.freedesktop.color-manager.modify-profile") &&
       subject.isInGroup("wheel")) {
      return polkit.Result.YES;
   }
});
Press Ctrl + X and ENTER to save the changes you just made.
Important Note
As the text at the top of the file mentions, these changes may be overridden when an update is made, so you’ll have to edit the file again.
Here is what KDE Plasma looks like:

Install MATE Desktop Environment
MATE is a continuation of the GNOME 2 desktop environment named MATE to avoid confusion with the GNOME environment. The origin of MATE was prompted by GNOME 3 replacing the traditional menu bar and taskbar, causing major controversy in the Linux and GNU communities. MATE is supported in multiple Linux distributions, including Debian, Fedora, and Ubuntu.
We must thank Reddit user /u/stenstorp, for their solution. Since the current maintainer of MATE for Fedora/CentOS isn’t currently maintaining it for CentOS 8, they’ve taken matters into their own hands and set up a working MATE for CentOS 8 that we can use. The following installation instructions can also be found in the “official unofficial” repository that’s maintained here at coprs/stenstorp/MATE. Thanks, /u/stenstorp!
First, we’ll enable the stenstorp/MATE repository by running the following command:
sudo dnf copr enable stenstorp/MATE
Press Y and ENTER when prompted.
Next, we’ll enable the PowerTools repository because some EPEL packages might depend on some PowerTools packages.
sudo dnf config-manager --set-enabled PowerTools
PowerTools repository contains packages that are required as dependencies when installing other applications or building applications from source code.
Note
In case you just checked the stenstorp/MATE repository page and are confused as to why they’re running an extra command to install the EPEL Repo, but we aren’t, that’s because we’ve already added an EPEL repository at the beginning of the tutorial.
Finally, run the following command to install MATE:
sudo dnf install NetworkManager-adsl NetworkManager-bluetooth NetworkManager-libreswan-gnome NetworkManager-openvpn-gnome NetworkManager-ovs NetworkManager-ppp NetworkManager-team NetworkManager-wifi NetworkManager-wwan abrt-desktop abrt-java-connector adwaita-gtk2-theme alsa-plugins-pulseaudio atril atril-caja atril-thumbnailer caja caja-actions caja-image-converter caja-open-terminal caja-sendto caja-wallpaper caja-xattr-tags dconf-editor engrampa eom firewall-config gnome-disk-utility gnome-epub-thumbnailer gstreamer1-plugins-ugly-free gtk2-engines gucharmap gvfs-afc gvfs-afp gvfs-archive gvfs-fuse gvfs-gphoto2 gvfs-mtp gvfs-smb initial-setup-gui libmatekbd libmatemixer libmateweather libsecret lm_sensors marco mate-applets mate-backgrounds mate-calc mate-control-center mate-desktop mate-dictionary mate-disk-usage-analyzer mate-icon-theme mate-media mate-menus mate-menus-preferences-category-menu mate-notification-daemon mate-panel mate-polkit mate-power-manager mate-screensaver mate-screenshot mate-search-tool mate-session-manager mate-settings-daemon mate-system-log mate-system-monitor mate-terminal mate-themes mate-user-admin mate-user-guide mozo network-manager-applet nm-connection-editor p7zip p7zip-plugins pluma seahorse seahorse-caja xdg-user-dirs-gtk
Here is what MATE Desktop looks like:

GNOME Desktop Environment (Not Working)
GNOME is an open-source desktop environment for UNIX-like operating systems. The latest version of GNOME is GNOME 3, which doesn’t run X2Go Client. It’s also the default desktop environment for Fedora and Ubuntu.
Unfortunately, X2Go is probably not compatible with GNOME 3.12 and later, and CentOS 8 uses GNOME 3.28. When we tried running X2Go on GNOME, it didn’t work.
It returns an introductory Help window on the first run, along with a black screen in the background with a visible cursor.

We’ll update this section once we get it working. If you have a solution, just let us know in the comments and we’ll get in touch!
If you’d still like to try it out yourself, you can install GNOME on CentOS 8.
To install GNOME, we just have to install the workstation group by running:
sudo dnf groupinstall workstation
Press Y and ENTER whenever prompted.
Step 3 – Configure CentOS 8 Firewalld
X2Go uses SSH as a transport mechanism.
If your server doesn’t allow incoming SSH connections because of firewall rules, then you can open the SSH port 22 to allow incoming traffic by running the following commands:
firewall-cmd --permanent --zone=public --add-service=ssh
firewall-cmd --reload
Step 4 – Install X2Go Client Locally
The X2Go Client is the software that you’ll run on your computer, the one from which you want to connect to the server. It can be installed on almost any operations system, but the requirements for installing X2Go Client are different on different operating systems:
- MS Windows: the X11 server is shipped with X2Go Client
- Linux: the client part of X2Go uses the local Xorg server
- Mac OS X: the XQuartz X11 server must be installed as an extra component
Install X2Go Client on Windows
Installing X2Go on Windows is straightforward. You just have to download the X2Go Client, run the executable, and follow the steps to finish the installation.
Download the latest X2Go Client for Windows from the X2Go Documentation and install it with the install Wizard.
Install X2Go Client on Ubuntu & Debian
To install the X2Go Client on Ubuntu or Debian, run the following command:
sudo apt install x2goclient
Install X2Go Client on CentOS/RHEL & Fedora
To install the X2Go Client on CentOS/RHEL or Fedora, run the following command:
sudo yum install x2goclient
Press Y and ENTER if prompted.
Install X2Go Client on OSX
To install the X2Go client on a Mac, just go to the X2Go Download Page and in the X2Go Client section, select the .dmg to download according to your OS.
Step 5 – Connect to your Server using X2Go
The X2Go Client has the same interface on every Operating System.
The first time running the X2Go Client, it’ll probably open 2 windows by default:
- The X2Go Dashboard
- A window to create a new session since this is the first time running it and you have no previous sessions. If you don’t see this window, then go to the top menu in the upper left corner, click Session -> New Session
The screen should look something like this:

If it doesn’t open the ‘new session’ window by default, then you can open it by selecting session -> new session from the top left side of the screen. Once the new window has been opened, fill up the required information.
Session name: A unique name for your session (to easily tell different sessions apart).
Host: your server’s IP address or hostname.
Login: the username with which you’re able to connect with the server.
SSH port: 22 (by default); you can change it as per your SSH config file settings (/etc/ssh/sshd_config).
RSA/DSA Key: optional RSA/DSA keys. To use a private key, click on the folder next to the ‘Use RSA/DSA key for ssh connections’ and browse for your private key. You can leave it blank if you didn’t opt to use the secure SSH keys, in which case, X2Go client will ask for a password each time you log in.
Session type: your desktop environment (for example, XFCE).
Configuring a New Session
To connect to the server, we’ll have to configure a new session in X2Go.
In this guide, we’ll connect using password authentication, but you can also use SSH keys if you prefer.
We’ll just fill in the minimum information – Session name, Host, Login, Session Type, change the icon for personalization purposes and disable printer sharing.

You’ll notice we’ve selected Session type: XFCE in this example. You can conveniently change that to your selected session type.
Disable Client-side printing support
For the purpose of this tutorial, we’ll disable X2Go Client-Side Printing because if we leave it enabled, then we’ll get a warning when connecting to the server. If you want to know more about this topic, then visit the X2Go Documentation – X2Go Client-Side Printing.
You can disable it from the Media tab when creating/editing a session.
Just navigate to the Media tab, and at the bottom, uncheck Client-side printing support.

When you’ve finished configuring your session, just click ok and the session will be configured and saved in the right section of the X2Go interface.
Click it and then it’ll open a prompt with the username already filled, from your session configuration, and all you have to do is input your password and click ok, and then it should start connecting to your remote desktop.

Here’s how it looks when connecting with each of the working desktop environments:
Connecting using XFCE Desktop Environment
Connecting using KDE Plasma Desktop Environment
Connecting using MATE Desktop Environment
Conclusion
When it comes to Linux distributions, VNC is the go-to remote desktop solution. That’s kind of surprising as X2Go is not just faster but provides a smooth experience even at low bandwidth (unlike other RDPs).
If you haven’t already, make sure to give X2Go a try! I’m sure you’ll enjoy it!
Tell us about your experience and leave a comment if something you’re having a problem with X2Go. Where there’s a problem, there’s always a solution!


Thanks for this very complete write up. Have you tried desktop sharing? See
https://wiki.x2go.org/doku.php/doc:usage:desktop-sharing
I cannot get it to work on CentOS 8 but it works on CentOS 7. Not sure what the difference is.
Hi!
I’m afraid I haven’t taken desktop sharing into consideration, to be honest. But I am now.
Thanks a lot for the tip. I’m glad you got it to work.