At its most basic description the internet can be summarized as computers interconnected to each other, talking and exchanging data, establishing communication among themselves in bits, zeros and ones, making up all the great content we get off the internet.
From watching videos on YouTube to laughing about the latest memes shared by our friends on social media. Computers use different protocols to communicate with each other, interpreted by our operating systems and presented by our favorite browsers.
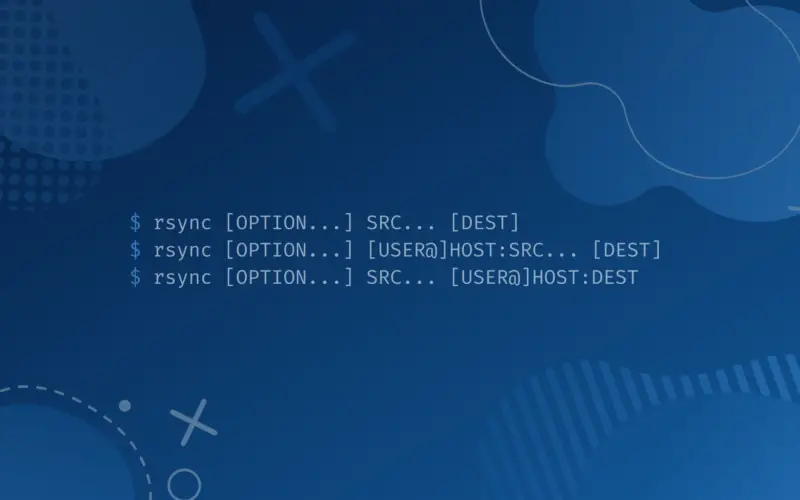
But there are many ways computers can communicate with each other, and one of the most cherished and beloved methods by advanced Linux users is using rsync.
rsync is a command line file transfer and synchronization utility developed at the dawn of the internet era more than 25 years ago. It is an open source project that is actively in development to this day, so it is trustworthy to use as it has been vetted by professionals thoroughly throughout its many years of existence.
While many graphical applications incorporate rsync under the hood the most efficient and quickest method to use it is through the command line.
In this tutorial we’ll learn how to use rsync to transfer and sync files between machines, as well as explore some of rsync‘s options, through examples and detailed explanations.
Table of Contents
- Installing Rsync
- 1. Transfer File From Local To Remote Host
- 2. Transfer File From Remote Host To Local
- 3. Transfer Directory Content And Preserve Attributes
- 4. Transferring and Compression
- 5. Sync Exact Replicas of Directories
- 6. Sync Unless Newer
- 7. Rsync Dry Run
- 8. Rsync Verbose Output
- 9. Rsync Multiple Files To A Remote Server
- 10. Difference In Files Between Source and Destination In Rsync
- Conclusion
Installing Rsync
While most of the Linux distributions come pre-installed with rsync, let’s make sure we have it installed on our system.
Run the command:
which rsync
If rsync is installed it will output the directory location where it’s installed.
/usr/bin/rsync
If nothing appears it means your Linux distribution didn’t bundle it, so let’s install it.
For Debian based systems run the command:
sudo apt update
sudo apt install rsync
For Arch based systems run the command:
sudo pacman -S rsync
For RHEL based systems run the command:
sudo dnf update
sudo dnf install rsync
Rsync will proceed to install in your machine along with any dependencies. Dependencies are other utilities that our application in use depends on to function, sometimes optionally and most of the time absolutely needed.
1. Transfer File From Local To Remote Host
In its most basic form rsync will transfer a file or a directory with files inside to a remote machine.
Remote in this sense can be in a local area network. Like for example sending files between your own computers at home, or through the internet remotely.
Let’s check the following example.

ls -lha
rsync Screenshot1.png bts@155.26.87.96:tmnt/raphael
Here:
- we listed files in a directory called Pictures
- we saw there was a file called Screenshot1.png
- we took
rsyncand told it to transfer Screenshot1.png through a network connection to a server with an IP address 155.26.87.96 that has a system user bts - the file Screenshot1.png will be placed starting at the home directory of the bts user followed by nested directories tmnt/raphael, so the file Screenshot1.png will end up at the home directory of the user bts with a relative path in the remote computer of ~/tmnt/raphael/Screenshot1.png.
That’s it. That was all that was needed to send a file to a remote server.
2. Transfer File From Remote Host To Local
If we wanted to download a file to a local machine from a remote server, we simply reverse the order with the following command.
rsync bts@155.26.87.96:tmnt/raphael/Screenshot1.png /Pictures
This will download the remote file Screenshot1.png inside a local directory called Pictures. It’s that simple and that cool.
3. Transfer Directory Content And Preserve Attributes
Rsync has lots of options to make life easier.
One of the simpler and helpful one is the ability to preserve the system attributes of a file, like for example when a picture was taken last summer during that Cancun trip, you would want all the photos to keep the date attributes when backing them up to a remote machine, so that they will be easier to find and categorize.

You absolutely don’t want the date attribute to be that of the date when it was backuped like it normally would happen in a simple copy command. So you use rsync with an a option.
rsync -ar cancun2022 bts@155.26.87.96:tmnt/raphael
Notice the -ar< options? This does two things:
- First of all this will transfer the cancun2022 directory and all of its content (all of your sunny Cancun pictures) to the same remote machine in the previous example. Everything in the directory gets transferred because of the
roption used, which stands for recursively.Recursively working with directories in Linux gets to be a common practice, so once you’re more of a seasoned Linux user it will become second nature to you. - The other thing that happened in the example was the directory and, recursively, all of the pictures inside kept the
dateattributes of the pictures, the directory itself kept the date ofApril 14 at 10:54 PM, and all the pictures kept their date attributes of when they were taken.As long as you keep using the-aoption you will always keep the original information. It’s important to note that attributes of a file in Linux are not the same as meta data.
4. Transferring and Compression
Another useful option in rsync that you can use is the compression feature.
Compression happens during the transfer, there is no need to compress the files beforehand.
So let’s continue with the Cancun example and let’s add the compression option with the -z option.
rsync -raz cancun2022 bts@155.26.87.96:tmnt/raphael
Now the cancun2022 directory and all of its content will compress with the zlib library in your system, in this case zlib is a dependency of rsync.
Here we learn a little bit more about dependencies, if we don’t have zlib installed in our system rsync can function normally but it would not be able to compress files using the compression option -z.
zlib is normally installed in most systems and it’s what’s used for zip compression.
Notice also the order of the options used.
In the fourth example we used -ar, a first and r second, the order of these two options doesn’t affect each other much before the command gets executed.
That’s why in the fifth example we interchanged them without any problems, -ra, but the order of the third option is indeed important because we must indicate that we want the -z option last after we told it to recursively archive. In the chance we inputted -zar with z coming before -ar, rsync would try to compress first and then perform the options to archive recursively.
So with this example we learn that the order of options sometimes don’t matter and sometimes do matter.
In this case, compression is a very CPU intensive task so using the -z option should be done only when it’s beneficial.
When Is Compression Beneficial With Rsync?
When is compression beneficial? When the contents of the transfer are able to be compressed.
One thing most new users don’t know is that not all file formats can be compressed further, so they end up doing CPU intensive -z compression without any single benefit.
How to know which files are able to be compressed?
The rule of thumb is that if the file format is already compressed then further -z compression will not help much or at all. For example images in JPEG format are already compressed using the JPEG library, database files already zipped in GZIP format with the extension of sql.gz are already compressed.
Anything that hasn’t been compressed benefits such as Microsoft Office files, MySQL databases, text documents are all files that can be compressed further. In our cancun2022 example it wouldn’t be beneficial because the jpeg images would not be further compressed, so in that example we would omit the -z compression option.
So knowing when to use the -z option is about knowing the type of file that you will transfer and compress. Compressing the files does save you on storage but just remember that it’s a trade of storage cost versus time of compression and CPU cost of compression.
In other words, is it cheaper for you to save a few MB when transferring and storing files or is it more expensive for you to perform the compression?
In this case compression would not be worth it because it would be considered more expensive for you to do the -z option.
5. Sync Exact Replicas of Directories
Rsync gets its name because beyond just transferring files it can scan and create exact replicas of directories.
We’re going to learn how to sync directories to have an exact replica, mainly for backup purposes.
Let’s try another example, say we want to backup an exact replica of all the files of a website you have on a server. The site public files we want to backup are in a directory called www nested inside a directory called site and we will save them in a local directory in our computer named backupwww.
rsync -ra bts@155.26.87.96:site/www /backupwww
There we grab all the files, but websites are constantly changing, we are always adding new images and files. If we run the same command it will again download all the files. But we don’t want to create a mess locally, so we run the --delete-before option.
rsync -ra --delete-before bts@155.26.87.96:site/www /backupwww
This will delete files in backupwww locally before downloading new files, if the files locally match the same name as in the server, meaning it deletes the backup files we saved on our computer to replace them with the ones on the server.
This ensures that you always have the latest files backed up locally exactly as they are on the server and not some outdated ones. There are a few variations to the delete option.
A simple --delete will delete files locally that no longer exist on the server. Good if you delete some pictures on the websites and no longer need them backuped locally.
Another option is --delete-during which does the same operation as --delete-before but deletes during the transfers and not before, this option is good if your server has a small amount of memory RAM.
It’s slower as it decides each operation before doing them but it’s more efficient on memory, it’s good to use with a VPS with not much resources.
In essence the --delete option allows us to keep exact replicas of directories, sometimes this is a good method to perform backups, say for example where there aren’t many frequent changes. Just having an identical copy locally is enough of a backup.
6. Sync Unless Newer
Then there are other times that websites are more dynamic and are updated frequently and upload lots of new files.
In those cases we don’t want to be re-downloading everything, we just want to download only the newer files. For that we use the -u option, the -u option tells rsync to ignore already transferred files, u it is newer. Continuing with our example.
rsync -rau bts@155.26.87.96:site/www /backupwww
This will, on the first download, copy a full backup of all the website files and on subsequent execution of the command, will download only files with attributes newer than the ones already present locally. This is, most of the time, a better backup method because it only downloads files not already present. It’s not an exact replica on each download. It is an incremental replica. Whichever method is suitable to you depends on your needs.
Rsync is so versatile and can be used at a personal level to sync your password database between your computers. It can be used to backup your websites. It can be used as a cut and paste within the same computer.
Learning and using rsync constantly in your computer life will only assist you to make things easier overall and it’s a worthy investment. All with the one mighty utility that is rsync, for it has been one of the most beloved Linux applications of all time. Go on, try it out yourself.
7. Rsync Dry Run
As you might have noticed by now, rsync is a very powerful utility.
It allows us to make copies to send and to receive files when syncing, but at the same time it allows us to delete files. Every time we are working in an environment in a way that we will allow a utility to delete files by its choice it can be a dangerous situation.
As opposed to deleting files manually where we do a human eye check on every file we delete, utilities deleting on instructions will have no qualm about what’s set to delete.
So making sure we provide the correct instructions is very important.
Sometimes when using the command line it can be daunting to new users because of exactly this reason.
But rsync has a feature where we can provide it instructions without rsync actually doing it.
It’s called dry run, dry run means to make a pass at executing the command but not really doing it, it’s just a simulated attempt, and when rsync uses the verbose option to display it’s output, dry running will display what it would have done if you actually executed the command.
In simpler terms, dry run allows you to test a command before actually doing it.

Here we see an example of dry running in action.
rsync -av --dry-run map.png root@rsyncbyexample:runningman/
Here we are sending an image map.png to a server called rsyncbyexample connecting under the root user and sending the image to a folder called runningman using the --dry-run option.
Rsync simulates all the commands and right at the end of the output of the first demo it tells us (Dry RUN). Nothing outputted actually happened. While the second demo doesn’t have the --dry-run option and actually executes the command of sending the file to the server.
The concept of dry running is very common in Linux command line utilities, after a while of using the command line you will get used to dry running utilities, as many of them have this butt saving ability.
8. Rsync Verbose Output
In the previous example we mentioned another option called verbose.
In the Linux command line there’s no set rule that utilities must tell us what is it that they have performed.
Some utilities are very rudimentary and don’t tell us what is that they have performed, while they actually executed their command, sometimes we have no clue of what. We humans are very visual creatures and need any type of visual confirmation so our brains know that the task was performed.
Computers actually do the task and have no care for confirmation. Luckily for us humans most command line utilities do give us feedback of what was performed, some can actually give us lots of information behind the verbose option.
Let’s redo the previous example but this time let’s show the verbose option. In rsync verbose is used with the -v option.

rsync -a --dry-run map.png root@rsyncbyexample:runningman/
If we execute the command without the -v option and perform a dry run, nothing will be displayed because rsync doesn’t give us much feedback if we don’t don’t use the verbose mode.
In this example rsync actually simulated sending the image map.png to a server called rsyncbyexample connecting under the root user and sending the image to a folder called runningman by dry running, the command was performed, the computer is satisfied without errors but we humans got no visual clue that it did happen.
In the second demo we actually used -v mode, rsync did the same task, it gave us feedback of what it simulated to do in the dry run.
Verbose option is another Linux command line mainstay among its utilities because it’s a way for developers to give us users feedback of what their programs are doing.
Sometimes and I would dare say most of the time, advanced command line users don’t need this feedback and that’s why the default of most utilities is to provide little to no information when executing commands on the command line.
But it’s good that it exists and it’s good practice to always use it, especially on complex utilities like rsync as we learned by this example.
9. Rsync Multiple Files To A Remote Server
Working with rsync we get used to transferring and syncing files quickly in the command line, but it can get tedious if we would need to send a file one by one. Luckily again we can command it to send multiple files at the same time.

rsync -rav {map1.png,map2.png,map3.png,cancun2022} root@rsyncbyexample:runningman/
In this example we list our files in our local directory, we see we have 3 more map image files to upload to the runningman directory on our rsyncbyexample server. And at the same time we want to upload our cancun2022 directory with all of our pictures inside of it to share with our family.
We don’t want to do this one by one, so we enclose all the files between a bracket { }, separated by a comma and with no spaces in-between them.
Because we used the -r recursive option our cancun2022 directory will upload along with all the content inside. And there, in one command, we sent multiple files by rsync in this example.
10. Difference In Files Between Source and Destination In Rsync
When we want to sync two directories to be exactly like each other, it doesn’t matter if locally or remotely, and we are not sure which files are missing from one another, rsync has another useful option to compare and output the files that are missing. It tells us where they are missing from, either at the source or the destination directory, and changes in their size or timestamp attributes.
Right out of the bat I will note that the quickest way professional system administrators tell the history of a directory is just by observing changes in attributes, this history allows us to diagnose if or when a server got hacked, for example.
So learning to observe file attributes is an important habit for Linux users.
Now in this example we will use the -i option so that rsync can spot and output to us which files are missing and where.

rsync -ravi cancun2022 root@rsyncbyexample:runningman/cancun2020
We want to know if the cancun2022 directory in our local computer and the cancun2022 directory in the remote server have the same files and if there are any missing.
First we list the content of cancun2022 and see that there’s 4 party pictures.
Then we rsync, with the -i option, our local cancun2022 directory and the one in the server nested in the runningman directory
Because we used the -v verbose option as well, rsync tells us that it’s sending the file list incrementally, this list contains the file names and file attributes
Right away rsync tells us that there are 4 files that are not present in both (the source and destination) directories. We see a < and next to it an f, the < denotes that the source has these files (and thus missing from destination) and the f denotes that they are files (and not directories). All possible attributes that rsync can display are:
f– for filesd– for directoriest– when the timestamp has changeds– when the size has changed<– for source>– for destination
Furthermore, these attributes are important.
If for example we see that the source and destination both have an image file with the same name but the rsync -i output tells us >s, it means the size of the uploaded image has changed from the source, meaning that it’s possible that the file didn’t upload correctly or some other funny business happened with it at the server.
Another example of the usefulness of these attributes, for example let’s say we backup a copy of our website on our remote server to our local computer. The rsync -i option tells us <ts on the index.php file is different then the one in our backup. That means the size and timestamp of our website index.php has changed. We know for a fact we haven’t updated index.php, it means something has modified it on our server. It’s a great indication that our website got hacked and our index.php file got modified to server some malware.
Just a simple -i option in rsync can give us great information and insight into our machines and syncs.
Conclusion
In this tutorial we learned how to use rsync to copy files and directories from a local to remote machine and vice versa. We also learned how to use some of rsync’s options when trasnfering files.
If you have any feedback or questions feel free to leave us a comment and we’ll get back to you as soon as we can.


