The MATE desktop environment uses GNOME 2 to provide an attractive environment while preserving the traditional GNOME essence. It is under active development. Various distributions support MATE.
It comes with a number of applications to help with daily tasks and utilities.
When talking about MATE, the distribution that comes to mind is the Ubuntu Mate, which is Ubuntu’s official derivative. It is a simple operating system with a customizable desktop environment. It has average hardware requirements. The major difference between Ubuntu Mate and Ubuntu is their user interface.
Ubuntu uses a rather ambitious GNOME 3, while Ubuntu MATE uses the MATE desktop platform as its user interface.
Follow the methods mentioned in this article, and you’ll have MATE themes in a matter of minutes. We’ll look into ways of installing the MATE desktop themes as well as the icons theme.
Table of Contents
Install MATE Themes
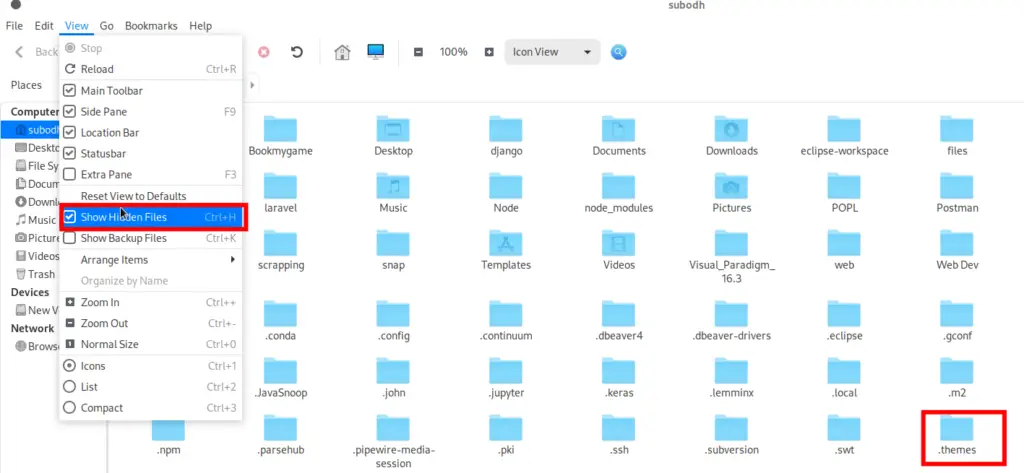
By default, MATE comes with various themes which need not be installed and can be selected and applied with a click. In order to install MATE themes on your computer, you need to make sure you have a .themes directory inside your home directory. Go to your home directory and click the View option. On the dropdown menu, you’ll see Show Hidden Files. Click that, and hidden files should be visible to you. If you see a .themes directory, great!
If not, you should create one by using the following command in the home directory.
sudo mkdir .themes
Don’t forget to put the dot preceding the folder name.
Once you’ve created the folder, the next step is to add a new theme to the folder. For that, we will download the themes. There are a number of platforms that allows us to download the MATE themes. This tutorial will use the MATE-look portal.
Follow the following steps to download and install the themes.
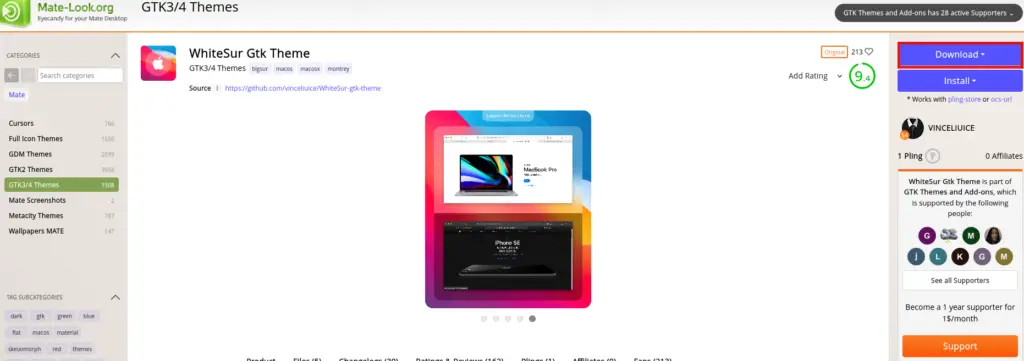
- Browse the portal and choose the best theme according to your need and taste. Next, click the download button.

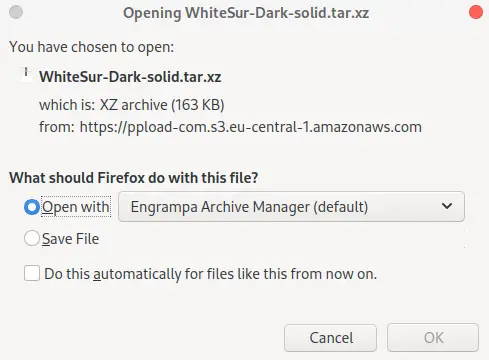
- Choose a zip file, and a download dialog box appears. Open the file with an archive manager.

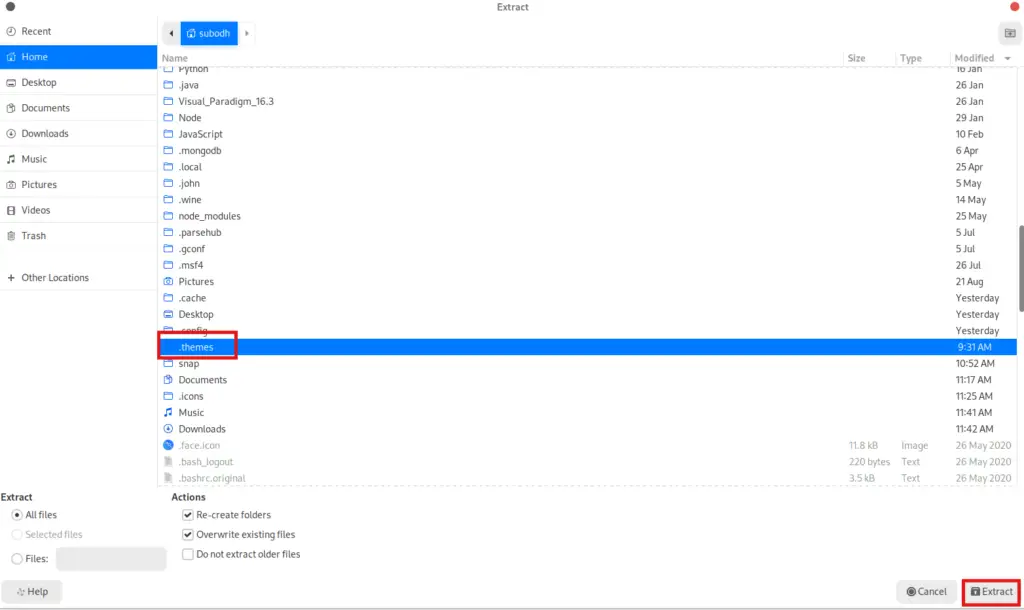
- You can directly extract it to the .themes directory that you created just a while ago.


- Alternatively, you can choose the Save File option, extract the folder in a specific location, and browse it. Copy the extracted folder and paste it inside the .themes directory. Whichever way you choose, the downloaded themes folder should be inside the .themes directory.

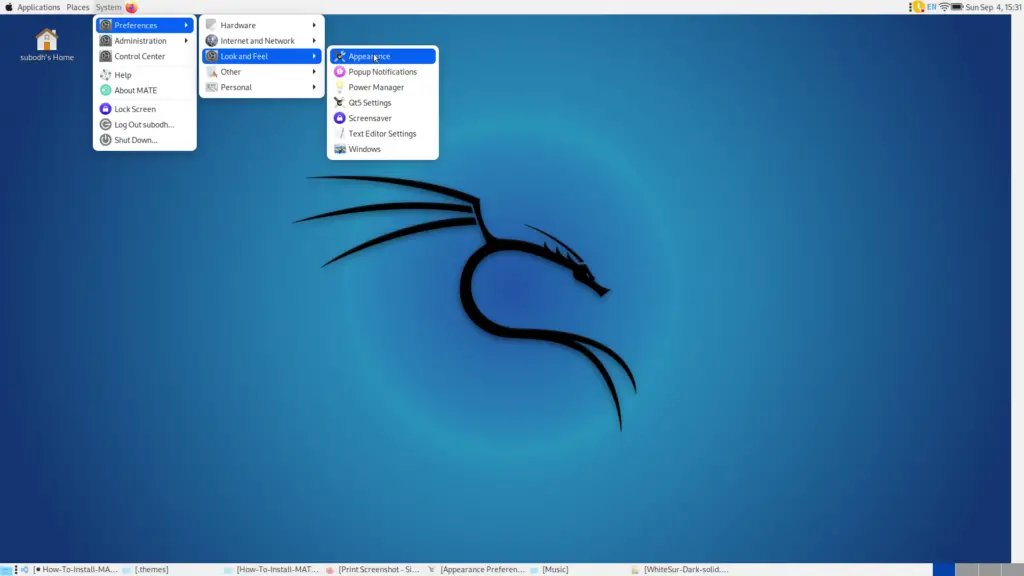
- Next, go to the Appearance setting.
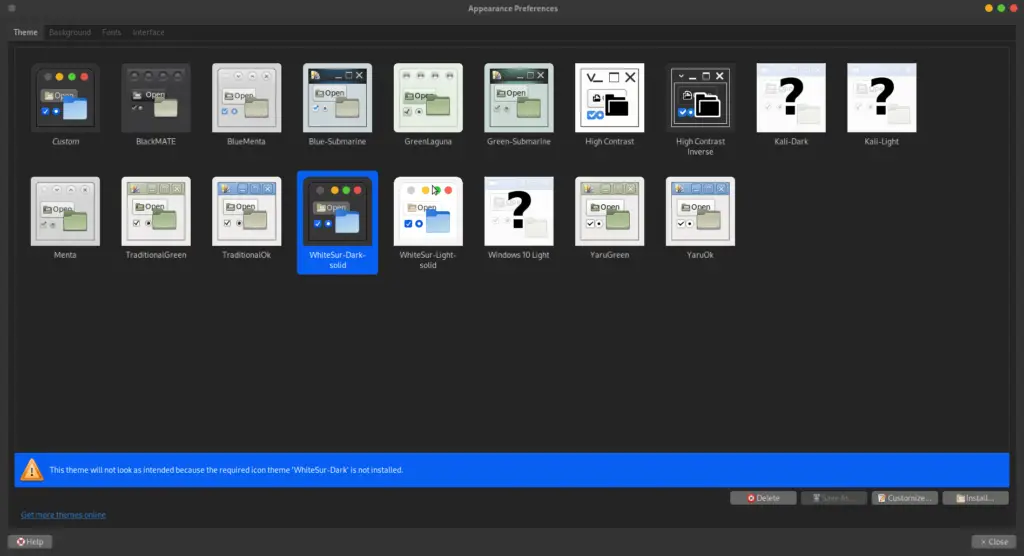
 Then, the list of themes will appear. The theme we just downloaded also appears in the list

- Click on the theme, which will be applied to your system.Sometimes, you might be prompted with an error, as in the picture above.
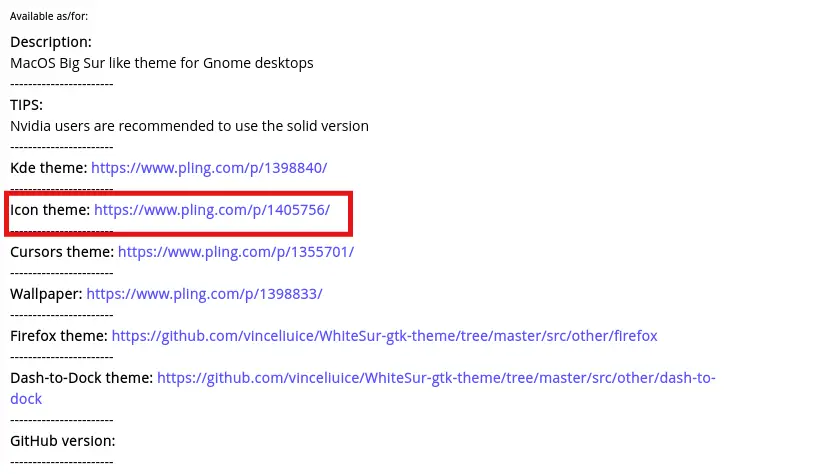
It means the theme you downloaded uses an icon that isn’t available in your system. You can check the description section of the theme you downloaded to get the icon theme. Then, look for the link for the icon themes to install it.
Install MATE Icon Themes
The following guide explains how to install the WhiteSur icon theme and the corresponding icon theme for WhiteSur Theme that we just installed in our system.
To customize your icons, you need to browse through the MATE-look portal for icon themes. Follow these steps:
- Look for the corresponding icon theme in the description of the WhiteSur Theme.

You can find the link to the icon theme. Go to the link and download the icon theme of your choice. - Extract the compressed file to the
.iconsdirectory in your home directory. If there isn’t an.iconsdirectory, create it like we created the .themes directory earlier.

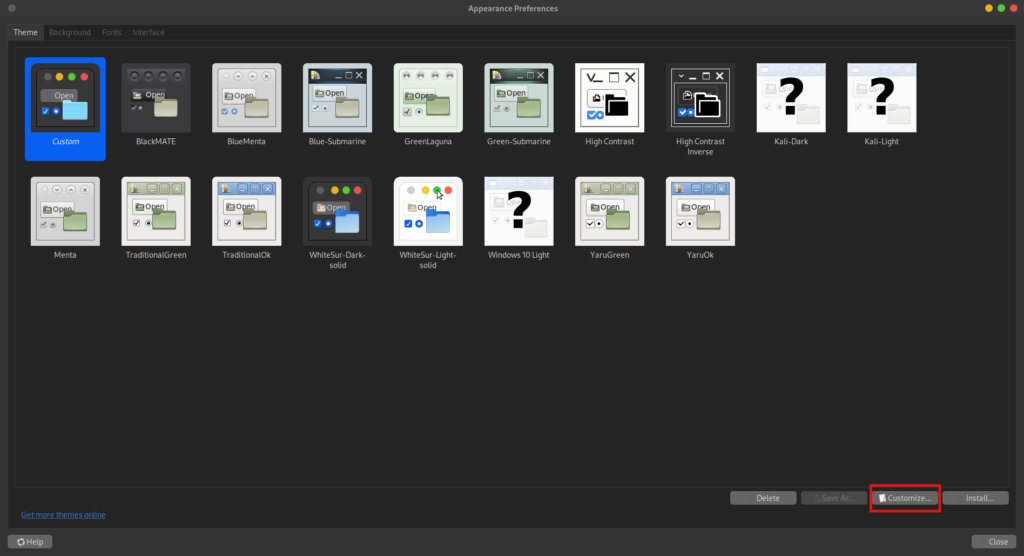
- Go to Appearance and click on the Customize button.

After that, check for the list of icons from the Icon menu. You should see the icon theme you downloaded. Select the icon theme to apply it.
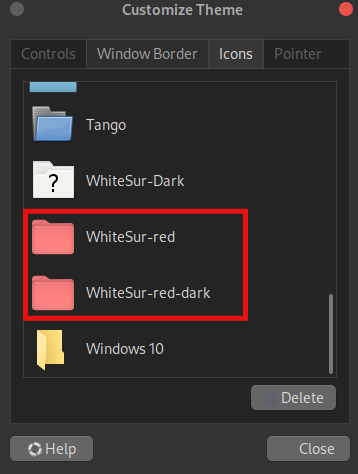
Now, the themes have been applied.
Conclusion
In this article, we learned how to install MATE icon themes. The methods described in the article are very easy and efficient. If you’ve tried all the steps, you should be able to download and change themes in your system running the MATE desktop environment.
You can customize by changing themes and seeing what kind of theme works best for you. If you are unsure about themes, you should probably stick with the popular ones and change if you do not like them.

