This tutorial teaches you how to sync files between two Ubuntu 22.04 desktop machines using rsync with SSH keys.
Requirements
Although most Linux distros have both tools installed, some new versions may lack them. So, the first step toward using rsync with SSH keys is installing rsync on Ubuntu. Next, you should install the OpenSSH server and configure it as follows.
Update and upgrade packages before the installation.
sudo apt update
sudo apt upgrade
Install the OpenSSH server.
sudo apt install openssh-server
Enable SSH service.
sudo systemctl enable ssh
Start the service.
sudo systemctl start ssh
Confirm whether the service is running.
sudo systemctl status ssh
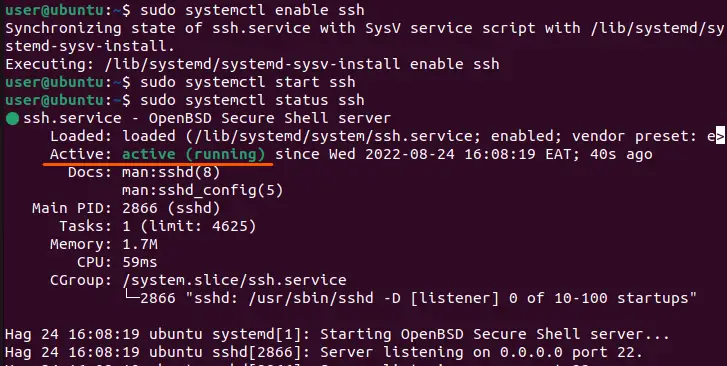
Configure firewall, allowing SSH to run on port 22.
sudo ufw allow ssh
sudo ufw enable
sudo ufw status
Connect the Two machines
Is the remote machine reachable?
After installing rsync and SSH server, the next step is to ensure the remote machine is reachable. We can use the ping command for that purpose.
ping [hostname or ip address]
e.g.
ping 192.168.56.107
PING 192.168.56.107 (192.168.56.107) 56(84) bytes of data.
64 bytes from 192.168.56.107: icmp_seq=1 ttl=64 time=1.03 ms
64 bytes from 192.168.56.107: icmp_seq=2 ttl=64 time=0.847 ms
64 bytes from 192.168.56.107: icmp_seq=3 ttl=64 time=0.641 ms
64 bytes from 192.168.56.107: icmp_seq=4 ttl=64 time=0.904 ms
64 bytes from 192.168.56.107: icmp_seq=5 ttl=64 time=1.10 ms
^C
--- 192.168.56.107 ping statistics ---
5 packets transmitted, 5 received, 0% packet loss, time 4100ms
rtt min/avg/max/mdev = 0.641/0.903/1.096/0.158 ms
The system receives packets from the remote machine. Since the two machines communicate, let’s try logging into the remote machine.
Generate SSH keys
Generate SSH keys on the local machine using the ssh-keygen command.
ssh-keygen -t rsa -b 4096
-t is the SSH key type, while -b denotes the number of bits.
Answer prompts till the key pairs are generated. On checking the keys,
ls ~/.ssh/
We find two pairs: public and private keys.
id_rsa id_rsa.pub known_hosts
Let’s copy the public key (ending in .pub) to the remote machine. Before that, let’s create the destination directory and file.
Store the public keys remotely
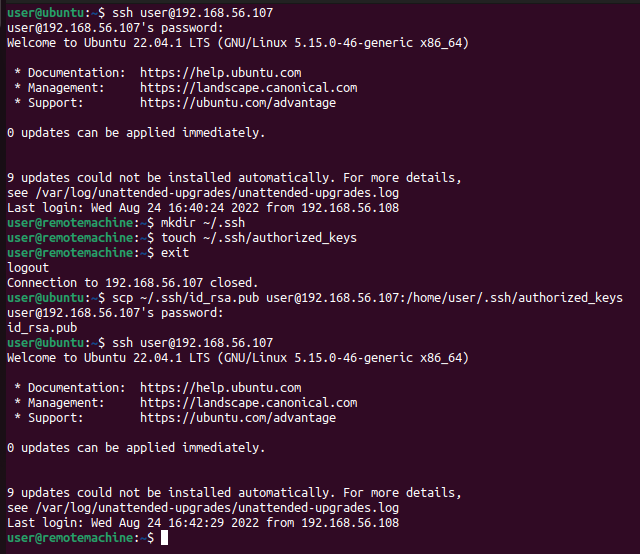
Log into the remote machine using a password.
ssh [username]@[hostname or ip address]
e.g.
ssh [email protected]
Create a .ssh directory and an authorized_keys file inside it.
mkdir ~/.ssh
touch ~/.ssh/authorized_keys
Next, log out of the remote machine.
exit
And return to the local machine before sending the public key to the remote machine’s ~/.ssh/authorized_keys file.
scp ~/.ssh/id_rsa.pub [email protected]:/home/user/.ssh/authorized_keys
Now try logging in without a password.
Log in with SSH Keys
ssh [user]@[ip address]
e.g.
ssh [email protected]
And voila, we are logged into the remote machine without retyping the password!
Now that we can log into the remote machine, let’s start syncing files across the two machines.
Lab Environment Setup
This section creates an environment to transfer
- files only,
- files and directories recursively, and
- all files and directories with their ownership, timestamps and modification details.
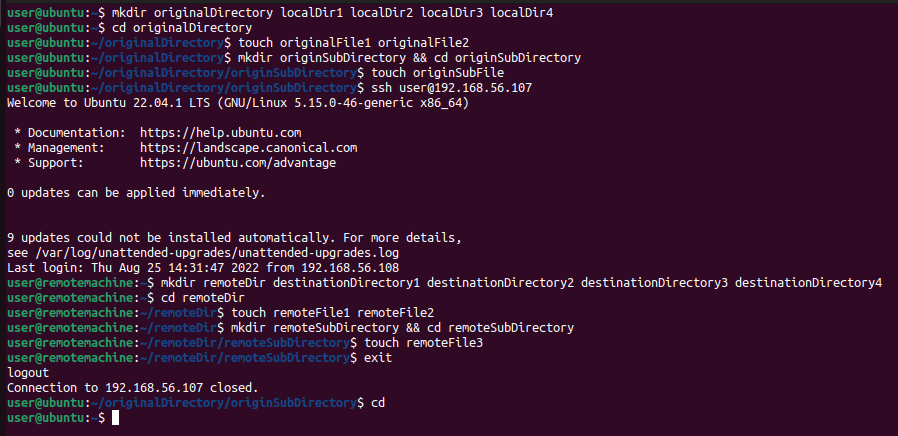
Let’s start by creating the local files and directories.
Host Machine
mkdir originalDirectory localDir1 localDir2 localDir3 localDir4
cd originalDirectory
touch originalFile1 originalFile2
mkdir originSubDirectory && cd originSubDirectory
touch originSubFile
Then, repeat the procedure in the remote machine but with different file and directory names.
First, SSH into the remote machine.
ssh [username]@[hostname or ip address]
e.g.
ssh [email protected]
Remote Machine
mkdir remoteDir destinationDirectory1 destinationDirectory2 destinationDirectory3 destinationDirectory4
cd remoteDir
touch remoteFile1 remoteFile2
mkdir remoteSubDirectory && cd remoteSubDirectory
touch remoteFile3
Lastly, return to the local machine’s home directory.
exit
cd
That’s all we need to start syncing files.
Examples
This section illustrates how to sync files and directories across machines using the following rsync options:
-a: sync all file details, including timestamps, modifications, users and groups.-n: run the command but don’t make changes,-P: show the progress of the sync process.-r: recursive file/directory sync.-z: compress large data during transfer and decompress it at the destination.
Example 1: Sync Files Only
A. From Local to Remote Machine
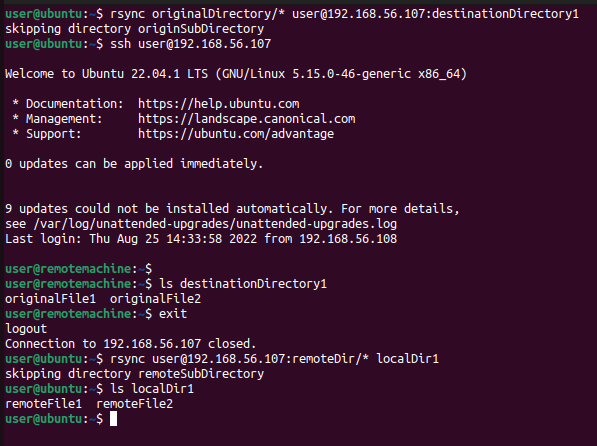
rsync originalDirectory/* [email protected]:destinationDirectory1
skipping directory originSubDirectory
ssh [email protected]
ls destinationDirectory1
originalFile1 originalFile2
The system skipped directories and transferred only regular files: originalFile1 and originalFile2. Let’s repeat the above process, but instead transfer files from the remote machine to the local one.
B. From Remote to Local Machine
rsync [email protected]:remoteDir/* localDir1
ls localDir1
remoteFile1 remoteFile2
Likewise, only regular files, remoteFile1 and remoteFile2, were synced.
Example 2: Sync Files and Folders Recursively
A. From Local to Remote Machine
ssh [email protected]
ls -l destinationDirectory2
rsync -rzP originalDirectory/ [email protected]:destinationDirectory2
sh [email protected]
ls -l destinationDirectory2
user@ubuntu:~$ ssh [email protected]
Welcome to Ubuntu 22.04.1 LTS (GNU/Linux 5.15.0-46-generic x86_64)

* Documentation: https://help.ubuntu.com
* Management: https://landscape.canonical.com
* Support: https://ubuntu.com/advantage

0 updates can be applied immediately.

9 updates could not be installed automatically. For more details,
see /var/log/unattended-upgrades/unattended-upgrades.log
Last login: Thu Aug 25 15:06:57 2022 from 192.168.56.108
user@remotemachine:~$ ls -l destinationDirectory2
total 0
user@remotemachine:~$ exit
logout
Connection to 192.168.56.107 closed.
user@ubuntu:~$ rsync -rzP originalDirectory/ [email protected]:destinationDirectory2
sending incremental file list
originalFile1
0 100% 0.00kB/s 0:00:00 (xfr#1, to-chk=3/5)
originalFile2
0 100% 0.00kB/s 0:00:00 (xfr#2, to-chk=2/5)
originSubDirectory/
originSubDirectory/originSubFile
0 100% 0.00kB/s 0:00:00 (xfr#3, to-chk=0/5)
user@ubuntu:~$ ssh [email protected]
Welcome to Ubuntu 22.04.1 LTS (GNU/Linux 5.15.0-46-generic x86_64)

* Documentation: https://help.ubuntu.com
* Management: https://landscape.canonical.com
* Support: https://ubuntu.com/advantage

0 updates can be applied immediately.

9 updates could not be installed automatically. For more details,
see /var/log/unattended-upgrades/unattended-upgrades.log

Last login: Thu Aug 25 15:07:22 2022 from 192.168.56.108
user@remotemachine:~$ ls -l destinationDirectory2
total 4
-rw-rw-r-- 1 user user 0 Hag 25 15:08 originalFile1
-rw-rw-r-- 1 user user 0 Hag 25 15:08 originalFile2
drwxrwxr-x 2 user user 4096 Hag 25 15:08 originSubDirectory
B. From Remote to Local Machine
exit
ls -l localDir3
rsync -rvn [email protected]:remoteDir/ localDir3
rsync -rv [email protected]:remoteDir/ localDir3
ls -l localDir3
user@remotemachine:~$ exit
logout
Connection to 192.168.56.107 closed.
user@ubuntu:~$ ls -l localDir3
total 0
user@ubuntu:~$ rsync -rvn [email protected]:remoteDir/ localDir3
receiving incremental file list
remoteFile1
remoteFile2
remoteSubDirectory/
remoteSubDirectory/remoteFile3

sent 37 bytes received 163 bytes 400.00 bytes/sec
total size is 0 speedup is 0.00 (DRY RUN)
user@ubuntu:~$ rsync -rv [email protected]:remoteDir/ localDir3
receiving incremental file list
remoteFile1
remoteFile2
remoteSubDirectory/
remoteSubDirectory/remoteFile3

sent 93 bytes received 279 bytes 248.00 bytes/sec
total size is 0 speedup is 0.00
user@ubuntu:~$ ls -l localDir3
total 4
-rw-rw-r-- 1 user user 0 Hag 25 15:22 remoteFile1
-rw-rw-r-- 1 user user 0 Hag 25 15:22 remoteFile2
drwxrwxr-x 2 user user 4096 Hag 25 15:22 remoteSubDirectory
Example 3: Sync Entire Directory with Its Configurations
A. From Local to Remote Machine
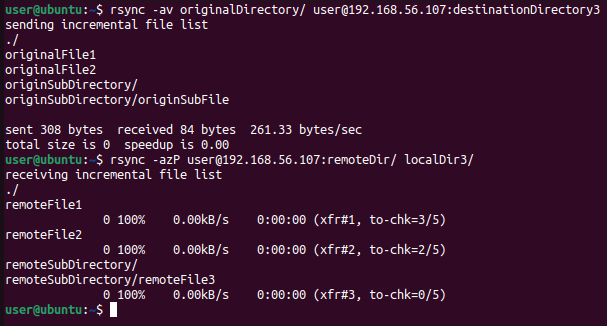
rsync -av originalDirectory/ [email protected]:destinationDirectory3
user@ubuntu:~$ rsync -av originalDirectory/ [email protected]:destinationDirectory3
sending incremental file list
./
originalFile1
originalFile2
originSubDirectory/
originSubDirectory/originSubFile

sent 308 bytes received 84 bytes 261.33 bytes/sec
total size is 0 speedup is 0.00
B. From Remote to Local Machine
rsync -azP [email protected]:remoteDir/ localDir3/
user@ubuntu:~$ rsync -azP [email protected]:remoteDir/ localDir3/
receiving incremental file list
./
remoteFile1
0 100% 0.00kB/s 0:00:00 (xfr#1, to-chk=3/5)
remoteFile2
0 100% 0.00kB/s 0:00:00 (xfr#2, to-chk=2/5)
remoteSubDirectory/
remoteSubDirectory/remoteFile3
0 100% 0.00kB/s 0:00:00 (xfr#3, to-chk=0/5)
Summary
This tutorial taught you how to sync files between a local machine and a remote one.
It walked you through configuring an open SSH server locally, generating SSH keys, and transferring the public key to a remote machine using the scp command. Next, you learned how to sync files using rsync options like -a, -v, -n, -z, -r, and -P. Lastly, you learned how to verify a successful file transfer.






Why not use ssh-copy-id, instead of shelling in, creating the directories, etc..?