In Linux, when a file is created, its ownership is granted to the user who created it. However, there will be situations or scenarios in which we may have to give ownership to some other user.
We can do this by using the chown command, which stands for change owner. Using this command, we can change the ownership of a file and the directories and symbolic links.
In this tutorial, we will learn to change the ownership of files using the chown command.
Table of Contents
Users and Groups
In a Linux system, we may have more than one user. Each user may log on to the system and work with their files and directories. The restrictions of using files and directories are controlled with the ownership and permissions.
When we refer to an individual user, a single user owns a certain number of files and directories.
When several users have a common goal, they are added to a group.
It is not always necessary for a group to have users. We can also create an empty group, though it is rarely done. When a user creates a file, the ownership is assigned to the user and its default group.
We can always change the ownership to a user or group using the chown command.
Linux Permissions
The files and directories in a Linux system are protected using the chown command. Before we get to the chown command, let’s understand the basic three permissions that are used in Linux:
- Read: Allows a user to read the files. When assigned to a directory, it allows the user to read subdirectories.
- Write: Allows a user to modify a file. When assigned to a directory, users can create, modify, and rename files. Using write permissions, a user can also delete a file.
- Execute: Allows a user to execute files, such as shell scripts. However, if you need to navigate inside a directory, you need the Execute permissions.
Let’s look at this example. Even though the edxd user has Read and Write permission on the data directory but without the Execute permissions, the user faces the Permission denied error.

Remember the ls -l command – we can list the files in a current or specified directory. In the output, we also get to see the files and directories and the owner’s name, groups, and others.
The chown Command
Using the chown command, we can change the file owner. By default, the file owner is the person who created the file. However, there will be reasons when we need to change the ownership. For example, a user is working on a project file. Someone else is now going to handle the project, and therefore, we need to assign the ownership of the file to the person, which can be done with the chown command. Other than the files, we can also change the ownership of directories and symbolic links.
Let’s first look at the chown command:
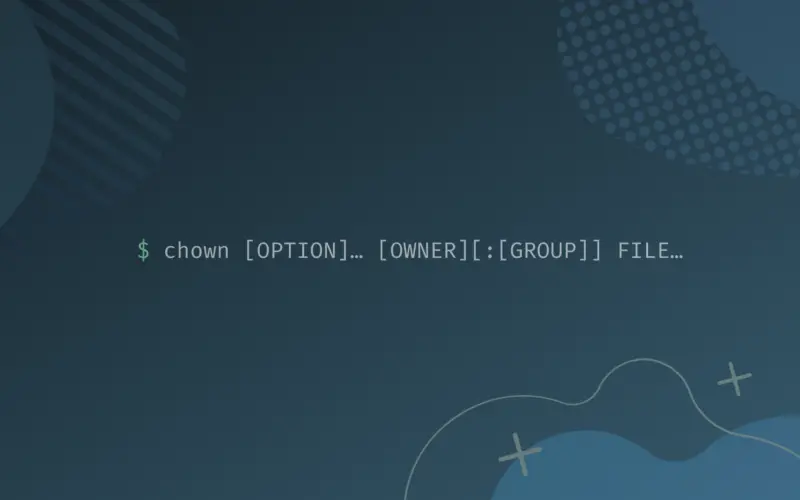
chown [OPTION]… [OWNER][:[GROUP]] FILE…
There are essentially three core elements of this command:
- Owner: is the username of the user to whom you want to assign the ownership
- Group: is the group name of the group to whom you want to assign permissions
- File: Is the name of the mentioned file whose ownership needs to be changed
When changing the ownership, there are specific important points you should keep in mind:
USER– If a username is specified without the group name, only the user becomes the owner of the mentioned file. The existing group ownership is not changed.USER:– If a username is specified with a colon, but without the group name, the user becomes the file owner. However, the user’s login group also becomes the file owner.USER:GROUP– In this case, the mentioned username and group become the owner of the specified file.:GROUP– If no username is specified, but only the group name, then the existing user’s ownership is retained, but the group ownership is changed of the specified file.:– If we do not specify the username or group name, then no change is made to the specified file’s ownership. Existing ownership is retained as is.
We are logged in as the edxd user. First, create a file named permit.txt and then try to change its permissions.
To create the file, we use the touch command:
touch permit.txt
After the file is created, we will now attempt to assign the ownership to another user named arthur:
chown arthur permit.txt
When we hit Enter, we get an error:
chown: changing ownership of 'permit.txt': Operation not permitted
This is because even the owner of the file cannot change ownership. We need to be either root or have the root-equivalent permissions.

We run the same command with sudo, and no error is displayed. The command runs successfully.
sudo chown arthur permit.txt

If we run the ls -l command in the output, we will have arthur as the file owner. Since we did not change the group ownership, it still has edxd.

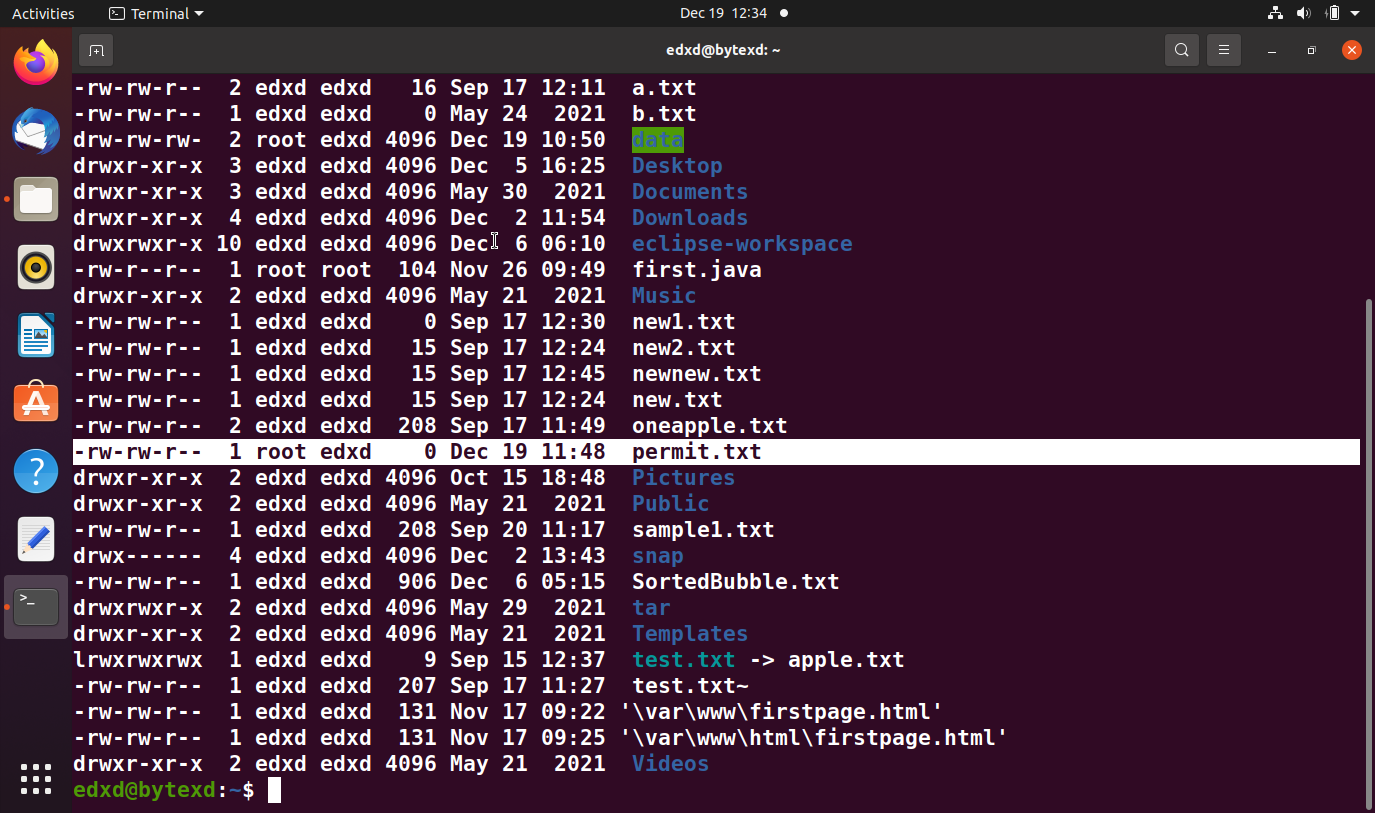
Let’s change the ownership to the root user on the permit.txt file along with the data directory:
sudo chown root permit.txt data
No error is returned, which means the command has been executed successfully. Let’s verify the ownership with the ls -l command. Notice the output in the exhibit below. The root user is the data directory owner and the permit.txt file.
Instead of specifying the username, you can also use the user ID, which can be found in the /etc/passwd file. Other than this, you can use commands like id to find the user ID of a user:
id edxd
The output displays the user ID of the edxd user.

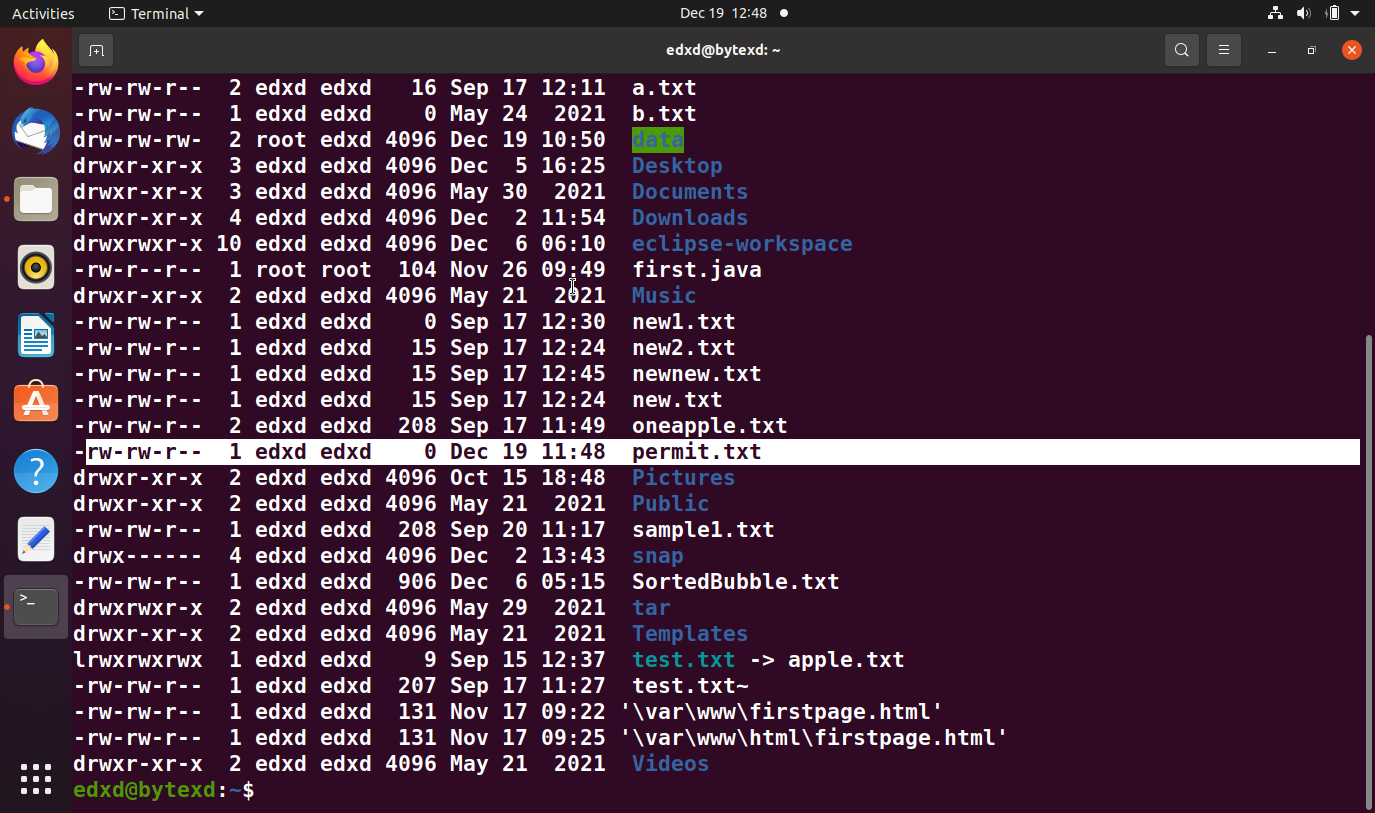
Let’s use this user ID to assign the ownership back to edxd:
sudo chown 1001 permit.txt
The command executes successfully.

We verify the output with the ls -l command:
The edxd user is now the owner of the permit.txt file.
Now, we will change the ownership for the root user and its group with the following command:
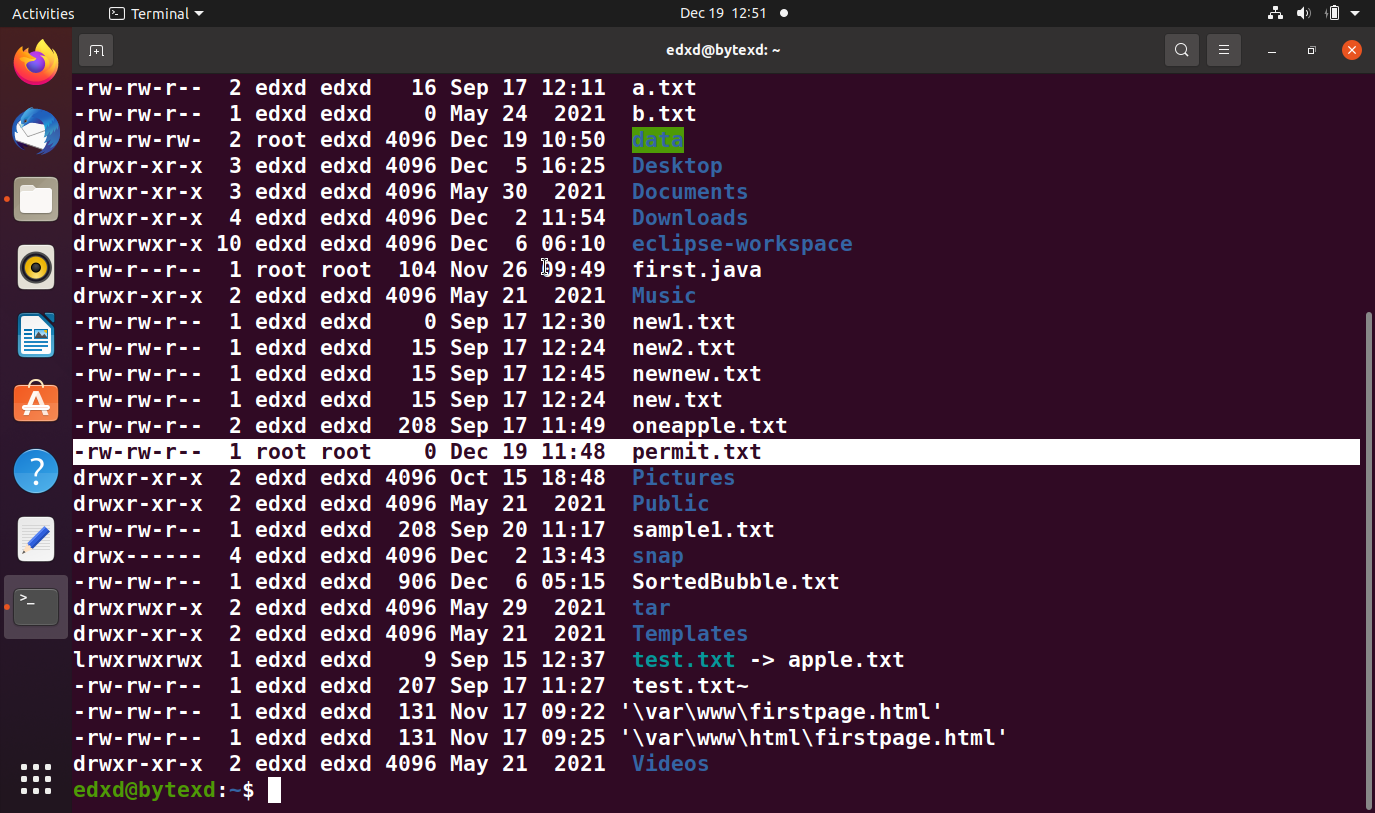
sudo chown root:root permit.txt

Once again, we use the ls -l command to verify the ownership. The root user and its group is now the owner of the permit.txt file.
Let’s again change the ownership back to the edxd user without specifying its login group. We will use a colon after the username, automatically assigning the user’s login group as the owner of the specified file.
sudo chown edxd: permit.txt

When we verify it with the ls -l command, we notice that edxd and its login group are the owners.
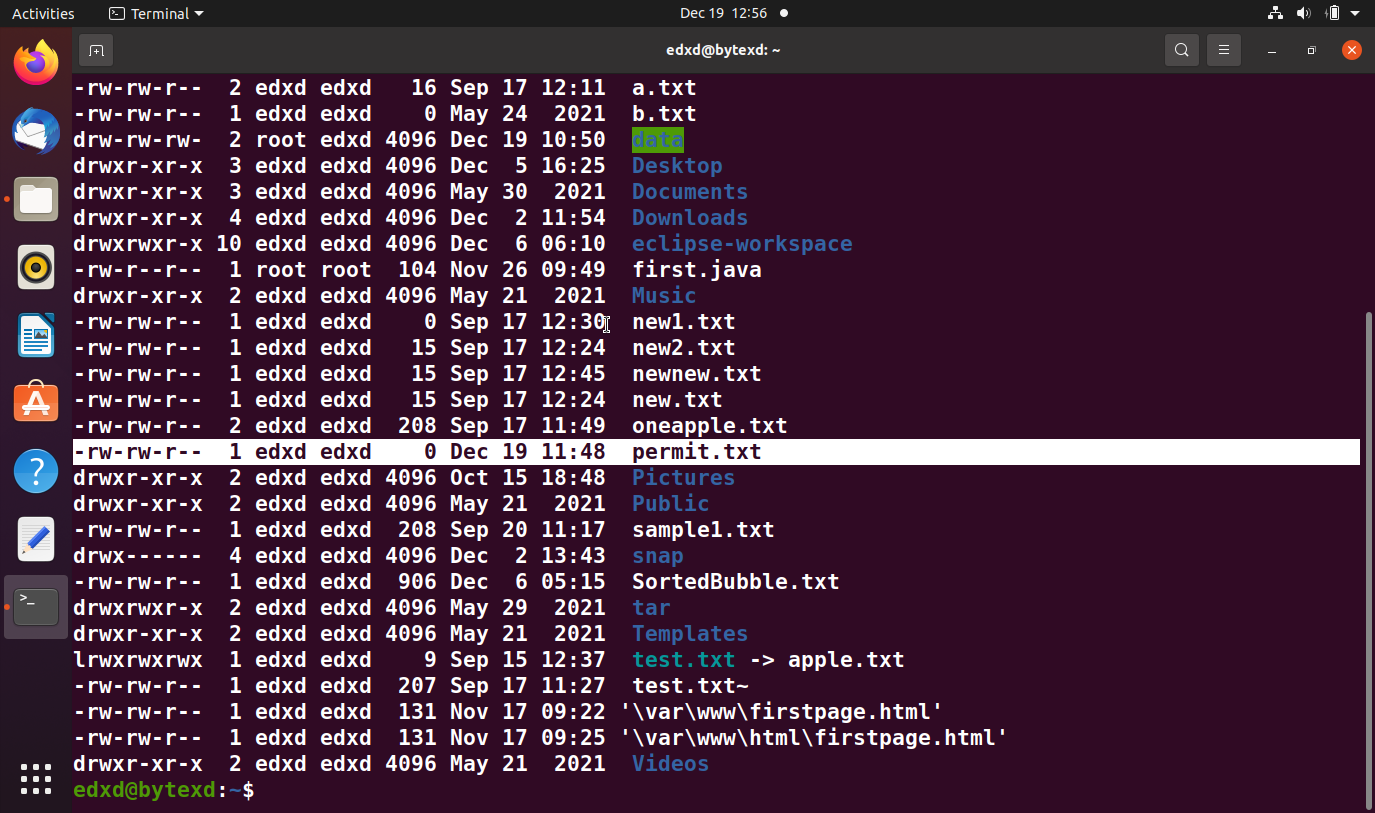
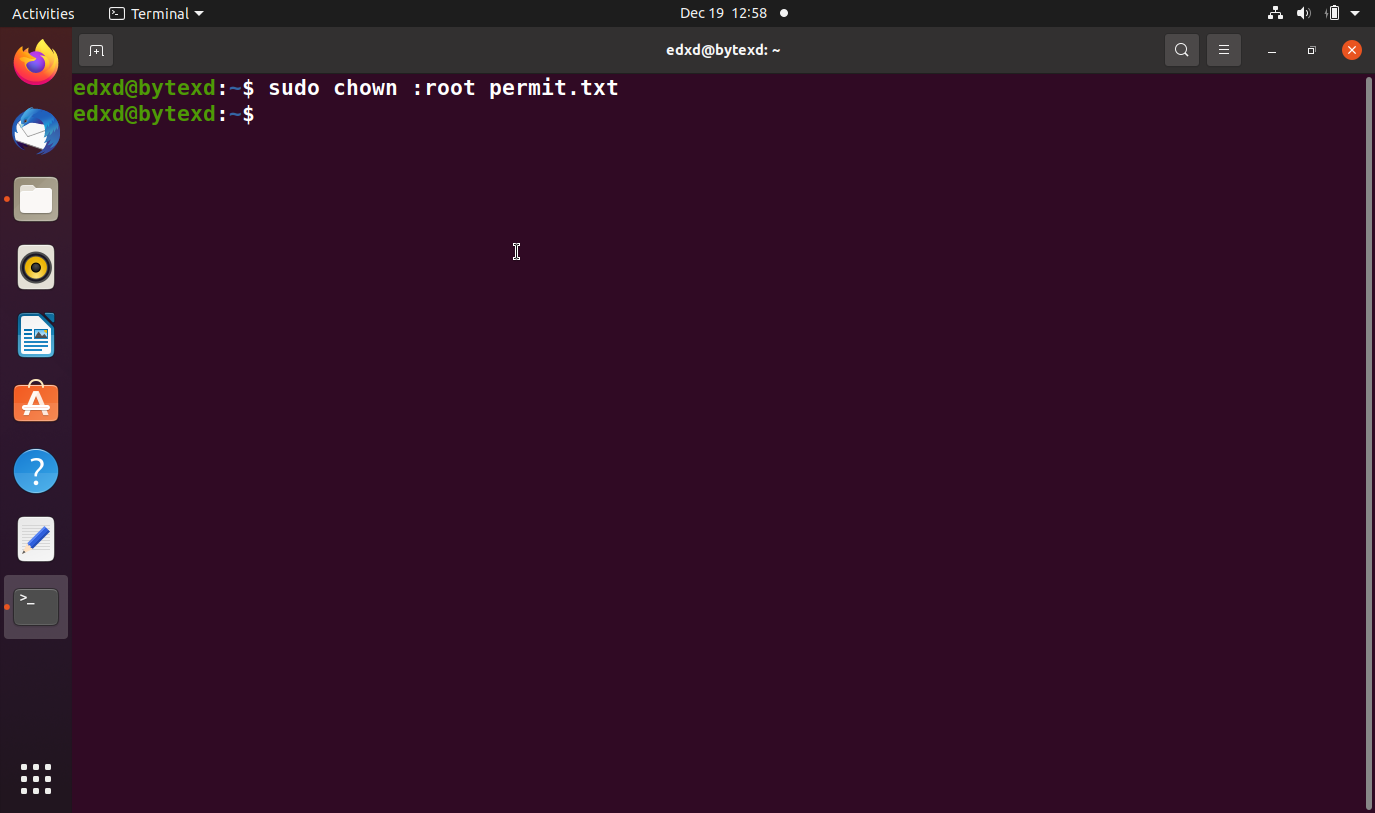
We will now only change the group ownership on the permit.txt file.
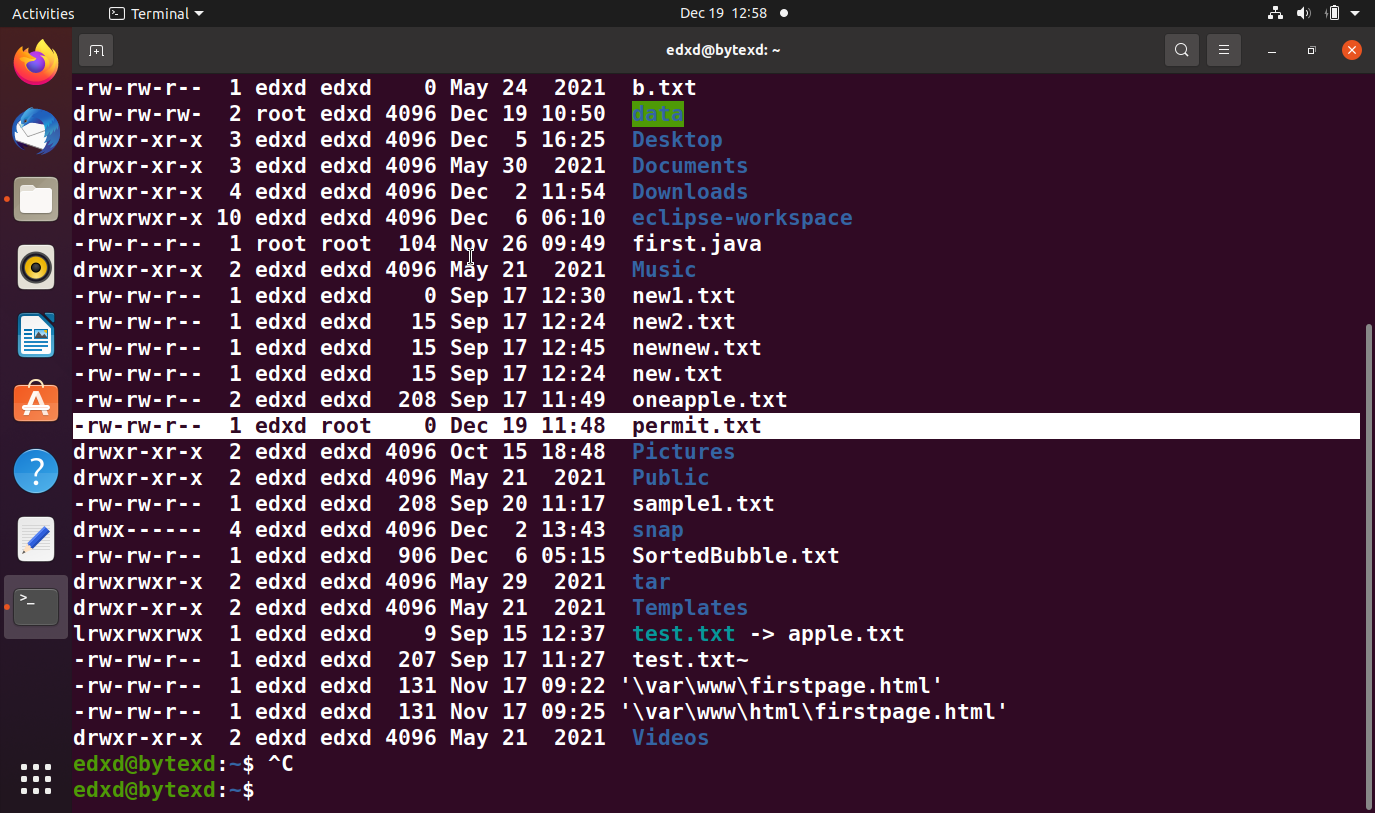
sudo chown :root permit.txt
When we verify the output, we see that only the group owner has changed.
Conclusion
Well done. Hopefully, this tutorial helped you learn to use the chown command in Linux. If you encountered any issues, please feel free to leave a comment or contact us, and we’ll get back to we as soon as we can.
