Nethogs is a small, free, open-source utility used to monitor network traffic for Linux. Nethogs behaves differently from other traffic monitoring tools, as it groups the bandwidth per process, instead of breaking the traffic down per subnet or a protocol. It doesn’t rely on kernel modules to be loaded. Therefore, Linux administrators using Nethogs can easily identify which program is generating utilization spikes.
Nethogs relies on /proc, so most of the features are only available on Linux therefore, it doesn’t work well for other operating systems such as FreeBSD and Mac OS X. Nethogs tool will only display the connections on these systems without displaying the processes. Nethogs program is useful for monitoring real-time network traffic. Moreover, you can track a specific network interface or all network interfaces using this utility on your system.
This article will explain how to install Nethogs on CentOS 8 and we will also explain how to monitor or track network traffic using the Nethogs tool.
Table of Contents
Prerequisites
- CentOS 8 running server
- Administrative privileges (root or sudo)
Installation of Nethogs on CentOS 8
You need to follow these steps to install the Nethogs network monitoring tool on CentOS 8:
Step 1: Add EPEL repository
Nethogs is not available in the default CentOS 8 packages repositories. So, you need to add an Epel repository to your system to install the nethogs monitoring tool. Add the Epel repository to your CentOS 8 system by using the following command:
sudo yum install https://dl.fedoraproject.org/pub/epel/epel-release-latest-8.noarch.rpm
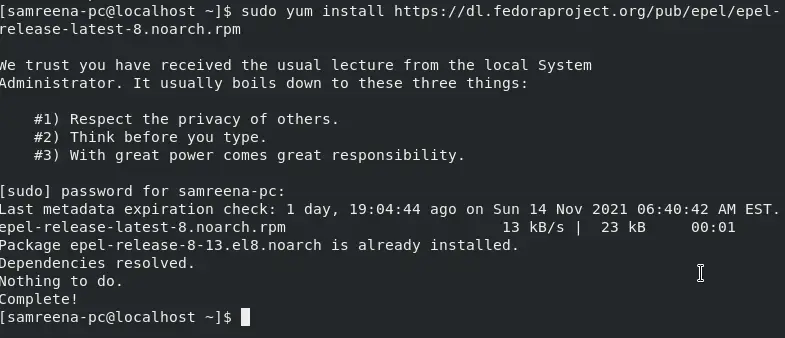
When the above command executes, you will be prompted to press y/n to import the application GPG key. Press y and then hit Enter to import the GPG into your system.
Step 2: Install Nethogs on CentOS 8
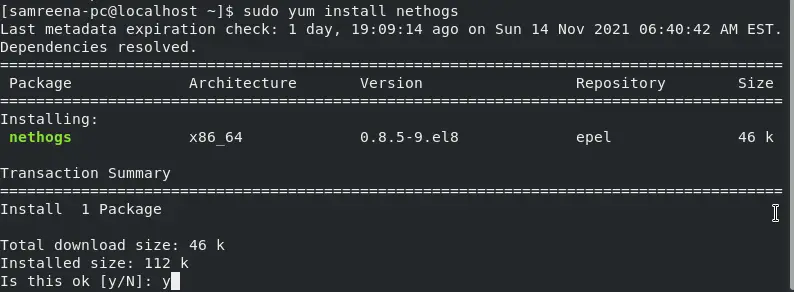
After adding the Epel repository, install nethogs on CentOS by executing the following command:
sudo yum install nethogs
The above command prompted you to press y and then Enter to continue the nethogs installation. Once the nethogs installation is completed, the following complete status will display on the terminal:
Step 3: Verify nethogs installation
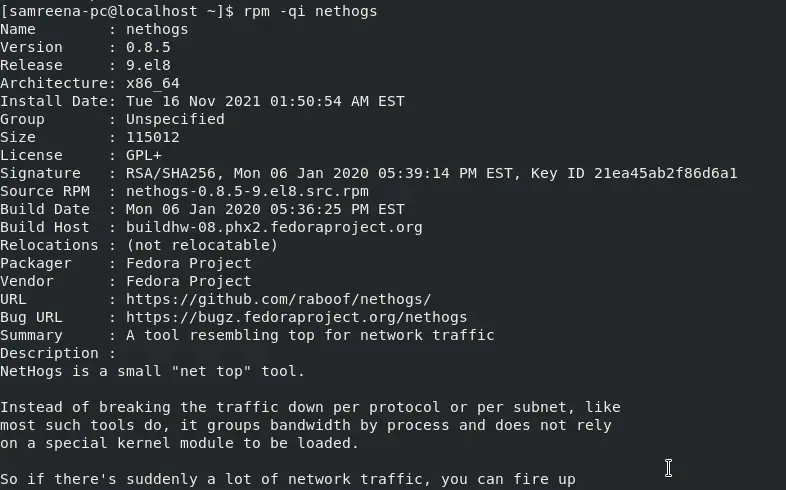
You can easily verify that either the nethogs utility is successfully installed or not on your machine. The following command will display detailed information about the installed nethogs tool:
rpm -qi nethogs
As you can see in the following output screen the nethogs 0.8.5 has been installed on this system:
How to use nethogs?
Use the following syntax to run the nethogs utility on your Linux system:
sudo nethogs [option] [interface_name]
Let’s run the following command to understand how it works:
sudo nethogs
If you will not specify the network-interface name then it will automatically show you the bandwidth information for all network interfaces as follows:

In the following output, you can notice that the nethogs command displays the processes along with their user name and PIDs that are sending and receiving the network data packets over the network interfaces. In this case, you can easily find out which process or program is utilizing system bandwidth.
Monitor a specific network interface
You can specify the network interface name with the nethogs command as follows:
sudo nethogs enp0s3

To monitor more than one network interface, you can use the following syntax:
sudo nethogs [network-interface1] [network-interface2]
Nethogs output automatically refreshes after every second but, if you want to monitor the screen with some delay then, type the following command:
sudo nethogs -d 4
When you use the above command, your output screen will refresh after every 4 seconds.
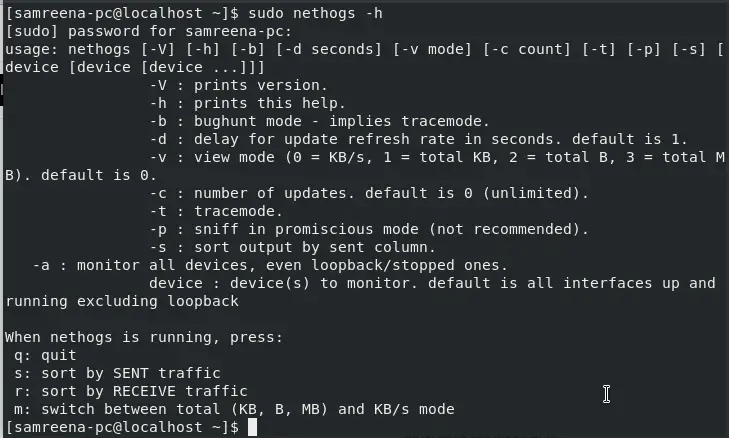
While the nethogs utility is running on your system, the following options can help you in monitoring network interfaces:
m: When you press the m key at runtime, the units for the displayed bandwidth will be changed (KB, B, MB, and KB/s)
r: When you press the r at runtime, it will sort the output of the RECEIVED column.
s: When you press the s key at runtime, it will sort the output of the SENT column.
q: When you will press q, it will quit the nethogs command shell.
Use the option -h along with the nethogs command to explore more information.
sudo nethogs -h
Uninstall Nethogs from CentOS 8
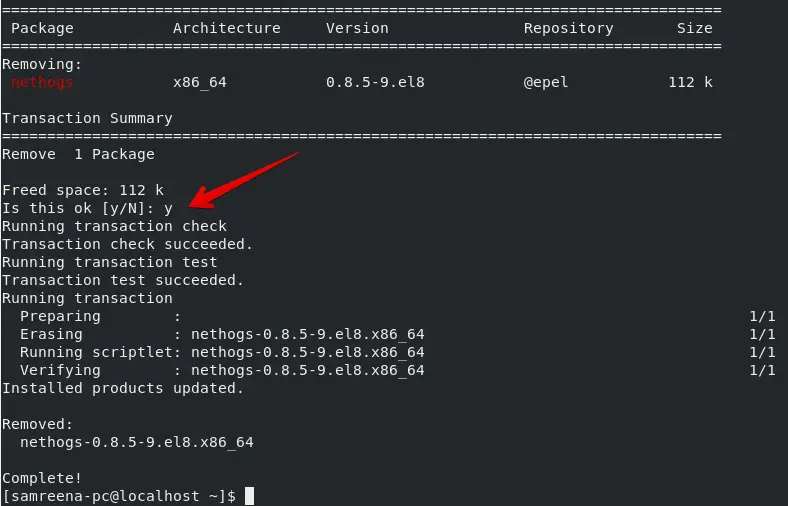
You can use the following command to uninstall the nethogs tool from the CentOS system:
sudo yum remove nethogs
Conclusion
We installed the Nethogs on CentOS 8 in this tutorial. By following the above steps you can easily install the nethogs utility and monitor your network traffic bandwidth.
