The nmcli command, available in many Linux variants, is a command-line tool for managing NetworkManager. Using nmcli, a Linux administrator can perform various tasks, such as managing network connections and displaying the network interface adapter’s status.
Objectives
In this tutorial, we will learn to use the nmcli command to manage NetworkManager.
Table of Contents
- Objectives
- Prerequisites
- Using the nmcli Command
- Check the Network Device Status
- Listing All Connections
- Show Device Information
- Check the NetworkManager Status
- Showing the Values of a Specific Field
- Activate the Network Connection
- Disconnect and Re-activate the Network Interface
- Create an Ethernet Connection
- Delete the Network Connection
- Reload the Network Connections
- Using the nmcli Terminal and Perform Configurations
- Conclusion
Prerequisites
- Access to a Linux machine (I’m using a Ubuntu 20.04 machine)
- Acting as a non-root sudo user to ensure a secure environment
Using the nmcli Command
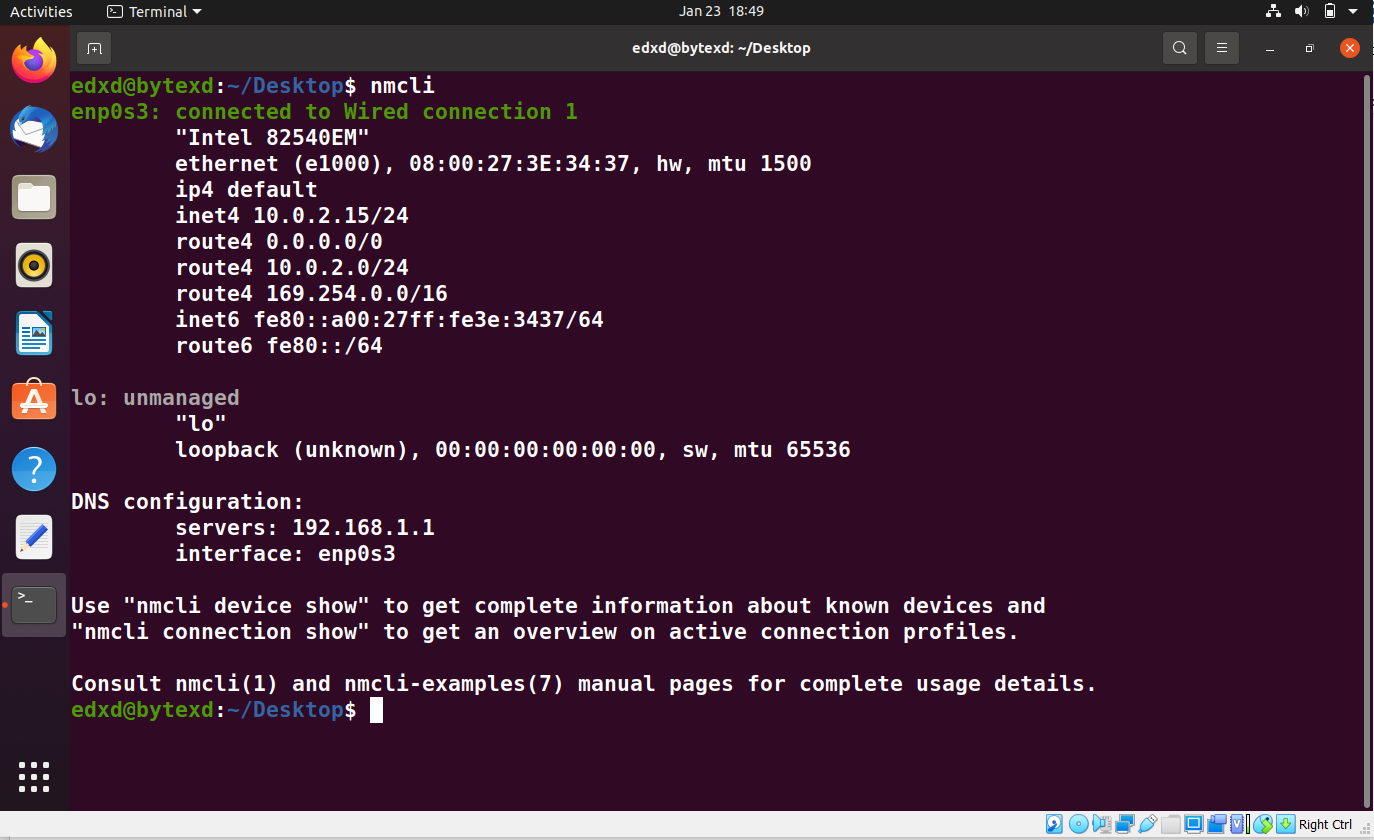
Using the nmcli command, we can perform various tasks, such as checking the network connections, creating, editing, or deleting them as and when required. We can execute the nmcli command:
nmcli
The output displays the IPv4 and IPv6 addresses on all available network devices DNS server IP addresses.
Check the Network Device Status
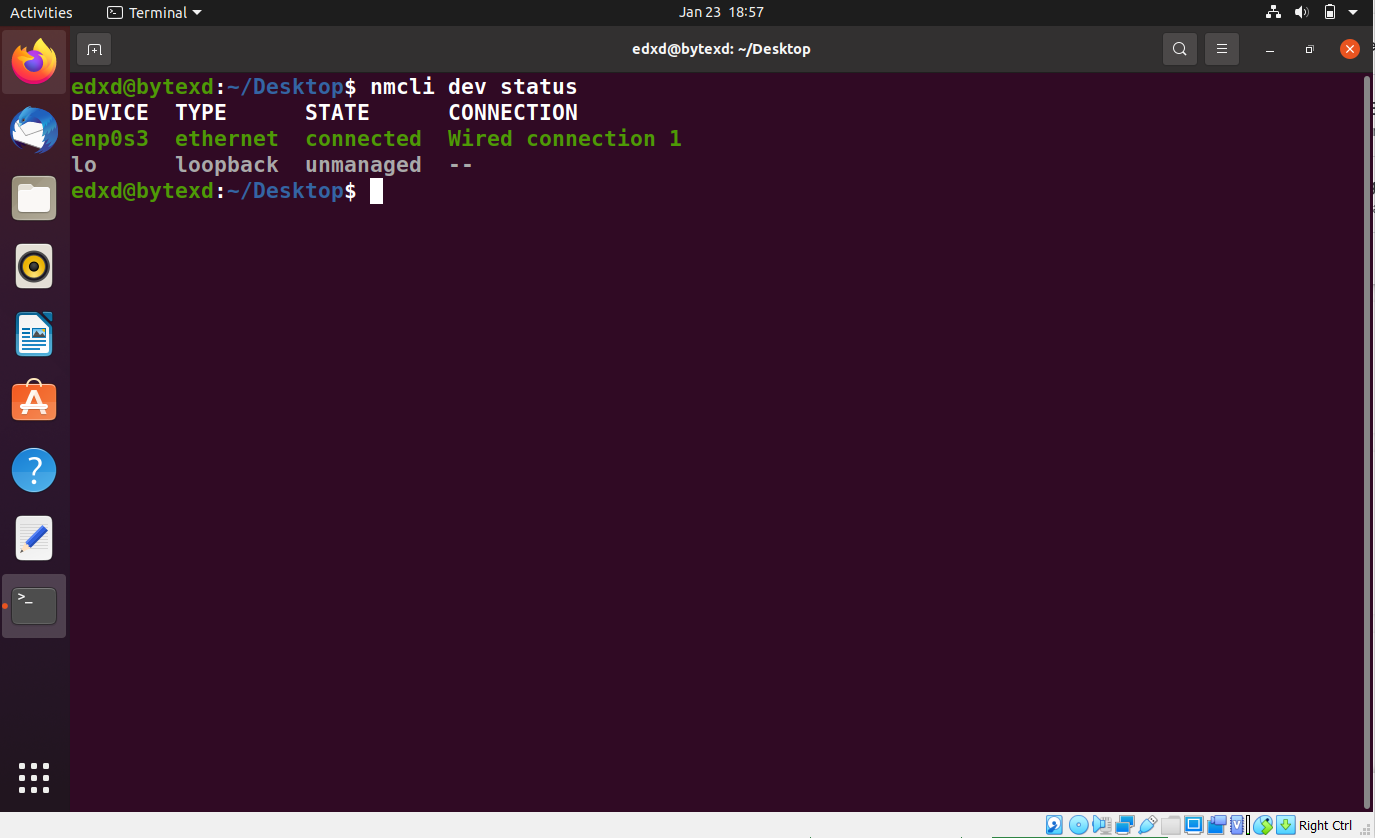
We can also check the network device status by using the following command:
nmcli dev status
In this output, we can see two network devices, enp0s3 and lo. The status of both the network adapters is also displayed. The parameters, dev status, are used for displaying the network device status.
Listing All Connections
Let’s go ahead and list all the connections with the following command:
nmcli con show
This output shows a single connection activated using the enp0s3 network device.
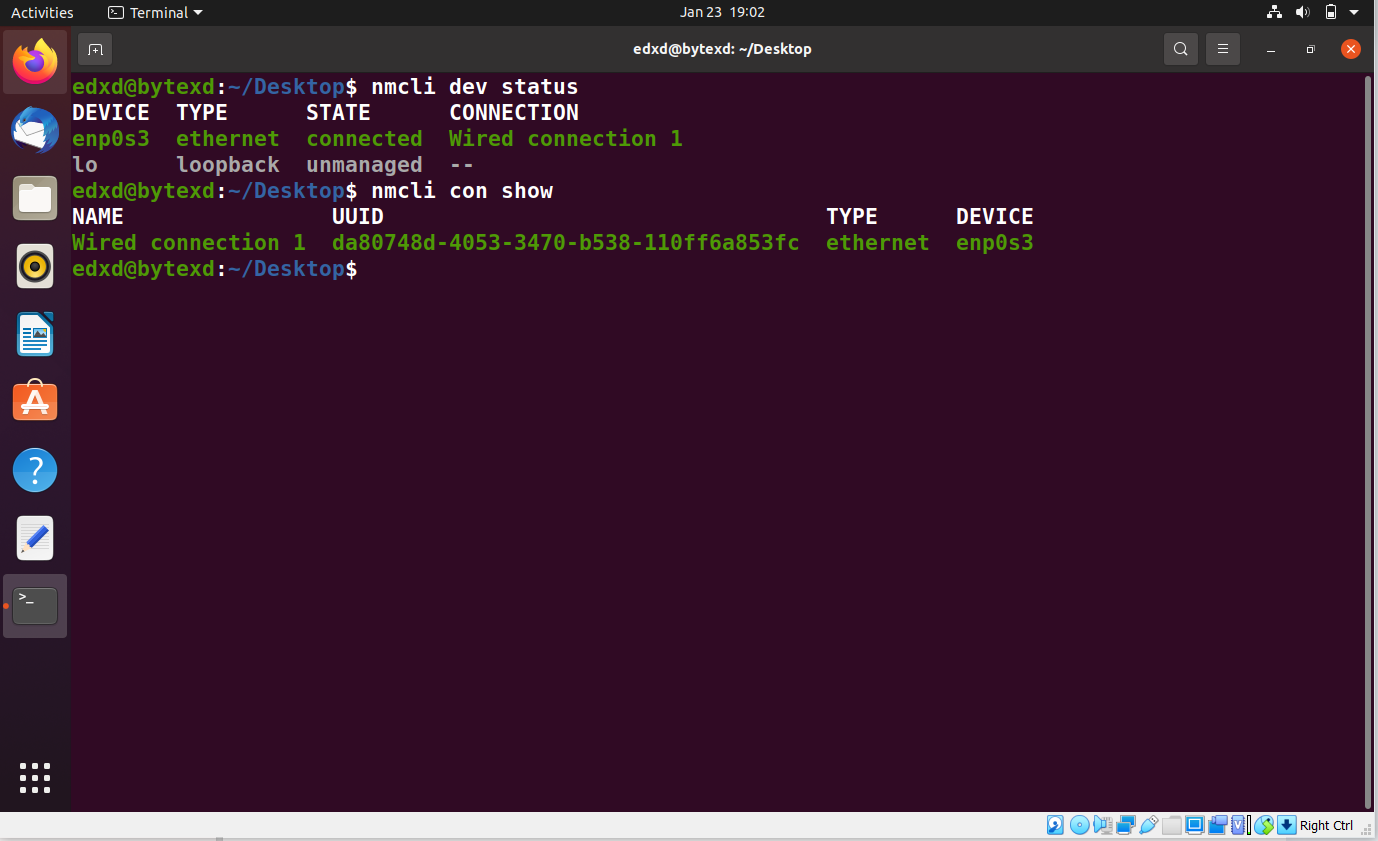
We can get the same output with the following output:
nmcli connection
We get the same output as the previous command that was executed.
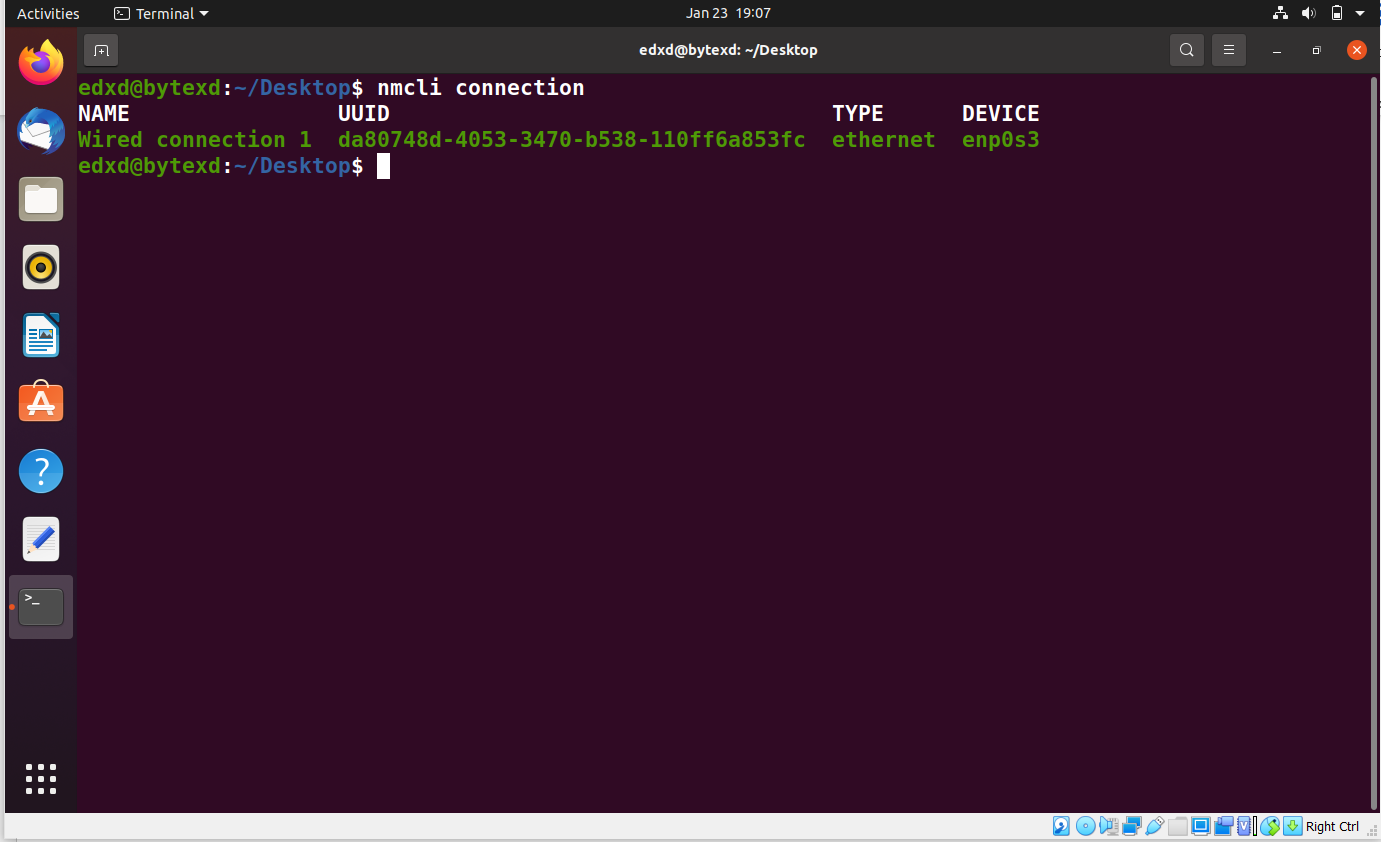
We can also use the following command to get the same output:
nmcli connection show --active
The output is the same as the nmcli connection, and nmcli con show commands.
Show Device Information
We can also show the device information, such as the etwork connection name. To do this, execute the following command:
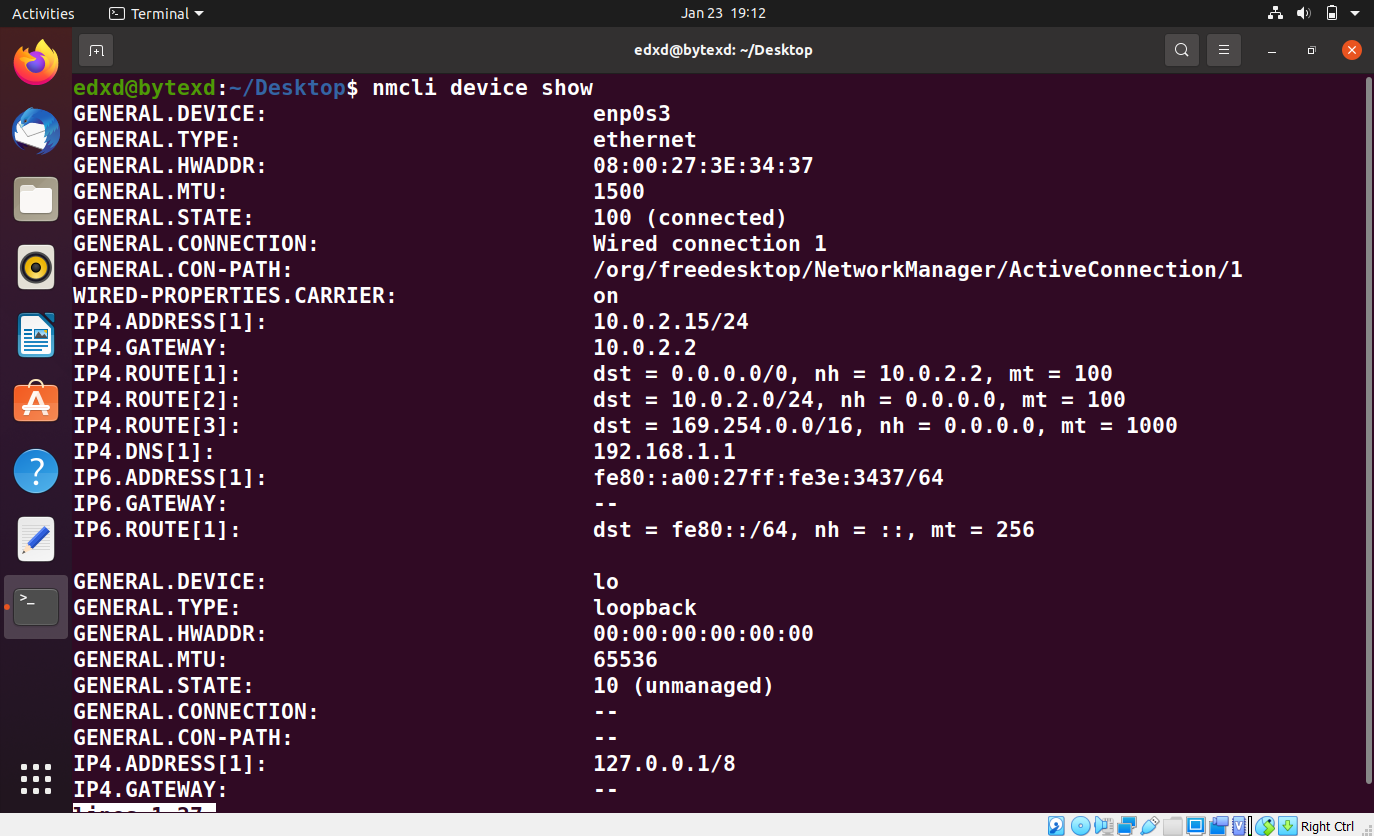
nmcli device show
The output displays a lot of information, such as network connection name, hardware address, gateway, and the routes associated with the device.
Check the NetworkManager Status
We can check whether the NetworkManager is running or not. To do this, we can execute the following command:
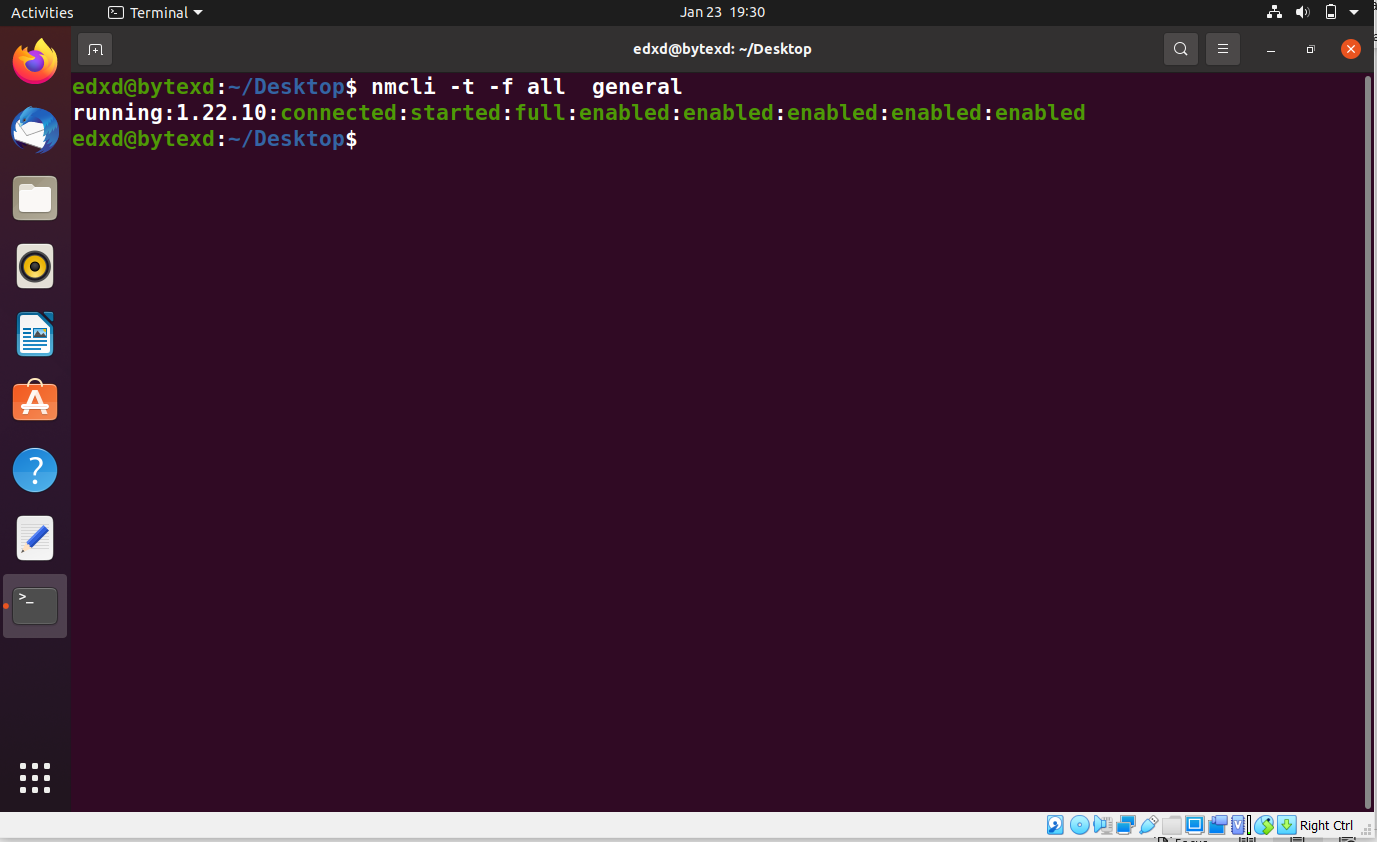
nmcli -t -f all general
The output checks whether the NetworkManager is running or not. The -t parameter is used for brief output. The -f parameter defines the field name. Since we have mentioned all, it displays all output of all fields.
Showing the Values of a Specific Field
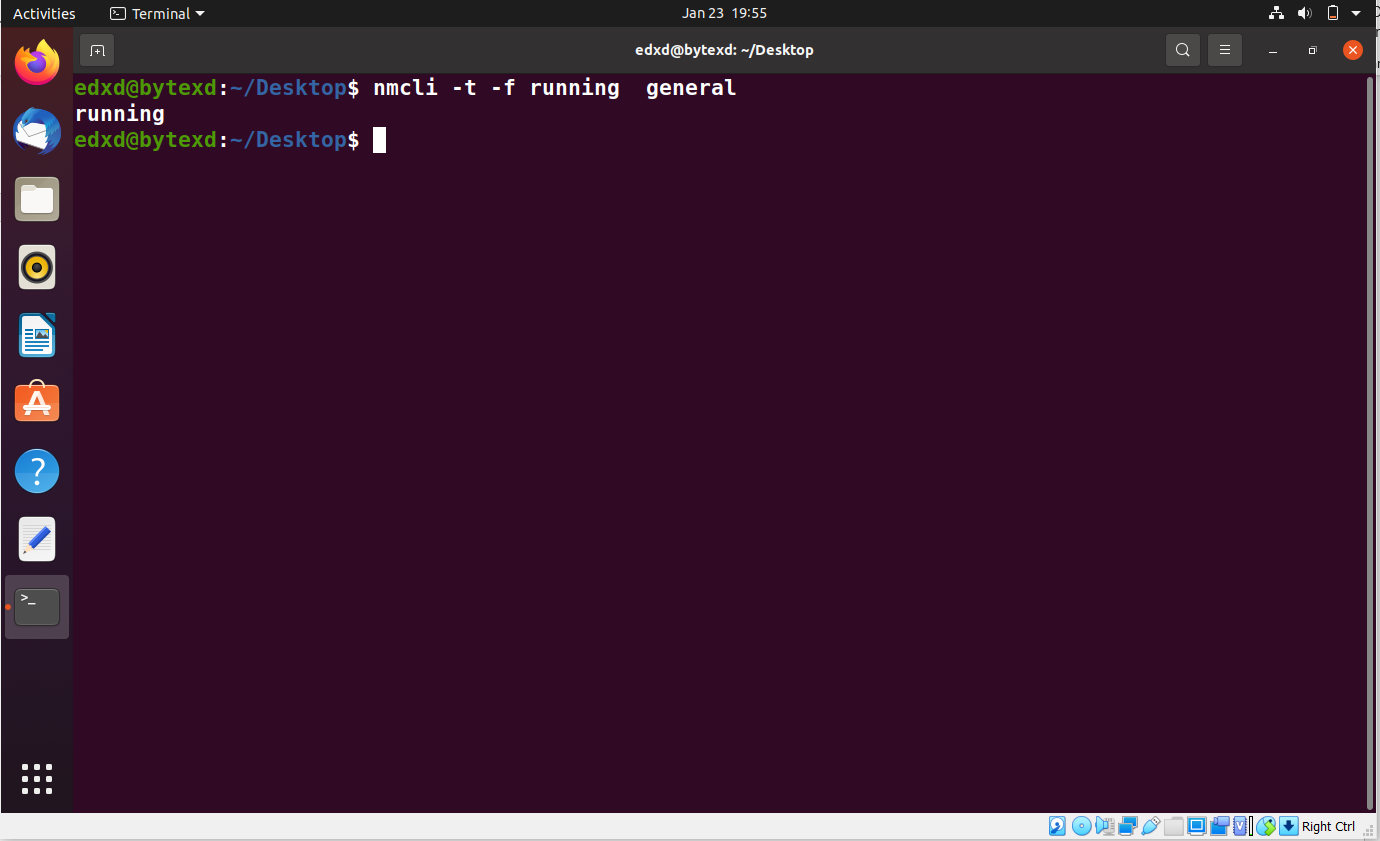
We can also narrow down the output to a specific field. Let’s say that we want to view whether NetworkManager is running or not. To do this, we need to execute the following command:
nmcli -t -f running general
Instead of using all argument, we replace them with running. Notice that this time, only one output is displayed.
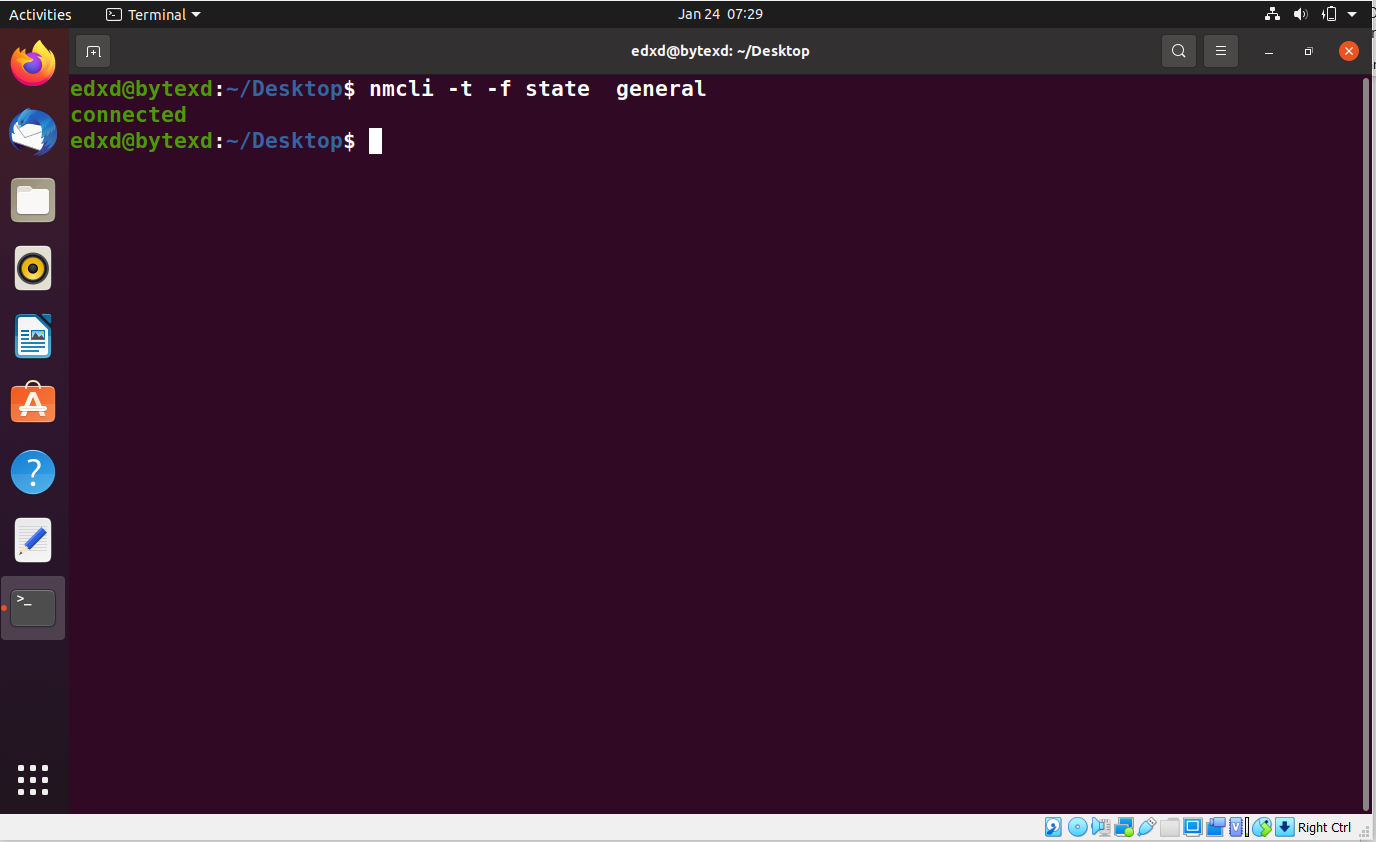
Let’s now view the connection status of NetworkManager. To do this, we need to use the state parameter along with -t and -f. Execute the following command:
nmcli -t -f state general
The output this time displays connected.
Activate the Network Connection
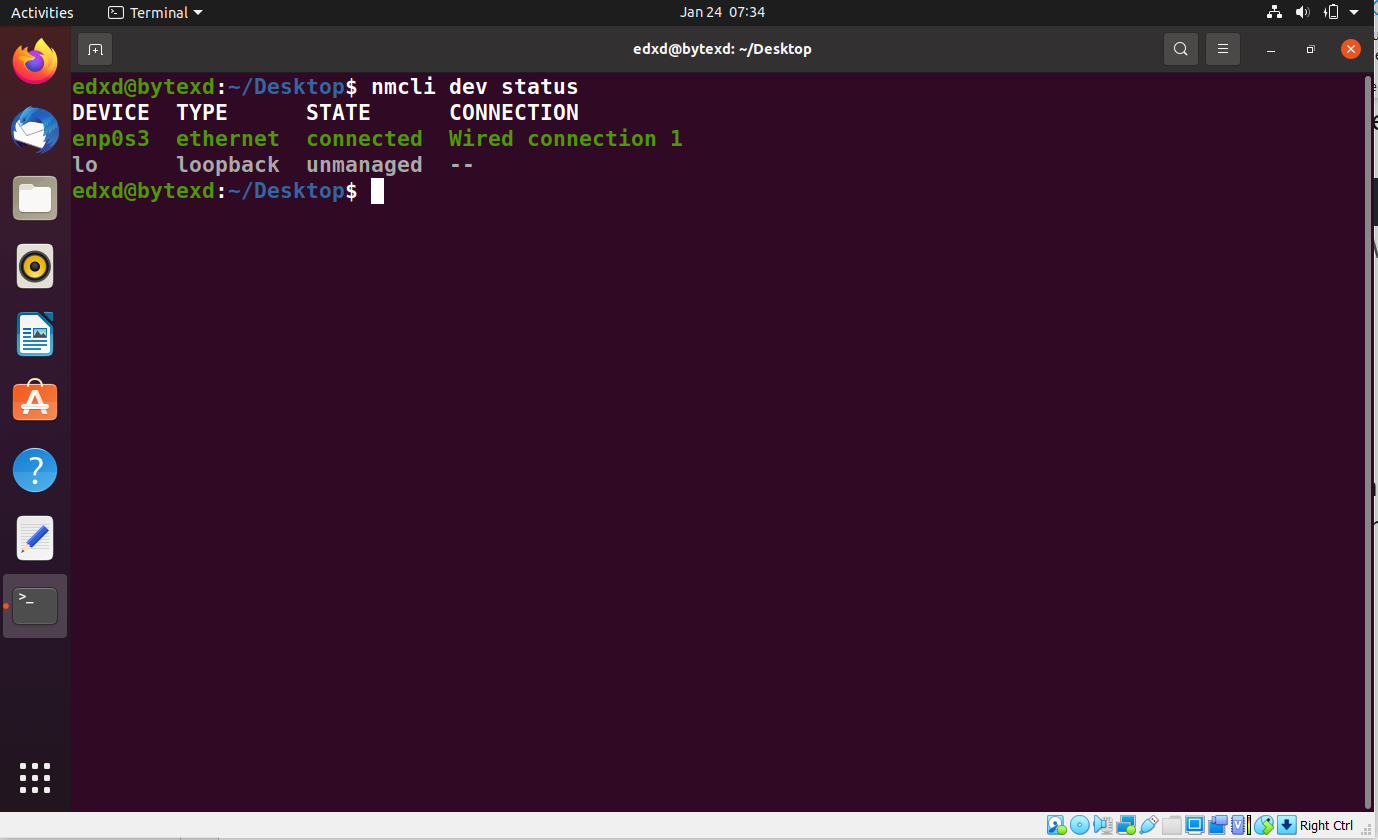
Let’s now find the status of the network interface. We have already used the following command:
nmcli dev status
We need to know the connection name shown in the output as Wired connection 1. It is important to note that we may have different connection names in different environments.
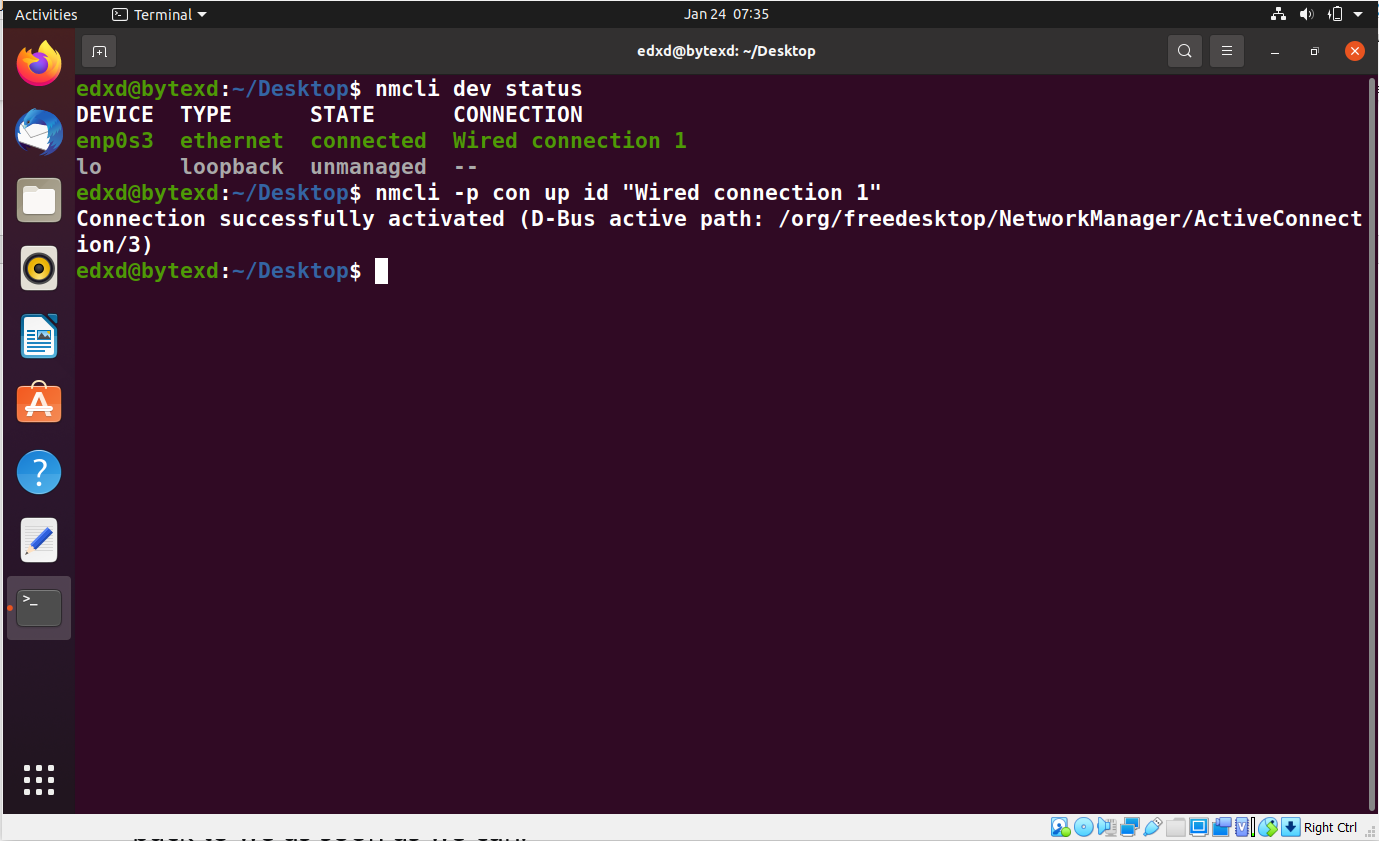
We will use the connection name to activate it with the following command:
nmcli -p con up id "Wired connection 1"
The connection is now successfully activated.
Disconnect and Re-activate the Network Interface
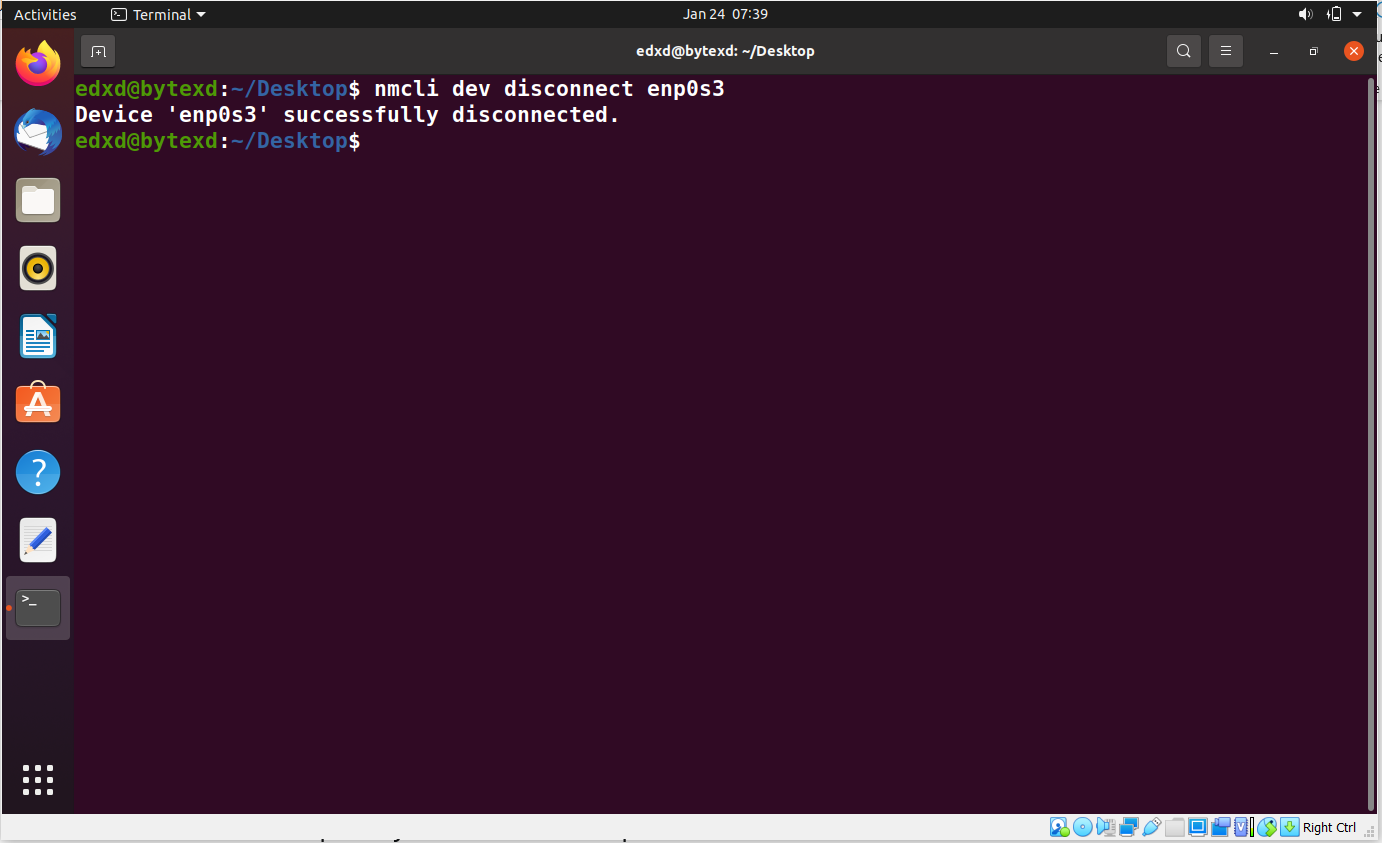
We will now disconnect the network interface. To do this, we need to use the following command:
nmcli dev disconnect enp0s3
The connection is now successfully disconnected.
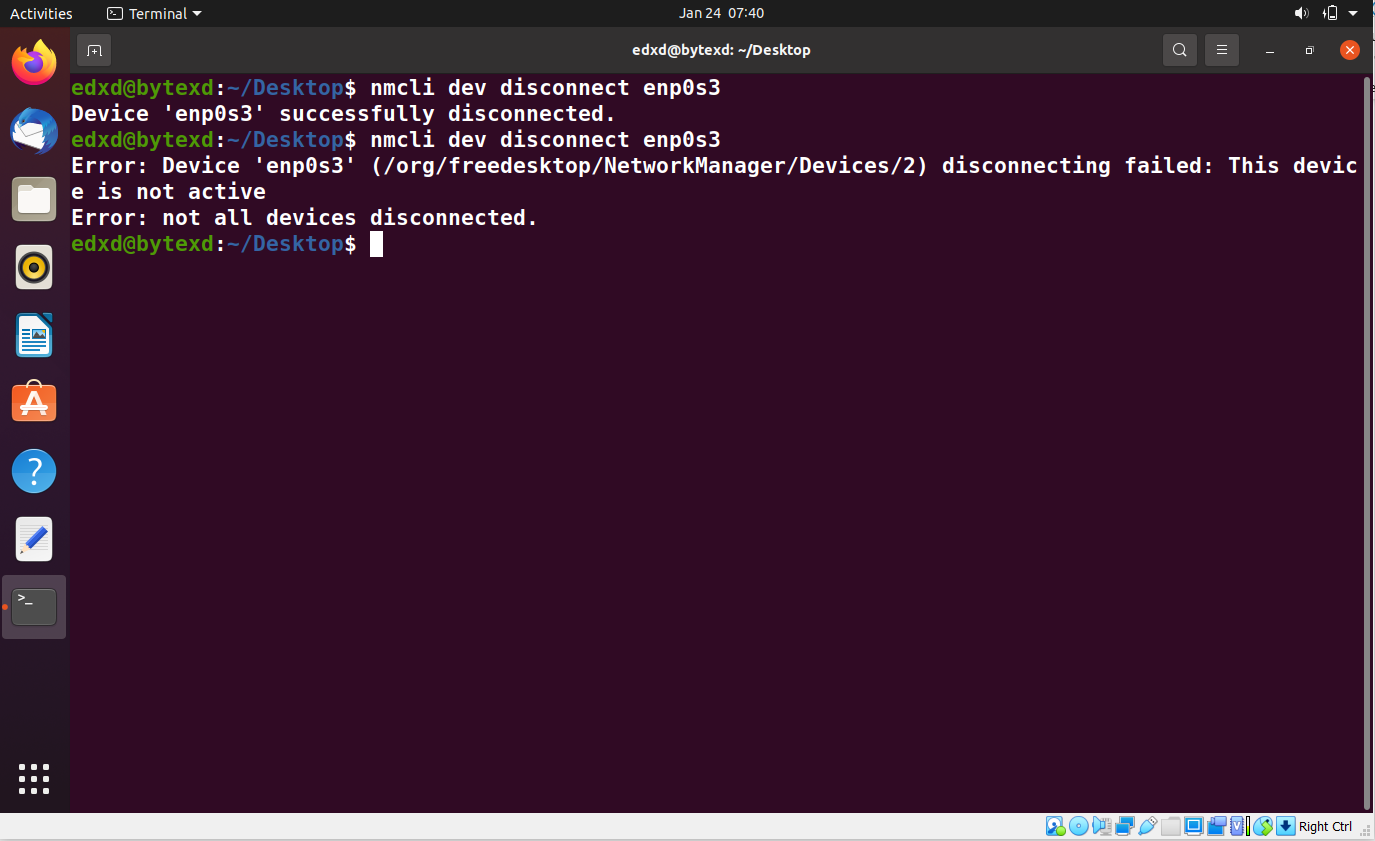
If we repeat this command, we will get an error stating that the device is not active.
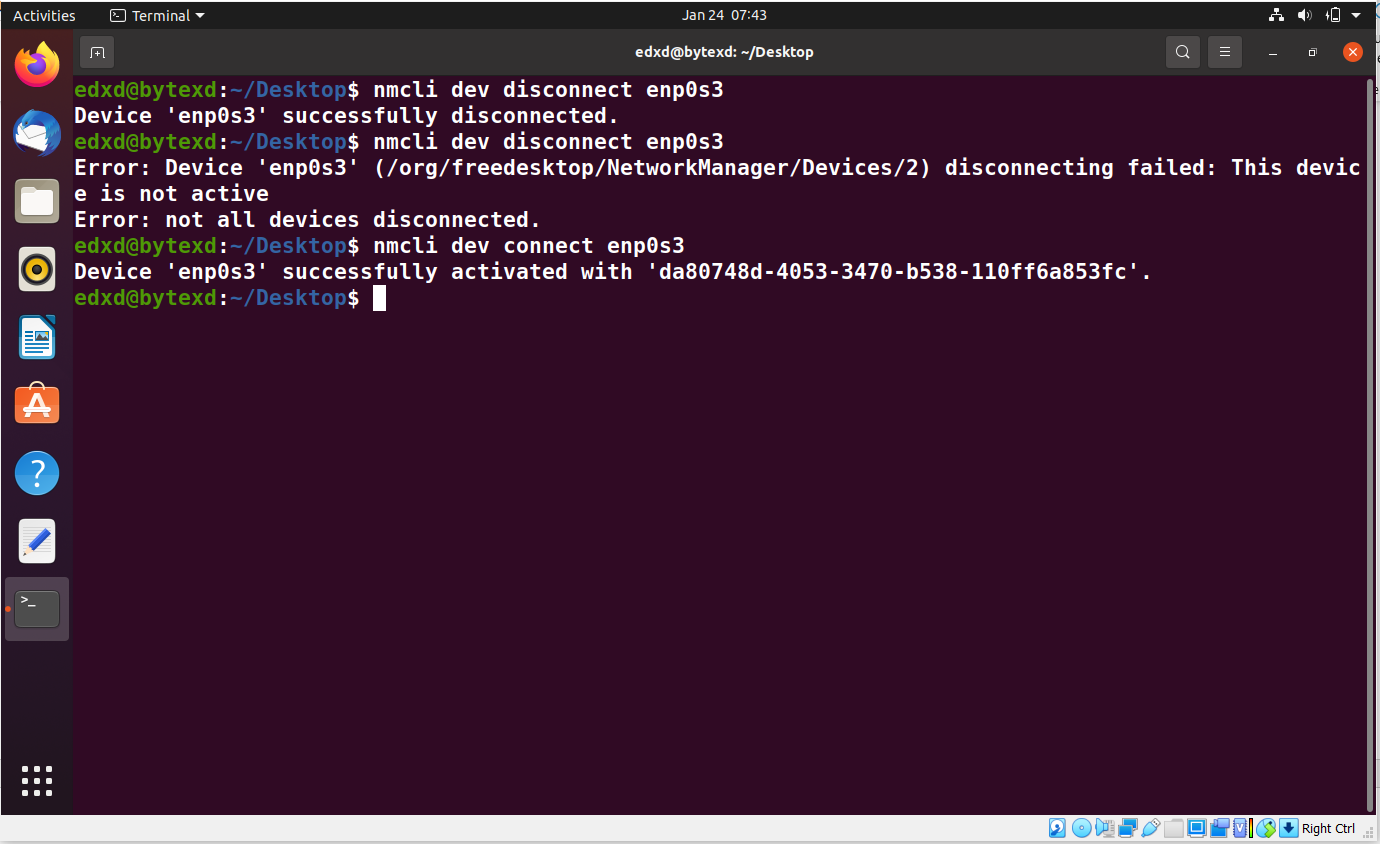
We can activate the network interface in two different ways. Either, the autoconnect property of the network interface is set to TRUE, or the user manually activates it with the connect parameter. We will manually activate it with the following command:
Create an Ethernet Connection
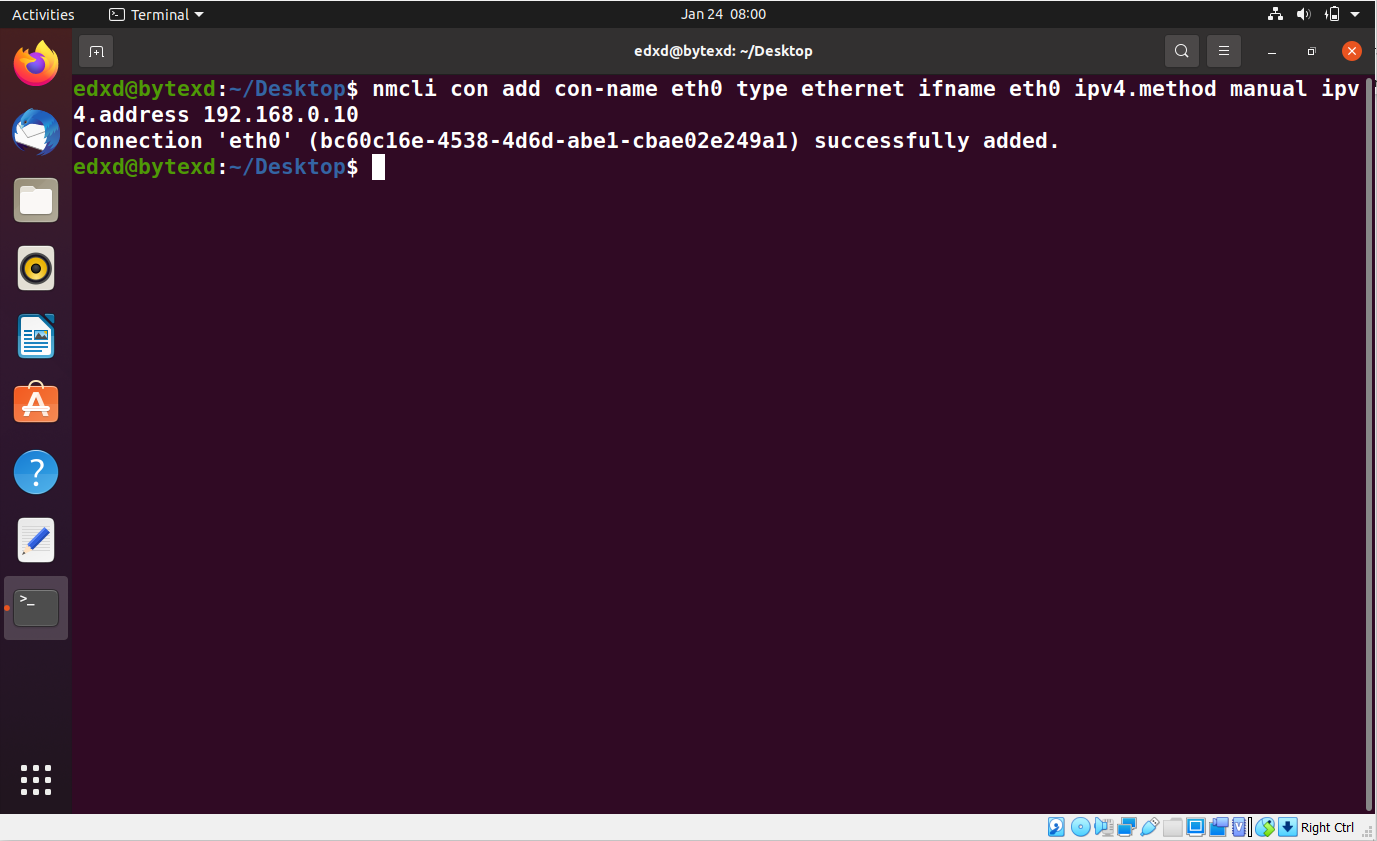
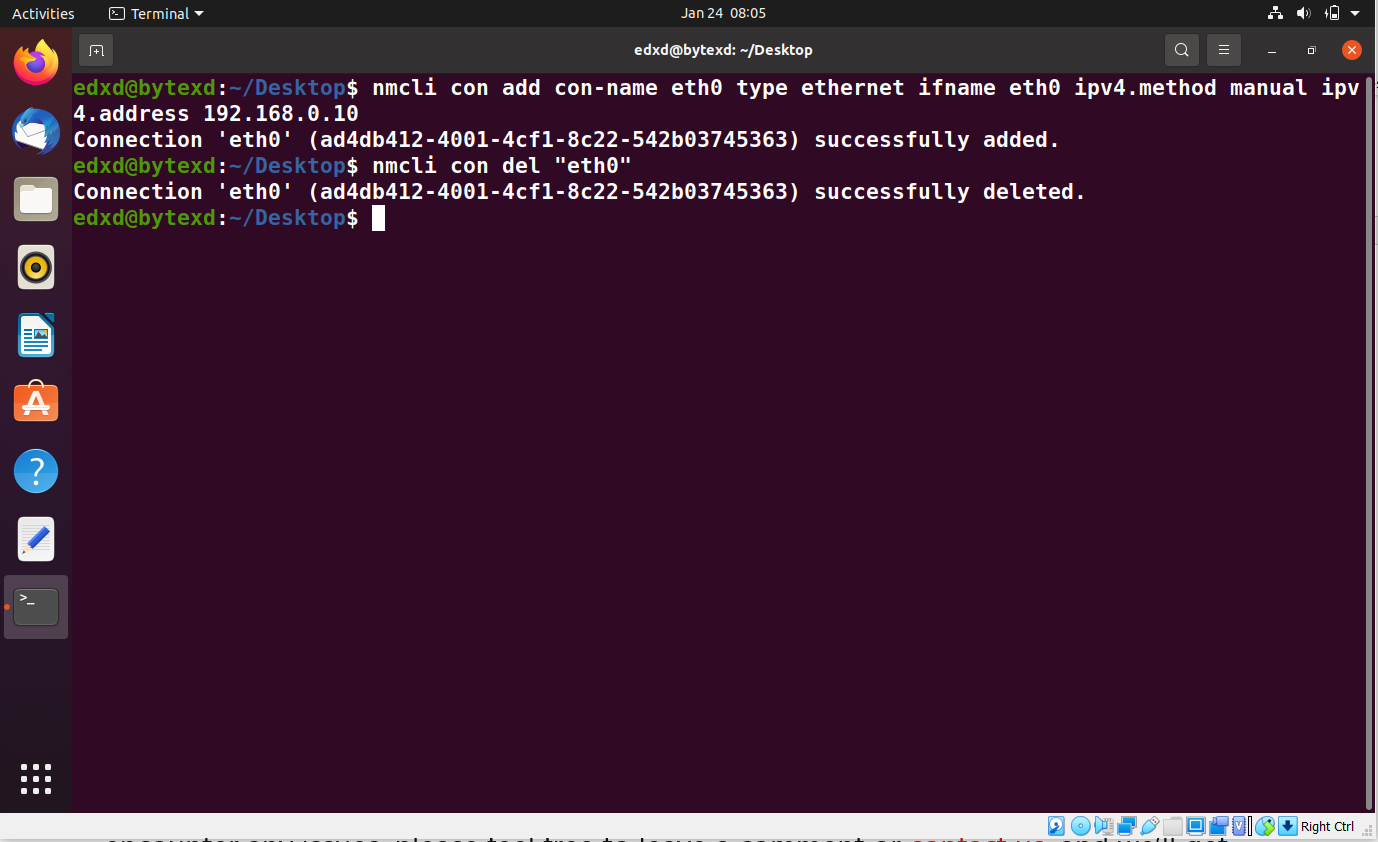
Let’s now create a new Ethernet connection. We will add and assign a static IP address to it. To do this, we need to execute the following command:
nmcli con add con-name eth0 type ethernet ifname eth0 ipv4.method manual ipv4.address 192.168.0.10
The connection eth0 is successfully added.
Delete the Network Connection
Let’s go ahead and delete this connection that we just added. To do this, we need to execute the following command:
nmcli con del "eth1"
The connection is now deleted.
Reload the Network Connections
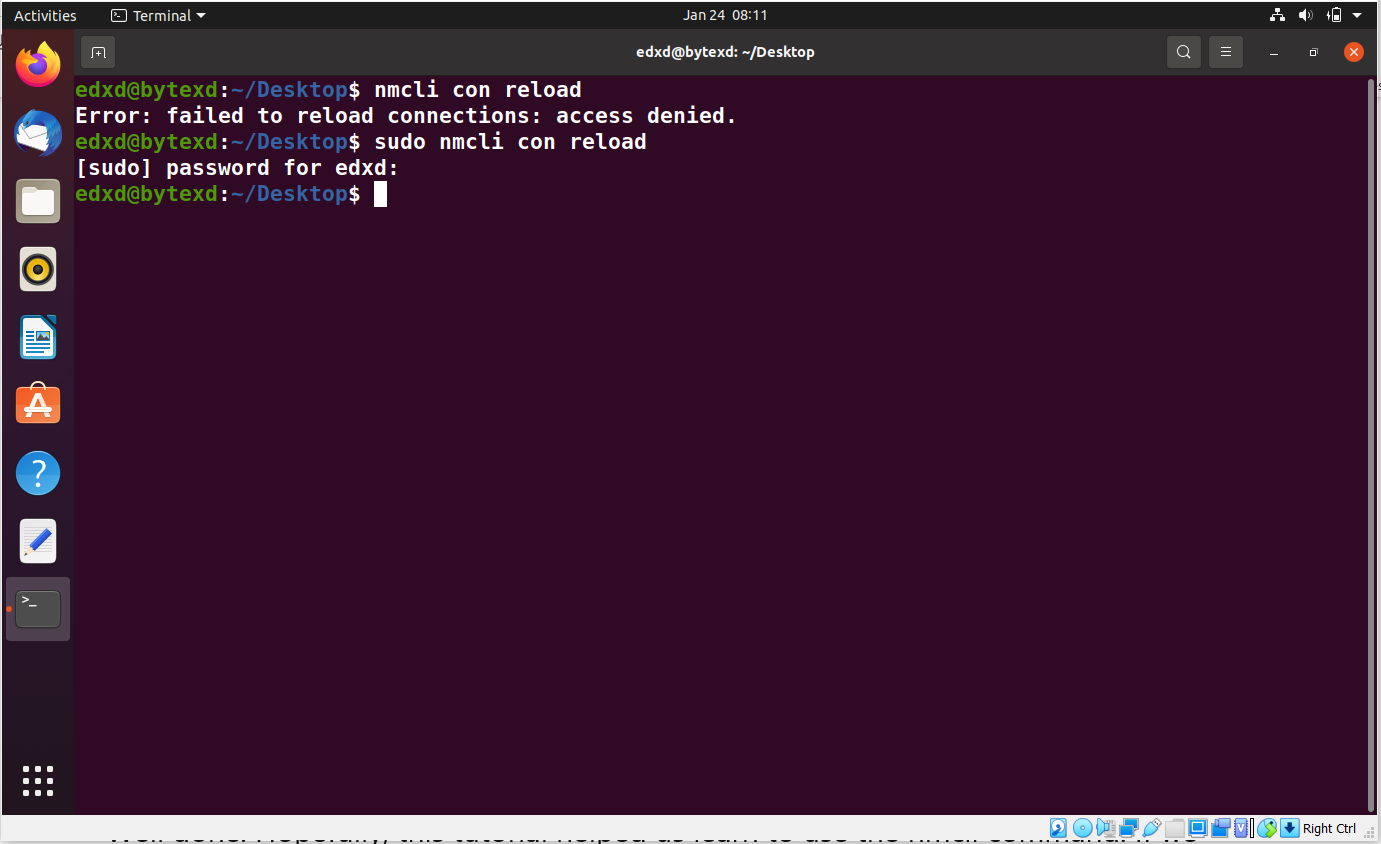
Network connections are saved in files. By default, these files are not monitored by NetworkManager. If we change any of these files, the changes are not applied instantly. We need to reload the files with the following command:
nmcli con reload
The files are now reloaded. Note that if we use a regular user account, we will have the “access denied” error. However, we can use sudo to execute the same command. After we execute the command, no error occurs, which means that the command is executed successfully.
Using the nmcli Terminal and Perform Configurations
The nmcli command can also work as a command terminal to execute commands. We need to invoke this with the connection name. For testing purposes, we can go back and execute this command to create a new connection:
nmcli con add con-name eth0 type ethernet ifname eth0 ipv4.method manual ipv4.address 192.168.0.10
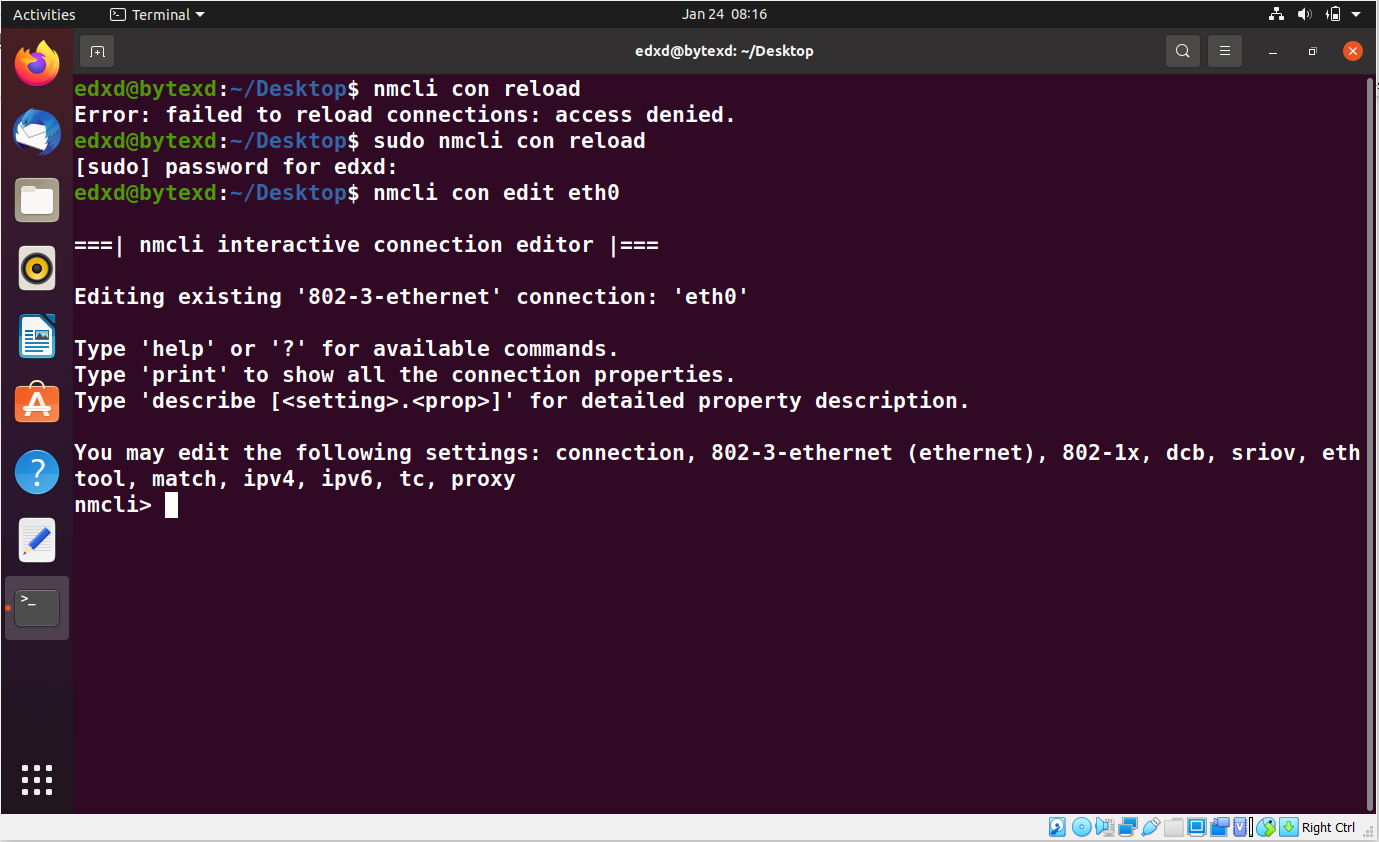
The connection eth0 is successfully added. Let’s now edit it using the following command:
nmcli con edit eth0
The nmcli prompt is displayed. We will execute various commands to work with the eth0 interface.
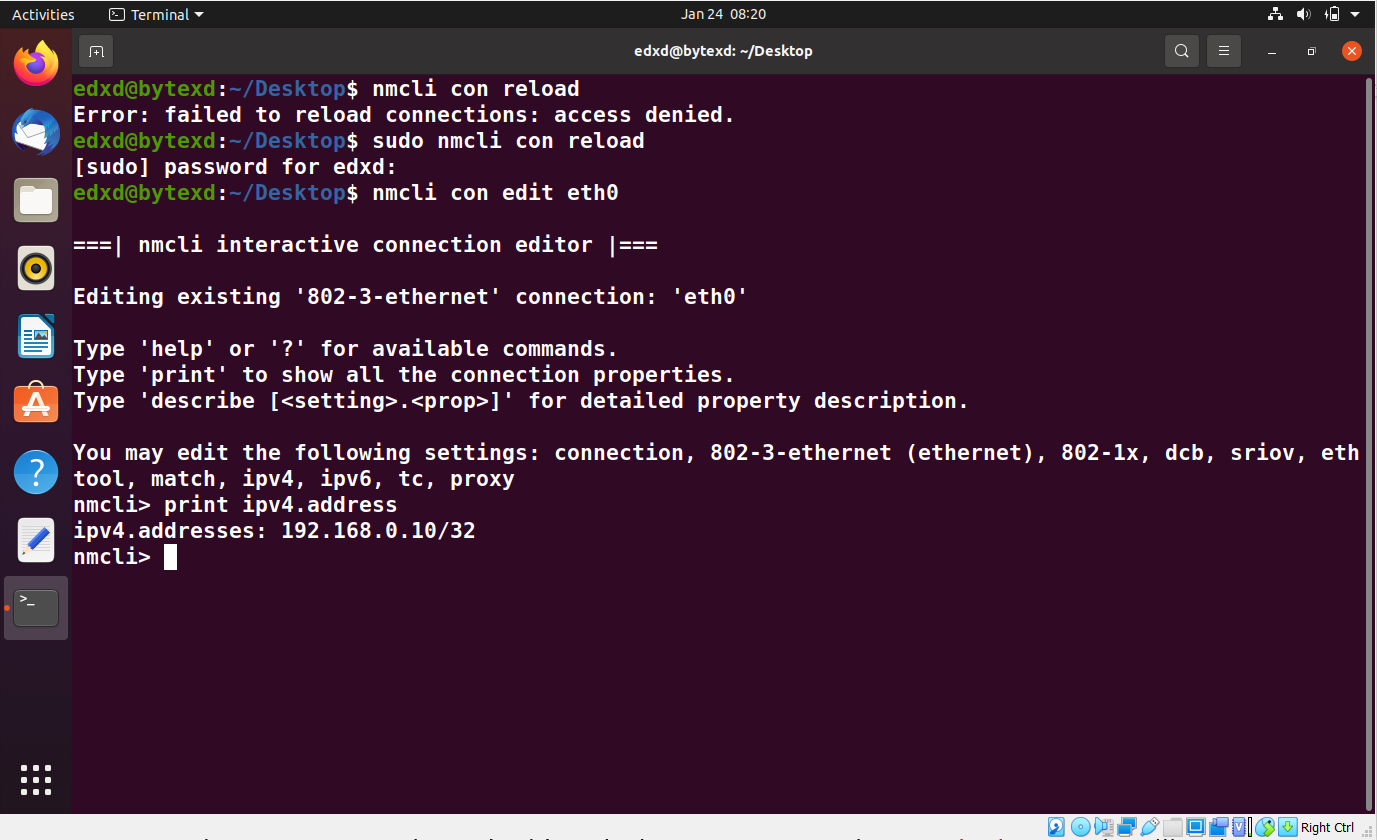
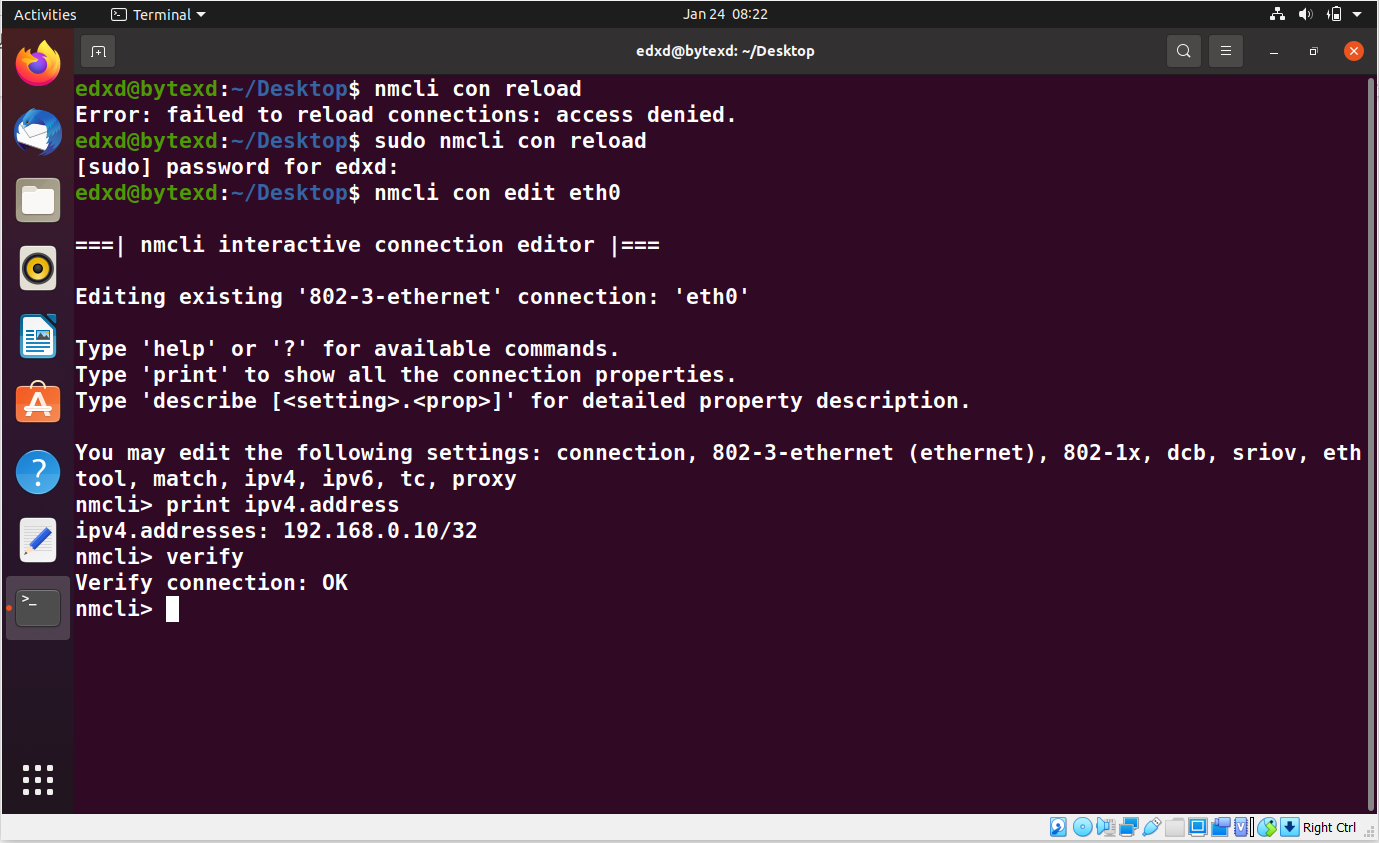
First, let’s display the IP address that we had assigned to the eth0 interface. Execute the following command at the nmcli prompt:
print ipv4.address
The output of the command is displayed. We can see the IP address that we had assigned earlier.
We can verify the connection with the verify command.
verify
The output displays Verify connection: OK.
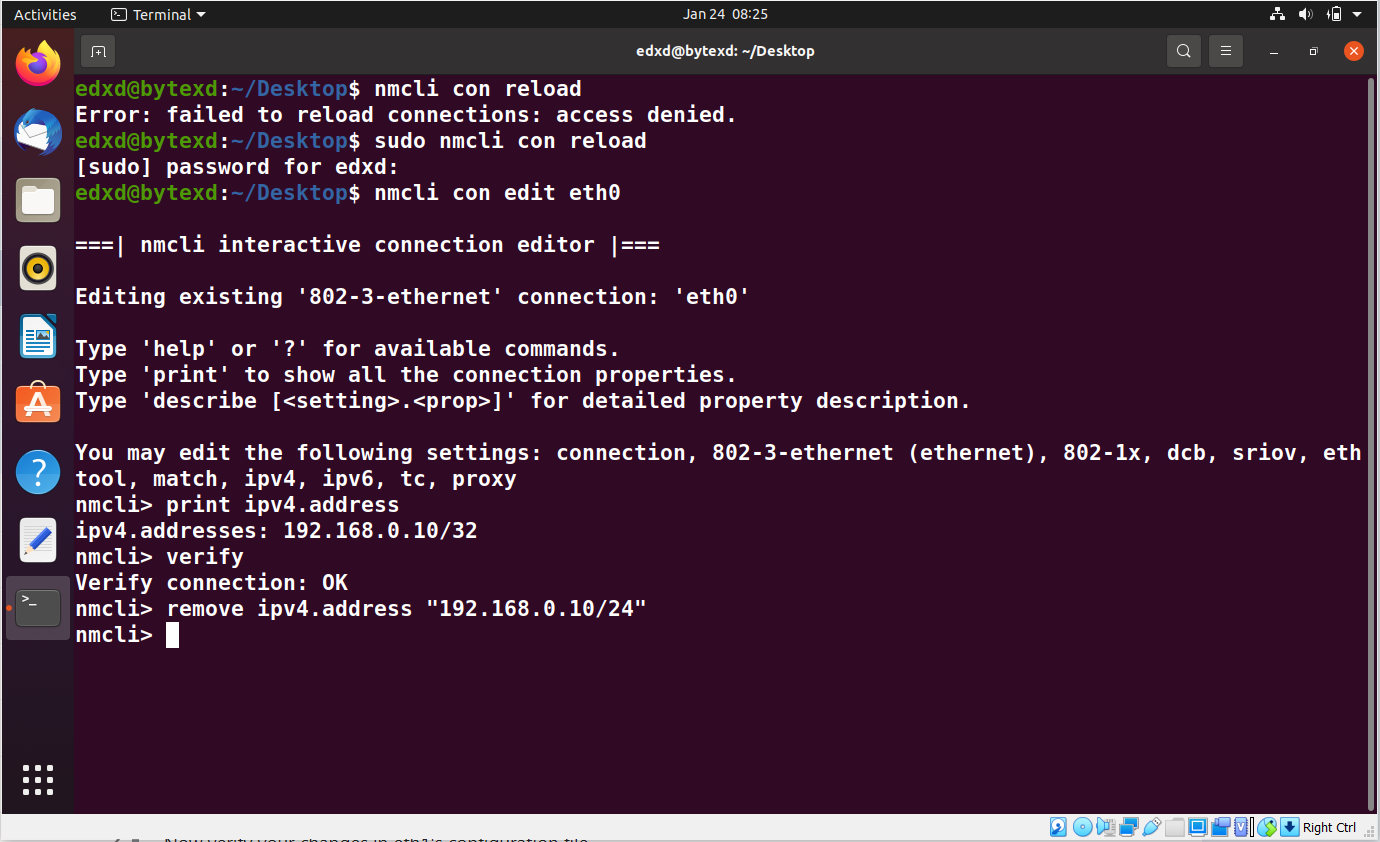
We can remove the IP address from the eth0 interface. To do this, we need to execute the following command:
remove ipv4.address "192.168.0.10/24"
No output is generated, which means that the command is executed successfully.
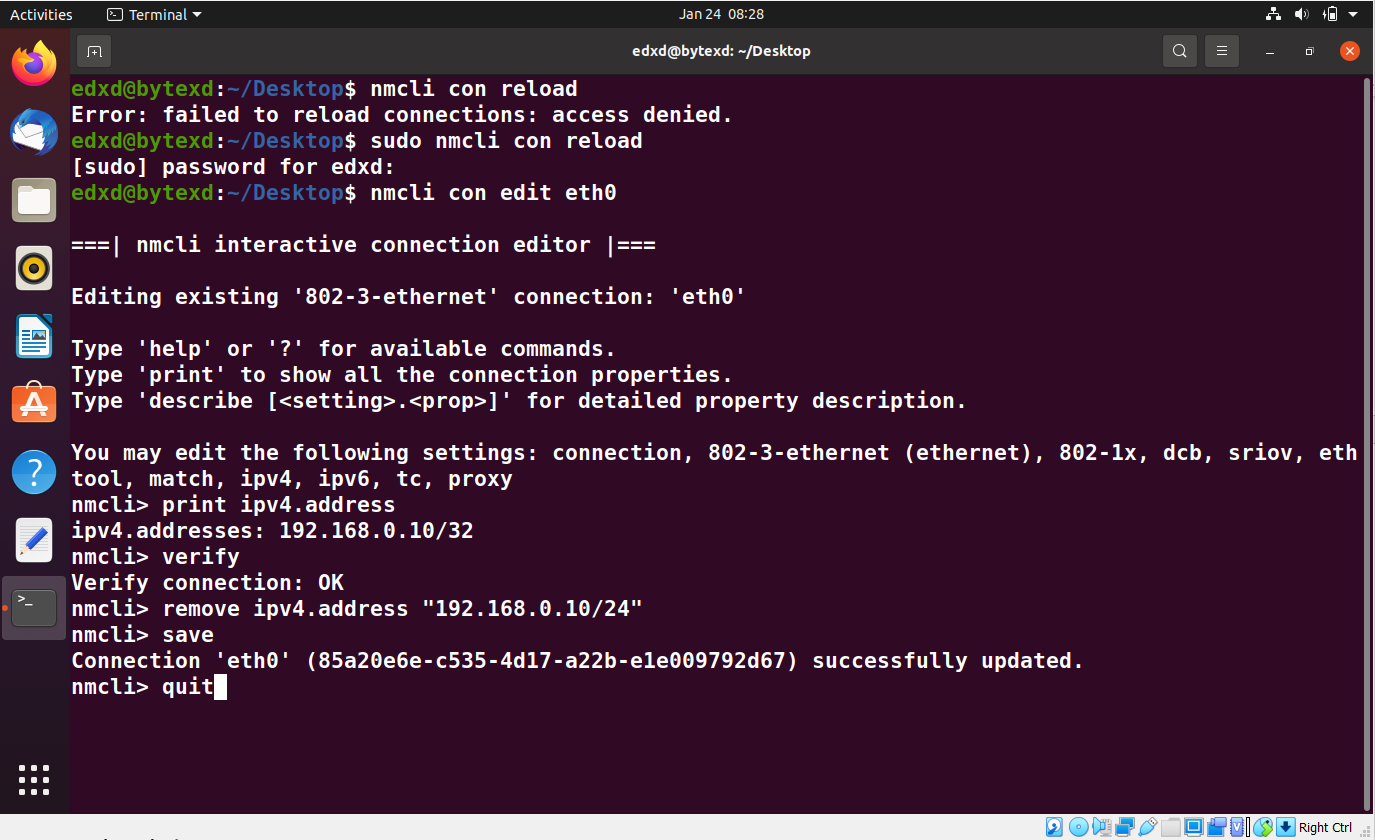
Assuming that we do not need to make more changes, we need to save the configuration. We need to execute the following command:
save
The output displays that the eth0 interface has been updated successfully. We can now exit from the nmcli prompt by using the quit command.
Conclusion
Well done. Hopefully, this tutorial helped you learn to use the nmcli command. If you encounter any issues, please feel free to leave a comment or contact us, and we’ll get back to we as soon as we can.
