Nerd Fonts are a set of free fonts designed for use with code editors. The fonts are designed to be easy to read, even at small sizes, and have a wide variety of character sets. You might have noticed that some projects don’t properly display fonts as they should be.
This is likely because the fonts are not installed on your system.
Table of Contents
What are Nerd Fonts?
Nerd font is a developer font often used to write software programs/ code that is patched with icons from iconic fonts like Font Awesome, weather icons, Octicons, material design icons, and many more. Take a look at the image below.
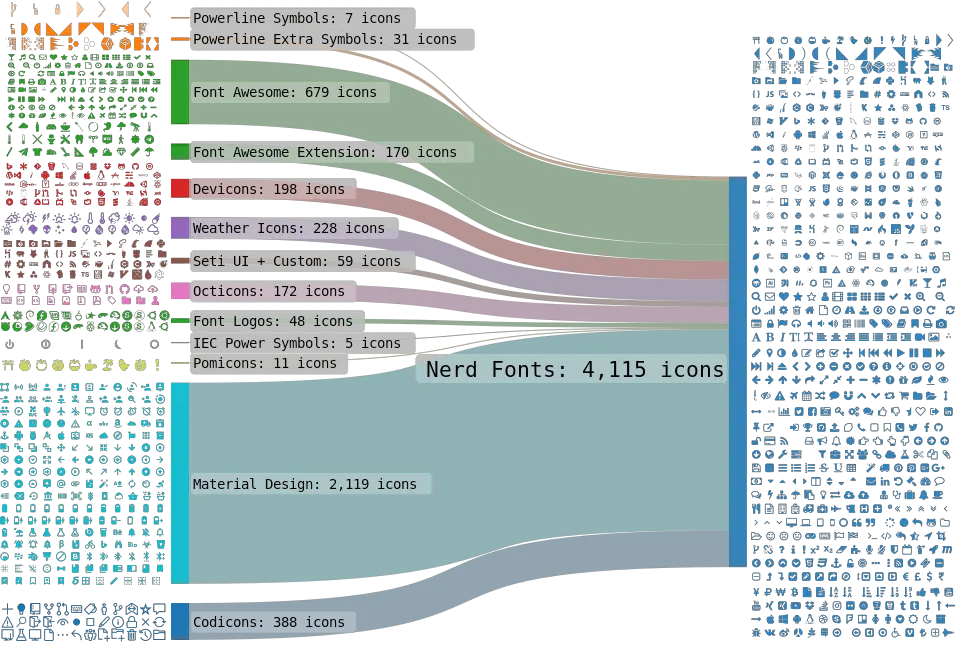
Now, imagine you took all of the icons on the left side, aggregated them, and then applied them to a font so that the font can use all those awesome icons. With that, you just created a Nerd font.
Nerd Fonts Sources
As of writing this post, one of the most reliable places where you can download Nerd Fonts or read more about them is the Nerd Fonts official website. Alternatively, you can check out the official GitHub page behind these fonts. This post will show you how to install Nerd fonts from the official Nerd font website or the above GitHub page.
Nerd Font Features
- They give you access to a whole set of icons you might need to use in your projects. As of writing this post, there are more than 3600 icons sourced from popular collections like Font Awesome, Font Awesome Extension, Material Design Icons, Weather Icons, Devicons, Octicons, Codicons, Powerline Extra Symbols, etc.
- The developers have patched these fonts into more than 50 programming fonts you can use in your projects. These include Hack, FiraCode, Meslo, Source Code Pro, Terminus Monoid, etc. You can view all the patched fonts on their GitHub patched fonts section.
Projects that Support Nerd Fonts
Since Nerd Fonts are becoming more popular among developers and other users, they are included in various projects and tools you use in your day-to-day activities. Some of these projects include.
Powerlevel10k
Powerlevel10k is a popular theme for the ZSH (Z shell). It is popularly known for shipping with Powerline fonts. Now, users can also access Nerd Fonts on Powerlevel10k.
Colors
Colorls is a Ruby command-line utility that beautifies the output of various Terminal commands using colors and font awesome icons.
The Fish Shell Framework
Fish is a simple, easy-to-use command line shell for macOS and Linux systems. It is mainly famous for features like syntax highlighting, autosuggest-as-you-type, and fancy tab completions.
LSD (LSDeluxe)
LSD is the next-generation version of the famous ls command that lists files and directories on the terminal. Unlike its predecessor, LCD introduces new features like colors, icons, tree-view, more formatting options, etc.
Install Nerd Fonts on Linux
Installing Nerd Fonts is similar to how you would install any additional fonts on your system. This post will use Ubuntu as the Linux distribution of choice. Follow the steps below.
Download Nerd Font
As stated above, there are more than 50 Nerd Fonts available for download. Navigate to the official nerd font download page and download the font of your choice. This post will download the DejavuSansMono nerd font.
Extract and Install the Nerd Font on Ubuntu
After a successful download, you will notice the font is compressed in a “.zip” format. To install the font, we will need to extract the contents to the fonts directory on your system.
If you want to install the fonts for all system users (system-wide), extract and copy the contents to the /usr/share/fonts/ directory. However, if you want to install the fonts for the local user, extract and copy the fonts to the ~/.local/share/fonts/ directory.
This post will install the Nerd Fonts for the currently logged-in user (local user). First, copy the downloaded zip file to the fonts directory, as shown below.
cp DejaVuSansMono.zip ~/.local/share/fonts/
Tip: You will get an error if you don’t have the “fonts” directory. Use the command below to create the directory.
mkdir ~/.local/share/fonts
Next, use the cd command to navigate to the fonts directory and extract the downloaded font using the unzip command.
unzip [font-name.zip]
e.g.
unzip DejaVuSansMono.zip

Delete the zip file after successfully extracting the fonts to avoid piling unnecessary files in your system. Use the command below.
rm [file-name.zip]
e.g.
rm DejaVuSansMono.zip
That’s it! You have successfully installed the first nerd font on your Linux system. However, there are a few things that you still need to do before proceeding to use the font in your projects.
Update the Fonts Cache
After successfully installing nerd fonts on your system, you need to update and build the fonts cache, enabling you to use the fonts in your projects. Execute the command below.
fc-cache -fv

If you installed the fonts system-wide for all users – that is, you copied the fonts either in the /usr/share/fonts/ or /usr/local/share/fonts/, use the command below to update the fonts cache.
sudo fc-cache -fv
Verify If Font is Successfully Installed
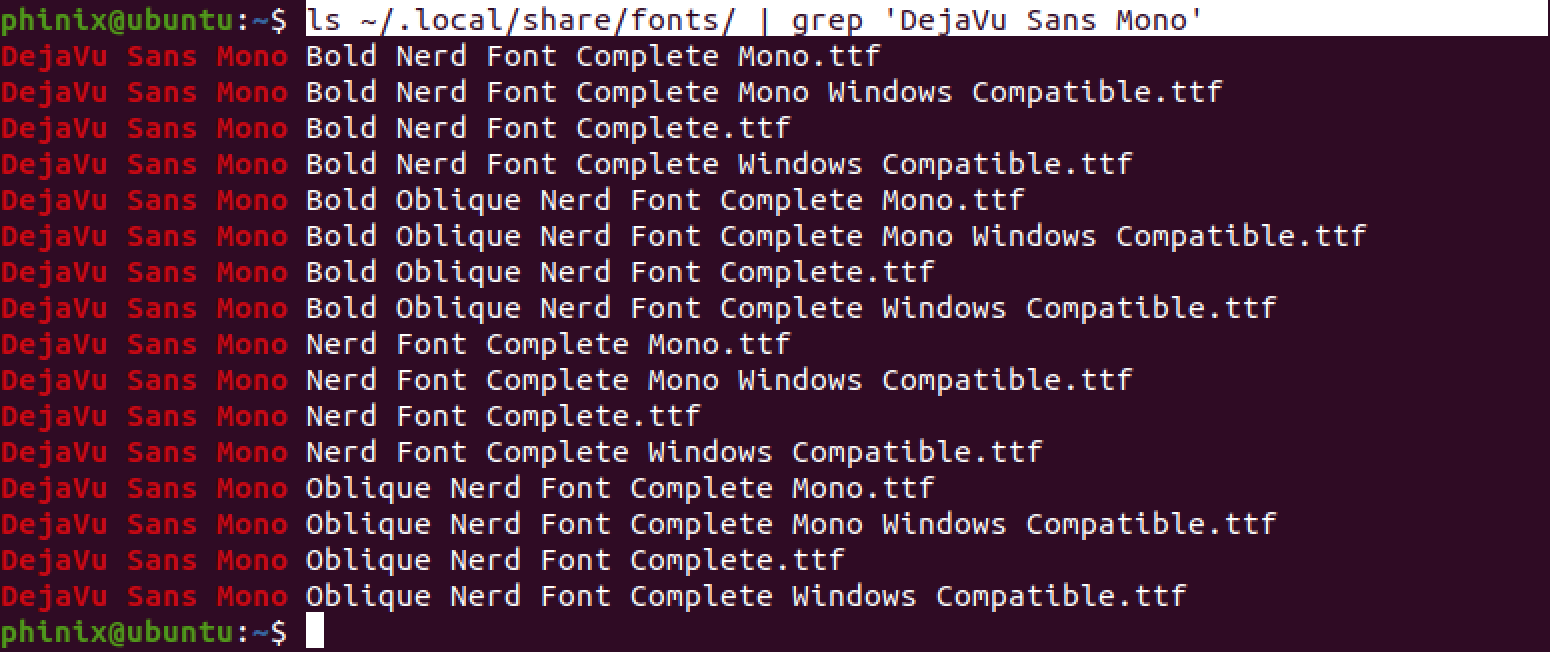
To verify whether the font was successfully installed on your system, launch the terminal and execute the command below.
ls ~/.local/share/fonts/ | grep [font-name]
e.g.
ls ~/.local/share/fonts/ | grep 'DejaVu Sans Mono'
Tip: While executing this command, remember to write the correct font name. This might be different from the name displayed in the downloaded zip file. For example, this post downloaded the DejaVuSansMono.zip font. However, the actual font name is DejaVu Sans Mono.
Testing Nerd Fonts
Up to this point, you have successfully installed nerd fonts on your PC. But you might wonder, how do you get to use all these amazing icons?
Well, it is not as straightforward as you might expect, but it’s also not complicated. If you are using the terminal, first change the default font to the nerd font you downloaded. If you are on Ubuntu or Debian, right-click anywhere on the terminal and select preferences to open the terminal settings window.
Under the Text tab, tick the custom fonts checkbox and select the nerd font you installed on your system.
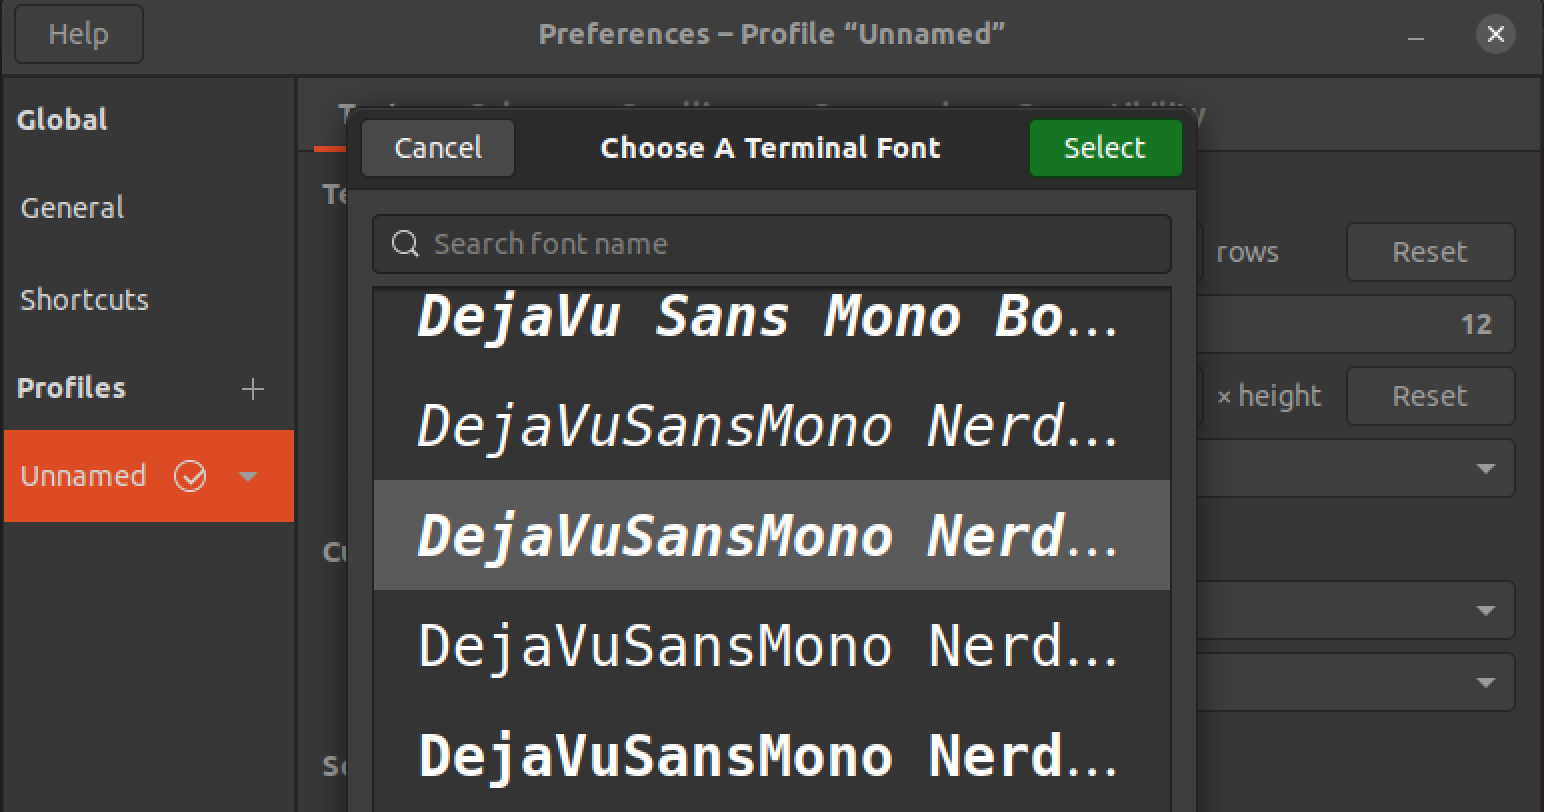
After enabling the font, navigate to the nerd font cheat sheet page, where you can search for all the icons you need. If you want to use the WiFi icon, type wifi in the search box to list all available WiFi icons.
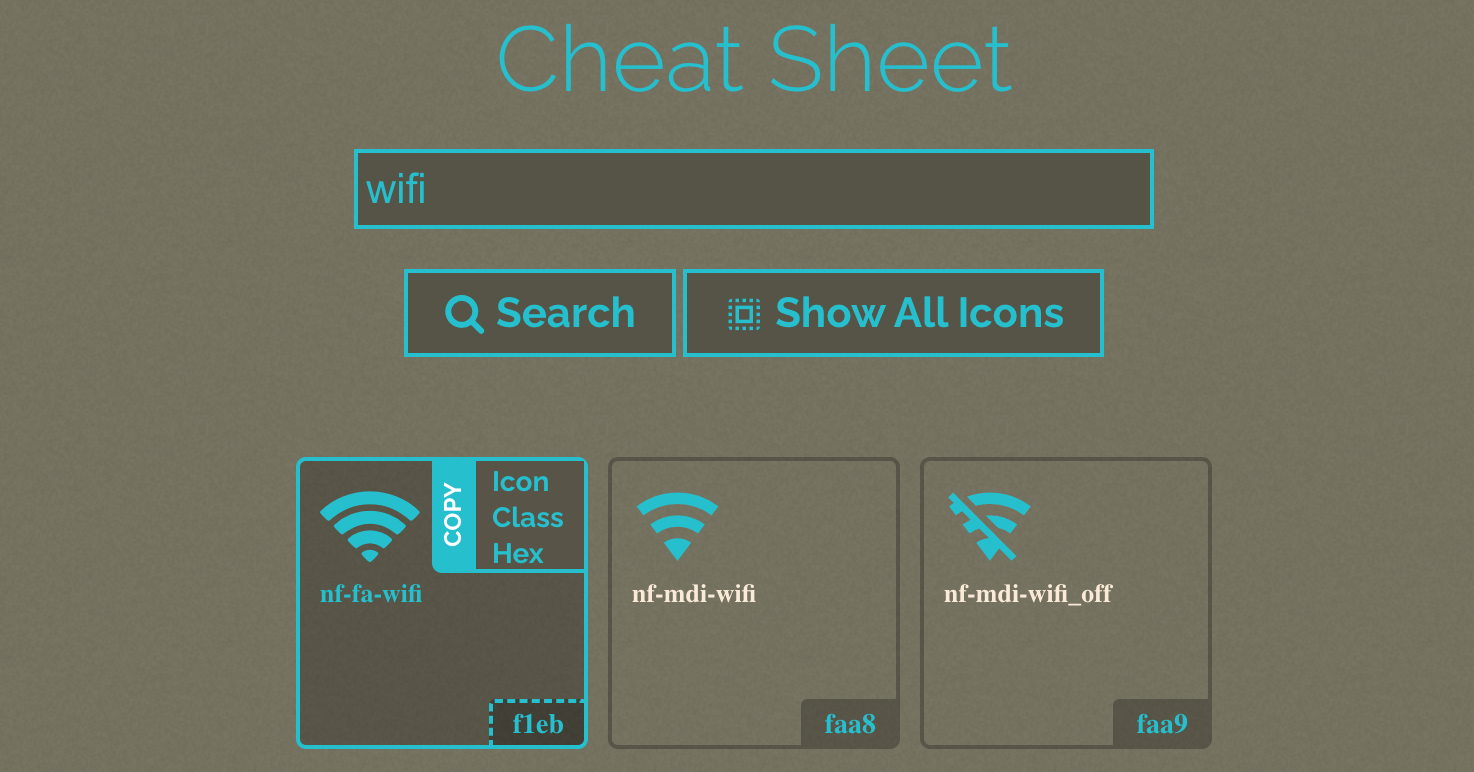
There are three ways that you can use an icon on your system. All these three ways will be displayed when you hover on the icon you want to use.
- Icon: This option enables you to copy and paste the icon directly onto your project.
- Class: This option gives you a CSS class that enables you to use the icon in your projects.
- Hex: This option gives you the hex code of the icon
Tip: Click on any of these options to copy the icon.
For this post, we will click the icon option to copy the icon and paste it into the Terminal. We added the wifi,car, and book icons.

Conclusion
This post gave you a comprehensive guide on installing nerd fonts on your Linux system. Don’t feel limited to using the icons only in text, as you can also customize the general user interface to use icons. For example, you can customize the terminal prompt to have icons instead of the username, as in our case. If you encounter any issues feel free to let us know in the comments below.
