Anybody who wants to get started with Ethical hacking or wants to advance their skills in penetration testing will need a platform to practice whatever they learn using the various security tools available.
Performing penetration tests on systems without administrative permission is considered illegal and can land you in huge problems, including a jail term with hefty fines.
Practice makes perfect, but then, where do you practice hacking skills?
There are so many platforms available that you can use to practice penetration testing. Some of these are online platforms like TryHackMe, HackTheBox, etc.
Some like Vulnhub allow you to download vulnerable virtual machines that you can exploit. This post will look at one of the platforms that you can install and set up on your Kali Linux system – The Damn Vulnerable Web Application (DVWA).
DVWA is a vulnerable web application developed with PHP and MYSQL.
Yes! It’s intentionally developed to be vulnerable.
From my experience, it’s a great platform for both beginners and skilled since you have an option to set the desired security level (low, medium, high or impossible).
It’s also a great resource for web developers who wish to develop web applications with security in mind.
To learn a bit on how you can practice on it, you can check our related tutorial on explaining SQL injections using DVWA
Let’s dive in and get started right away.
Note: This tutorial should work on other Debian-based distros, as well.
Table of Contents
Step 1. Download DVWA
Since we will be setting up DVWA on our localhost, launch the Terminal and navigate to the /var/www/html directory. That’s the location where localhost files are stored.
cd /var/www/html
Next, we will clone the DVWA GitHub repository in the /html directory using the command below.
sudo git clone https://github.com/ethicalhack3r/DVWA
We trust you have received the usual lecture from the local System
Administrator. It usually boils down to these three things:

    #1) Respect the privacy of others.
    #2) Think before you type.
    #3) With great power comes great responsibility.

[sudo] password for kali:
Cloning into 'DVWA'...
remote: Enumerating objects: 3398, done.
remote: Counting objects: 100% (85/85), done.
remote: Compressing objects: 100% (54/54), done.
remote: Total 3398 (delta 38), reused 58 (delta 29), pack-reused 3313
Receiving objects: 100% (3398/3398), 1.65 MiB | 4.21 MiB/s, done.
Resolving deltas: 100% (1508/1508), done.
Step 2. Configure DVWA
After successfully cloning the repository, run the ls command to confirm DVWA was successfully cloned.
ls
DVWA index.html index.nginx-debian.html
From the image above, you can see the DVWA folder. Now we need to assign Read, Write and Execute permissions (777) to this folder. Execute the command below.
sudo chmod -R 777 DVWA
To set up and configure DVWA, we will need to navigate to the /dvwa/config directory. Use the command below:
cd DVWA/config
Run the ls command to see the contents of the config directory.
ls
config.inc.php.dist
You should see a file with the name config.inc.php.dist. That file contains the default DVWA configurations.
We will not tamper with it, and it will act as our backup if things go south. Instead, we will create a copy of this file with the name config.inc.php that we will use to configure DVWA. Use the command below.
sudo cp config.inc.php.dist config.inc.php
You can use the ls command to check if the file was copied successfully.
ls
config.inc.php config.inc.php.dist
Now, open the config.inc.php file with the nano editor to make the necessary configurations.
sudo nano config.inc.php
Scroll down to the point where you will see parameters like db_database, db_user, db_password, etc., as shown in the image below. Feel free to change these values, but note them down since you will require them when setting up the database. In my case, I will set db_user to userDVWA and db_password to dvwa.
...
$_DVWA = array();
$_DVWA[ 'db_server' ]   = '127.0.0.1';
$_DVWA[ 'db_database' ] = 'dvwa';
$_DVWA[ 'db_user' ]     = 'userDVWA';
$_DVWA[ 'db_password' ] = 'dvwa';
$_DVWA[ 'db_port'] = '3306';
...
Save your changes (Ctrl + S) and Exit (Ctrl +X).
Step 3. Configure Database
By default, Kali Linux comes installed with the MariaDB relational database management system. You, therefore, don’t need to install any packages. First, start the mysql service with the command below.
sudo systemctl start mysql
You can check whether the service is running with the command:
systemctl status mysql
● mariadb.service - MariaDB 10.5.9 database server
     Loaded: loaded (/lib/systemd/system/mariadb.service; disabled; vendor p>
     Active: active (running) since Mon 2021-07-26 19:13:38 EDT; 8s ago
       Docs: man:mariadbd(8)
             https://mariadb.com/kb/en/library/systemd/
    Process: 1632 ExecStartPre=/usr/bin/install -m 755 -o mysql -g root -d />
    Process: 1634 ExecStartPre=/bin/sh -c systemctl unset-environment _WSREP>
    Process: 1636 ExecStartPre=/bin/sh -c [ ! -e /usr/bin/galera_recovery ] >
    Process: 1699 ExecStartPost=/bin/sh -c systemctl unset-environment _WSRE>
    Process: 1701 ExecStartPost=/etc/mysql/debian-start (code=exited, status>
   Main PID: 1684 (mariadbd)
     Status: "Taking your SQL requests now..."
      Tasks: 15 (limit: 2287)
     Memory: 109.0M
        CPU: 1.339s
     CGroup: /system.slice/mariadb.service
             └─1684 /usr/sbin/mariadbd
To log in to the database, use the command below. In our case, we are using root since that is the superuser name set on our system. If you have something different, then you will need to replace the root.
sudo mysql -u root -p
You will be prompted for a password. However, since we haven’t set any yet, just hit Enter to continue.
Enter password:
Welcome to the MariaDB monitor.  Commands end with ; or \g.
Your MariaDB connection id is 45
Server version: 10.5.9-MariaDB-1 Debian buildd-unstable

Copyright (c) 2000, 2018, Oracle, MariaDB Corporation Ab and others.

Type 'help;' or '\h' for help. Type '\c' to clear the current input statement.
We will first create a new user using the credentials we set in the config.inc.php file in the DVWA directory. Execute the command below, replacing the username and password with your preset credentials.
create user 'userDVWA'@'127.0.0.1' identified by "dvwa";
Query OK, 0 rows affected (0.010 sec)
We now need to grant this user total privilege over the dvwa database. Execute the command below, replacing the username and password with your credentials.
grant all privileges on dvwa.* to 'userDVWA'@'127.0.0.1' identified by 'dvwa';
Query OK, 0 rows affected (0.001 sec)
That’s it! We are done configuring the database. Type Exit to close it.
Step 4. Configure Apache Server
The Apache web server comes installed by default on Kali Linux. Therefore, we don’t have to need to install any additional packages.
To get started configuring Apache2, launch the Terminal and navigate the /etc/php/7.4/apache2 directory.
Note: As of writing this post, the PHP version available for Kali Linux is 7.4. If there is an update, running the command might raise the no such file or directory error. Therefore, you might first want to check your PHP version (ls /etc/php) and replace it accordingly in the command above.
cd /etc/php/7.4/apache2
When you execute the ls command, you will see a file called php.ini. Execute the command below to edit this file using the nano editor.
sudo nano php.ini
Scroll and look for the allow_url_fopen and allow_url_include lines and ensure that both are set to On.
By default, both or one of them is always set to Off.
; Whether to allow the treatment of URLs (like http:// or ftp://) as files.
; http://php.net/allow-url-fopen
allow_url_fopen = On

; Whether to allow include/require to open URLs (like http:// or ftp://) as >
; http://php.net/allow-url-include
allow_url_include = On
Save your changes (Ctrl +S) and Exit (Ctrl + X).
Proceed to start the apache webserver service with the command below. You can check whether the service is running by running the status command.
sudo systemctl start apache2
systemctl status apache2
● apache2.service - The Apache HTTP Server
     Loaded: loaded (/lib/systemd/system/apache2.service; disabled; vendor p>
     Active: active (running) since Mon 2021-07-26 20:25:48 EDT; 5s ago
       Docs: https://httpd.apache.org/docs/2.4/
    Process: 2245 ExecStart=/usr/sbin/apachectl start (code=exited, status=0>
   Main PID: 2256 (apache2)
      Tasks: 6 (limit: 2287)
     Memory: 17.8M
        CPU: 82ms
     CGroup: /system.slice/apache2.service
             ├─2256 /usr/sbin/apache2 -k start
             ├─2258 /usr/sbin/apache2 -k start
             ├─2259 /usr/sbin/apache2 -k start
             ├─2260 /usr/sbin/apache2 -k start
             ├─2261 /usr/sbin/apache2 -k start
             └─2262 /usr/sbin/apache2 -k start
Step 5. Open DVWA on Your Web Browser
Up to this point, we have configured DVWA, Database, and the Apache webserver.
We can now proceed to start the DVWA application. Launch your Web browser and type the URL below.
127.0.0/DVWA
This action will redirect us to the DVWA setup.php page at http://127.0.0.1/DVWA/setup.php.
When you scroll down, you will see some errors in red color. Don’t panic! Click the Create / Reset Database button at the end of the page.
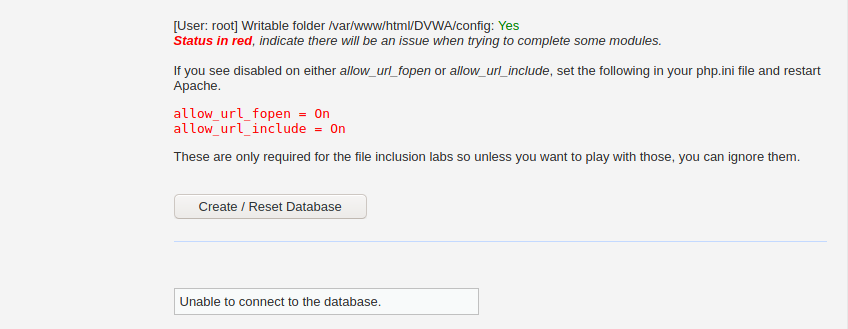
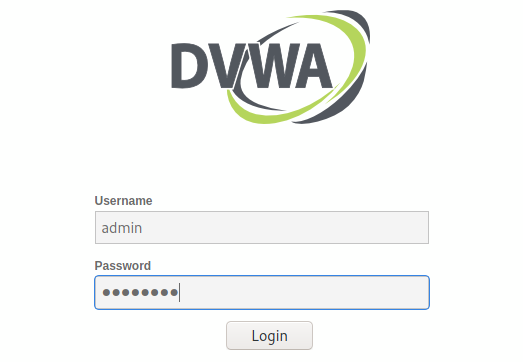
That will create and configure the DVWA database. After a few seconds, you will be redirected to the DVWA login page.
Use the default credentials below to log in.
- Username: admin
- Password: password
After successfully logging in, you will be greeted by the DVWA homepage. On the left side, you can see all the available vulnerable pages you can use to practice.
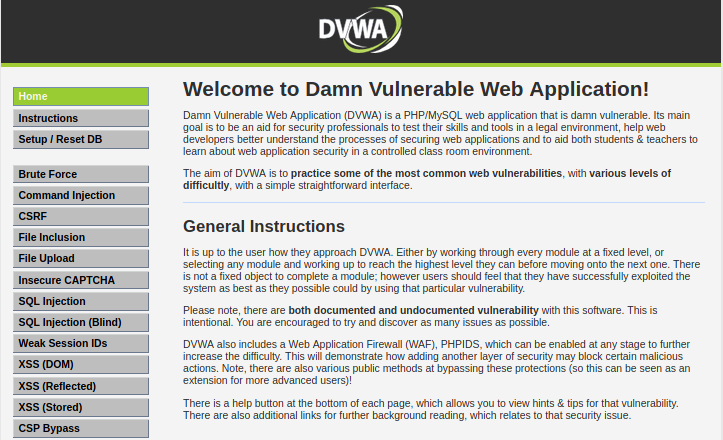
You will also see the DVWA Security option that enables you to choose the security level depending on your skills.

That’s it! Now, you can start testing out your web penetration skills on the DVWA.
Conclusion
DVWA is a great platform for both beginners and advanced users because of its multi-layered security support. I believe this post has given you a detailed guide on how to set up DVWA on your Kali Linux system.
If you faced issues or errors in any of the steps above, please feel free to let us know in the comments section or by contacting us.

Very good tutorial. I like it !!!
when i click on create database it takes me to blank white page and nothing comes